17
5-5) When Using Taper Grip for Hollow Shaft Type
5-5-1) Attachment Procedure of Taper Grip
1. Shaft Preparation Before Attaching the Machine
1-1) Remove all rusts and irregularity (especially protrusion) from the shaft.
1-2) Recommended tolerance of the shaft is "h8"
1-3) Wipe off all dusts and oil with a piece of cloth or alcohols solvent and such.
Take special care to wipe off all traces of oil or grease.
2. Set taper grip on the reducer.
2-1) Apply a thin coat of oil on the screw part at the taper grip.
2-2) Place thrust collar on the screw part of the taper grip.
Insert taper grip into the reducer shaft by clockwise rotation.
Rotate taper grip until the flange touches the thrust collar (Refer to Figure 21).
2-3) Next, rotate the taper grip counter clockwise and match the spot facing hole of the thrust collar and screw hole of
the taper grip.
Rough indication of the distance between thrust collar and taper grip flange is about 1 mm (Refer to Figure 22).
Tighten all setting bolts in the taper grip.
Tightening force should be just enough so that the bolt touches the spot facing hole lightly (about the force of hand-
tightening the bolt directly).
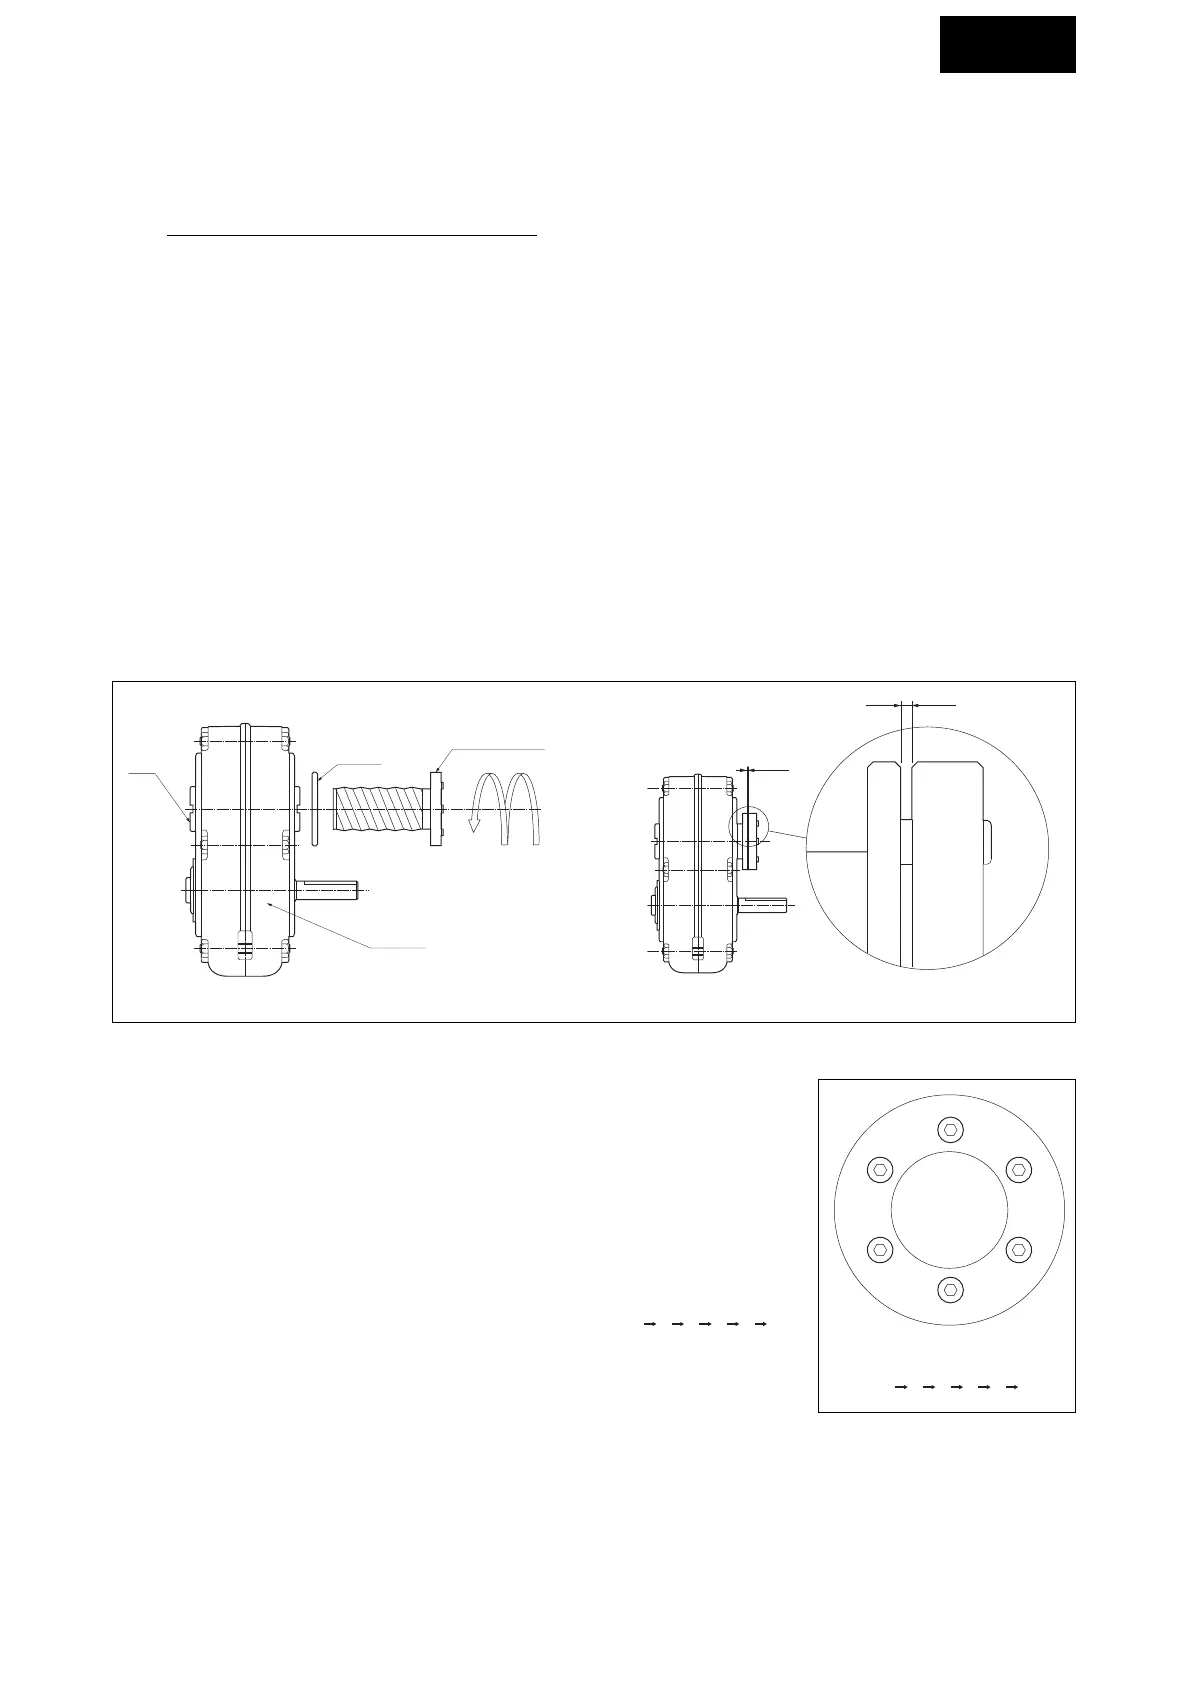
Fig.21 Bush Attachment to the Reducer
Fig.22 Opening between Taper Grip Flange and Thrust Collar
1mm appjrox.
3. Attach the reducer to the mechanical shaft.
3-1) Place reducer (hollow of the taper grip) on the mechanical shaft and insert to the
designated position (all the way into reducer dimension L1).
Loosen tightening bolt when it is difficult to insert. Do not pound strongly with
hammer, etc.
3-2) Tighten screw of taper grip in the following order.
Always use torque wrench for tightening bolts.
Designated tightening torque of the bolt is as indicated in Table 4 on page16.
1 First, tighten all bolts in the order indicated in Fig.23 (1 23456)
using 1/3 of the designated tightening torque.
2 Second, tighten all bolts in the same order using 2/3 of the designated
tightening torque.
3 Third, tighten all bolts in the same order using the designated tightening torque.
4 Finally, tighten all bolts in the same order a few times using the designated tightening torque.
Now, the attachment is complete.
Fig.23 Tighten all bolts in the
order indicated
123456

 Loading...


