12
Reversible grating, shaving and shredding
blades
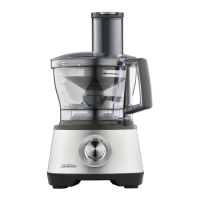
1.Fittheprocessingbowlandspindleas
detailedpreviously,infigures1,2and4.
2.Selectthe'Reversible'discofyourchoice
-Shredding(fineorcoarse),Gratingor
Shaving.
3.Fitthediscoverthespindleandpress
firmlyintoplace,seefigure6.
Warning: Usecautionasthebladesaresharp.
4.Fittheprocessingcovertotheprocessing
bowlaspreviouslyshowninfigure3and
placethefoodpusherinthefeedtube.
5.Plugthepowercordintoa230-240VAC
poweroutletandturnthepower‘ON’.
6.StartprocessingusingtheOn/Offbutton.
7.Whenprocessingiscomplete,removethe
discandspindlefromtheprocessingbowl
beforeremovingtheprocessedfood.
Variable slicing blades
1.Fittheprocessingbowlandspindleas
detailedpreviouslyinfigures1,2and4.
2.Fittheslicingdiscoverthespindleand
pressfirmlyintoplace,seefigure7.
Warning:Usecautionasthebladesaresharp.
3.Fittheprocessingcovertotheprocessing
bowlaspreviouslyshowninfigure3and
placethefoodpusherinthefeedtube.
4.Plugthepowercordinto230-240VAC
poweroutletandturnthepower'ON'.
5.StartprocessingusingtheOn/Offbutton.
6.Whenprocessingiscomplete,removethe
discandspindlefromtheprocessingbowl
beforeremovingtheprocessedfood.
Fitting/using the tools on your Oskar™ Professional continued
Fig 7
Fig 6
13
TheSunbeamOskar™Professionalwas
designedsothatallattachmentscanbe
storedwithintheunititself,seefigure8.
Storage drawer
Theuniversal's'blade,'ReversibleShredding'
disc,'ReversibleGratingandShaving'disc
and'Spatula'areallstoredinthestorage
drawer.
1.Slideoutthestoragedraweratthebaseof
thefoodprocessor.
2.Placetheuniversal's'bladeinthestorage
drawerasindicatedinfigure9.
3.Placeoneofthe'Reversiblediscs'in
storagedrawerasindicatedinfigure10.
4.Liespatulaontopof'ReversibleDisc'in
thestoragedrawerasindicatedin
figure11.
5.Placetheremaining'Reversibledisc'in
storagedrawerasindicatedinfigure12.
6.Closestoragedrawer,seefigure13.

 Loading...