5.2 Mounting Location Requirements
Do not subject the PV charge controller to direct sunlight or any other heat sources. Protect the PV charge
controller from any dust, dirt and moisture. Mount it flat to a vertical wall. Must be a non-flammable
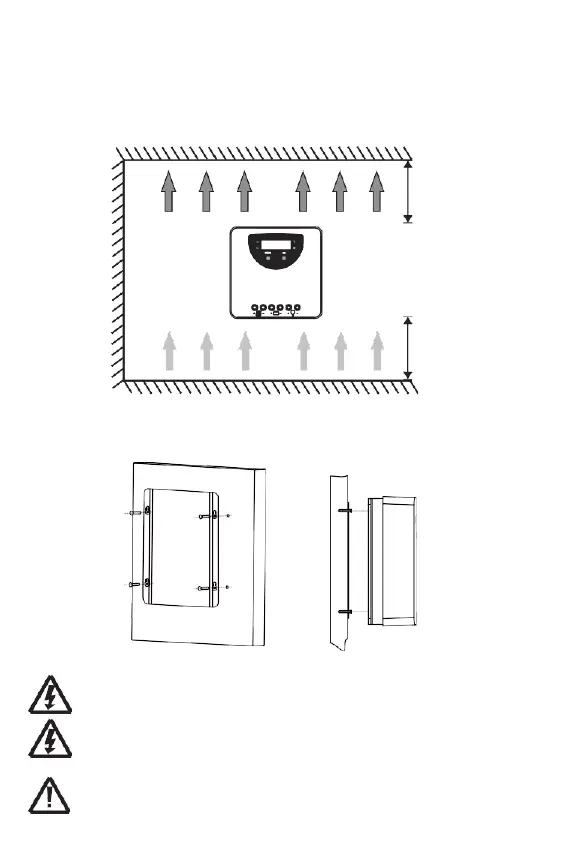
material. Maintain a minimum clearance of 15 cm/6 inches below and around the controller to ensure
unhindered air circulation. Mount the PV charge controller close to the batteries.
Mark the position of the PV charge controller fastening holes on the wall, drill 4 holes and insert dowels,
fasten the PV charge controller to the wall with the cable openings facing downwards.
>6 Inches
WARM
AIR
COOL AIR
>6 Inches
5.3 Mounting the controller
Drill 4 mounting holes in the wall according to "installation position" and fix the four screws(M5) , then set
controller's mounting holes over the screws and mount the controller.
5.4 Connections
WARNING: The PV-module/array can produce open-circuit voltages in excess of 100 Vdc
when exposed to sunlight.
WARNING: Risk of explosion! In case the battery's positive and negative terminals or leads
ever touch, i.e. short-circuited, a fire or explosion hazard might get triggered. Always pay
maximum attention when handling batteries and related circuits.
CAUTION: 1. If no temperature sensor is connected to the controller, the battery
temperature value will display the internal temperature.
2.If a power inverter is used, connect it directly to the battery. Do not connect it to the
controller's load terminals.