15
VI MAINTENANCE, CLEANING AND STORAGE
CAUTION
A dirty respirator causes reduced protection. A written program for cleaning and
sanitizing should be established and followed. This program should include all federal
and local requirements.
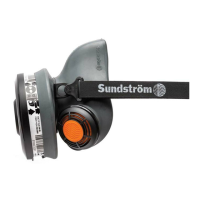
A. Disassembly
1) Remove all protective elements.
2) Remove the covers from the exhalation valves and remove the membranes (two).
3) Gently pinch the exhalation flaps with your fingers and pull them off the center pin.
4) Detach the head harness by pushing the two connection points toward the filter attachment. (Op-
tional – The harness can be washed, but takes extra time to dry.)
5) Reachinsidetherespiratorandgentlypullouttheinhalationap.
B. Cleaning
1) Clean with warm soapy water or other respirator cleaner and a soft brush, lint free cloth or sponge.
2) Do not exceed 104 °F (40 °C) during the cleaning operation. Never use solvents for cleaning. Strong
cleaning and disinfecting agents can damage rubber and plastic.
3) Sanitize the respirator. Use an approved sanitizing or disinfecting agent or a solution of 2 tablespoons
ofhouseholdbleachmixedinonegallonofwater(50PPMchlorine);or1teaspoonoftinctureof
Iodine(50PPMIodine)inonegallonofwaterforatleast2minutes.
4) Rinse thoroughly.
5) Checktheconditionoftherespiratorandtheparts.Replaceanydamagedordefectiveitem.
6) Dry the respirator and parts.
C. Assembly
1) Check the edge of the inhalation valve. Gently stretch the flap until it slips over the stud.
2) Pusheachexhalationvalveaponthevalvestuduntilit‘pops’.
3) Snap on exhalation valve covers.
4) Snap on the harness by putting each plastic swivel into the contoured slot and pulling it until it snaps
in.
5) Performatcheck.Placetherespiratorinacleananddrystorageboxorothersuitablestoragearea.
D. Storage
Shelf life for protective elements in unopened packages: Particulate filter 10 years, chemical cartridge
5years.Theexpirationdateisprintedonthelabel:day,month,year,e.g.26Feb2012.
Store the respirator, filters and cartridges in a clean, cool, dry place out of direct sunlight.
 Loading...