High voltage inside the inverter!
Ensure all cables are voltage-free before electrical connection.
Do not connect the AC circuit breaker until all inverter electrical connections
are completed.
Step 1 Disconnect the AC circuit breaker and ensure it will not reconnect
accidentally.
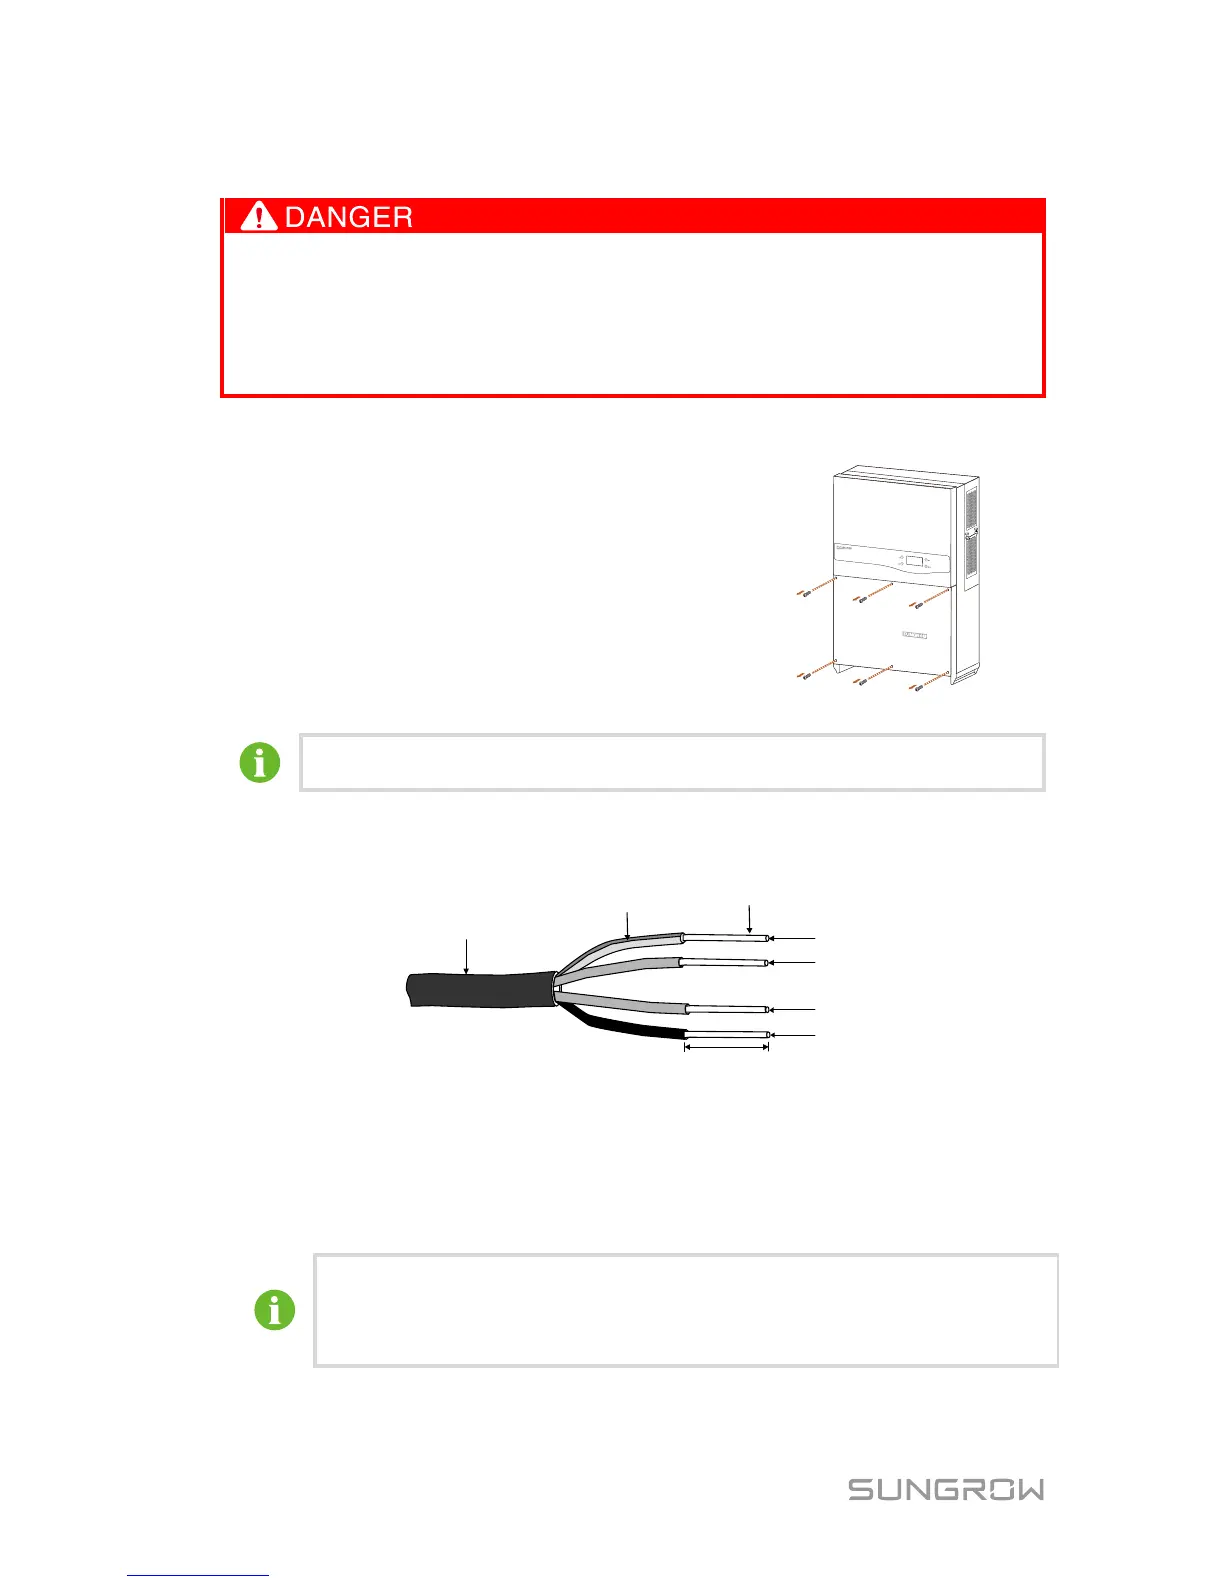
Step 2 Unscrew the 6 bolts on the front cover of the
Step 3 Peal the cables as shown below.
For flexible cables (stranded wires), use cold pressing terminal lugs.
The cross-section of the AC cable must be selected carefully in order to prevent
accidentally disconnections of the inverter from the grid due to high impedance of
the cable.
Step 4 Select the adaptive wire diameter of AC cable gland according to actual AC
cable diameter. Remove or install the two AC cable glands on the bottom of
the device by torque of recommended value.
Remove or install the smaller AC cable gland by torque of 12…13 Nm.
Remove or install the larger AC cable gland by torque of 16…17 Nm.
Peel the plastic film on one end of the AC cable protection with proper
tools before AC cable connection. Only the AC cable protection itself
needs to be replaced; other accessories (packing nuts) can still be used.
Step 5 Fix the AC cable to the corresponding terminals with torque shown in the
 Loading...