EasyManua.ls Logo

Sunlux XL-9600 - User Manual

Sunlux XL-9600
28 pages
Print Icon
To Next Page IconTo Next Page
Loading...
1
Wireless 2D Barcode Scanner
Full Manual
(Wireless Part)
V4.4
Question and Answer IconNeed help?

Do you have a question about the Sunlux XL-9600 and is the answer not in the manual?

Summary

Factory Default Settings

Restore Factory Default

Resets scanner settings to factory defaults.

Output Modes

USB Priority Output

Prioritizes data output via USB when connected.

Simultaneous Output

Allows data output via multiple connection types concurrently.

Data Transfer Modes

Immediate Mode

Uploads scanned data immediately without buffering.

Inventory Mode

Saves scanned barcodes automatically for later upload or review.

Automatic Storage Mode

Stores data when the scanner is out of range, uploading later.

Communication Modes

2.4 G Mode

Connects wirelessly using a 2.4GHz radio frequency.

Bluetooth HID Mode

Connects via Bluetooth using the Human Interface Device profile.

Bluetooth BLE Mode

Utilizes Bluetooth Low Energy for wireless communication.

Bluetooth SPP Mode

Uses Bluetooth Serial Port Profile for data transmission.

USB Interface and Data Types

USB Interface Types

Configures the scanner's USB connection type (HID or VCOM).

USB-HID Data Types

Selects how data is sent over USB-HID (e.g., keyboard keys, ASCII).

Sound and Sleep Settings

Sound Settings

Adjusts the scanner's audible feedback volume (Mute, Low, Medium, High).

Sleep Time Settings

Configures automatic sleep modes and durations (No Sleep, Sleep Now, timed).

Character Conversion and Language

GS Character Conversion

Sets how the Group Separator character is processed or converted.

Letter Case Conversion

Defines how input character casing is handled (Normal, Uppercase, Lowercase, Inversion).

Language Settings

Selects the keyboard layout and language for the scanner's output.

Wireless Pairing and Connectivity

2.4 G Pairing

Establishes a wireless connection using the 2.4GHz dongle.

Bluetooth HID Pairing

Pairs the scanner with devices via Bluetooth HID.

Bluetooth HID Transfer Rate

Configures the data transfer speed for Bluetooth HID connections.

Data Editor and Suffix Settings

Suffix Terminator Settings

Defines characters or actions to append after scanned data.

Hidden Character Settings

Hide Front Characters

Configures hiding a specified number of characters from the beginning of scanned data.

Hide Back Characters

Configures hiding a specified number of characters from the end of scanned data.

Prefix and Suffix Customization

Add Prefix Setting

Adds custom characters before the scanned data.

Add Suffix Setting

Appends custom characters after the scanned data.

Character Hiding Shortcuts

Hide Front Character Shortcuts

Provides quick scan codes to hide a specific number of leading characters.

Hide Back Character Shortcuts

Offers scan codes to hide a specific number of trailing characters.

Data Code Table

Data Code 0

Numeric code '0' for scanner configuration.

Data Code 1

Numeric code '1' for scanner configuration.

Data Code 2

Numeric code '2' for scanner configuration.

Data Code 3

Numeric code '3' for scanner configuration.

Data Code 4

Numeric code '4' for scanner configuration.

Data Code 5

Numeric code '5' for scanner configuration.

Data Code 6

Numeric code '6' for scanner configuration.

Data Code 7

Numeric code '7' for scanner configuration.

Data Code 8

Numeric code '8' for scanner configuration.

Data Code 9

Numeric code '9' for scanner configuration.

ASCII Code Table

ASCII Null Character

Represents the Null character in the ASCII table.

ASCII SOH Character

Represents the Start of Heading (SOH) character.

ASCII STX Character

Represents the Start of Text (STX) character.

ASCII ETX Character

Represents the End of Text (ETX) character.

ASCII EOT Character

Represents the End of Transmission (EOT) character.

ASCII ENQ Character

Represents the Enquiry (ENQ) character.

ASCII ACK Character

Represents the Acknowledge (ACK) character.

ASCII BEL Character

Represents the Bell (BEL) character.

ASCII BS Character

Represents the Backspace (BS) character.

ASCII HT Character

Represents the Horizontal Tab (HT) character.

ASCII LF Character

Represents the Line Feed (LF) character.

ASCII VT Character

Represents the Vertical Tab (VT) character.

ASCII FF Character

Represents the Form Feed (FF) character.

ASCII CR Character

Represents the Carriage Return (CR) character.

ASCII SO Character

Represents the Shift Out (SO) character.

ASCII SI Character

Represents the Shift In (SI) character.

ASCII DLE Character

Represents the Data Link Escape (DLE) character.

ASCII DC1 Character

Represents the Device Control 1 (DC1) character.

ASCII DC2 Character

Represents the Device Control 2 (DC2) character.

ASCII DC3 Character

Represents the Device Control 3 (DC3) character.

ASCII DC4 Character

Represents the Device Control 4 (DC4) character.

ASCII NAK Character

Represents the Negative Acknowledge (NAK) character.

ASCII SYN Character

Represents the Synchronous Idle (SYN) character.

ASCII ETB Character

Represents the End of Transmission Block (ETB) character.

ASCII CAN Character

Represents the Cancel (CAN) character.

ASCII EM Character

Represents the End of Medium (EM) character.

ASCII SUB Character

Represents the Substitute (SUB) character.

ASCII ESC Character

Represents the Escape (ESC) character.

ASCII FS Character

Represents the File Separator (FS) character.

ASCII GS Character

Represents the Group Separator (GS) character.

ASCII RS Character

Represents the Record Separator (RS) character.

ASCII US Character

Represents the Unit Separator (US) character.

ASCII SP Character

Represents the Space (SP) character.

ASCII Exclamation Mark

Represents the exclamation mark (!) character.

ASCII Double Quote

Represents the double quote (") character.

ASCII Hash Symbol

Represents the hash (#) character.

ASCII Dollar Sign

Represents the dollar sign ($) character.

ASCII Percent Sign

Represents the percent (%) character.

ASCII Ampersand

Represents the ampersand (&) character.

ASCII Single Quote

Represents the single quote (') character.

ASCII Opening Parenthesis

Represents the opening parenthesis (() character.

ASCII Closing Parenthesis

Represents the closing parenthesis ()) character.

ASCII Asterisk

Represents the asterisk (*) character.

ASCII Plus Sign

Represents the plus (+) character.

ASCII Comma

Represents the comma (,) character.

ASCII Hyphen

Represents the hyphen (-) character.

ASCII Period

Represents the period (.) character.

ASCII Forward Slash

Represents the forward slash (/) character.

ASCII Digit 0

Represents the digit '0' character.

ASCII Digit 1

Represents the digit '1' character.

ASCII Digit 2

Represents the digit '2' character.

ASCII Digit 3

Represents the digit '3' character.

ASCII Digit 4

Represents the digit '4' character.

ASCII Digit 5

Represents the digit '5' character.

ASCII Digit 6

Represents the digit '6' character.

ASCII Digit 7

Represents the digit '7' character.

ASCII Digit 8

Represents the digit '8' character.

ASCII Digit 9

Represents the digit '9' character.

ASCII Colon

Represents the colon (:) character.

ASCII Semicolon

Represents the semicolon (;) character.

ASCII Less Than

Represents the less than (<) character.

ASCII Equals Sign

Represents the equals (=) character.

ASCII Greater Than

Represents the greater than (>) character.

ASCII Question Mark

Represents the question mark (?) character.

ASCII At Symbol

Represents the at symbol (@) character.

ASCII Letter A

Represents the letter 'A' character.

ASCII Letter B

Represents the letter 'B' character.

ASCII Letter C

Represents the letter 'C' character.

ASCII Letter D

Represents the letter 'D' character.

ASCII Letter E

Represents the letter 'E' character.

ASCII Letter F

Represents the letter 'F' character.

ASCII Letter G

Represents the letter 'G' character.

ASCII Letter H

Represents the letter 'H' character.

ASCII Letter I

Represents the letter 'I' character.

ASCII Letter J

Represents the letter 'J' character.

ASCII Letter K

Represents the letter 'K' character.

ASCII Letter L

Represents the letter 'L' character.

ASCII Letter M

Represents the letter 'M' character.

ASCII Letter N

Represents the letter 'N' character.

ASCII Letter O

Represents the letter 'O' character.

ASCII Letter P

Represents the letter 'P' character.

ASCII Letter Q

Represents the letter 'Q' character.

ASCII Letter R

Represents the letter 'R' character.

ASCII Letter S

Represents the letter 'S' character.

ASCII Letter T

Represents the letter 'T' character.

ASCII Letter U

Represents the letter 'U' character.

ASCII Letter V

Represents the letter 'V' character.

ASCII Letter W

Represents the letter 'W' character.

ASCII Letter X

Represents the letter 'X' character.

ASCII Letter Y

Represents the letter 'Y' character.

ASCII Letter Z

Represents the letter 'Z' character.

ASCII Opening Bracket

Represents the opening bracket ([) character.

ASCII Backslash

Represents the backslash (\) character.

ASCII Closing Bracket

Represents the closing bracket (]) character.

ASCII Caret

Represents the caret (^) character.

ASCII Grave Accent

Represents the grave accent (`) character.

ASCII Letter a

Represents the letter 'a' character.

ASCII Letter b

Represents the letter 'b' character.

ASCII Letter c

Represents the letter 'c' character.

ASCII Letter d

Represents the letter 'd' character.

ASCII Letter e

Represents the letter 'e' character.

ASCII Letter f

Represents the letter 'f' character.

ASCII Letter g

Represents the letter 'g' character.

ASCII Letter h

Represents the letter 'h' character.

ASCII Letter i

Represents the letter 'i' character.

ASCII Letter j

Represents the letter 'j' character.

ASCII Letter k

Represents the letter 'k' character.

ASCII Letter l

Represents the letter 'l' character.

ASCII Letter m

Represents the letter 'm' character.

ASCII Letter n

Represents the letter 'n' character.

ASCII Letter o

Represents the letter 'o' character.

ASCII Letter p

Represents the letter 'p' character.

ASCII Letter q

Represents the letter 'q' character.

ASCII Letter r

Represents the letter 'r' character.

ASCII Letter s

Represents the letter 's' character.

ASCII Letter t

Represents the letter 't' character.

ASCII Letter u

Represents the letter 'u' character.

ASCII Letter v

Represents the letter 'v' character.

ASCII Letter w

Represents the letter 'w' character.

ASCII Letter x

Represents the letter 'x' character.

ASCII Letter y

Represents the letter 'y' character.

ASCII Letter z

Represents the letter 'z' character.

ASCII Opening Brace

Represents the opening brace ({) character.

ASCII Vertical Bar

Represents the vertical bar (|) character.

ASCII Closing Brace

Represents the closing brace (}) character.

ASCII Tilde

Represents the tilde (~) character.

ASCII Delete

Represents the Delete (DEL) character.

ASCII Caps Lock

Represents the Caps Lock function key.

ASCII F1 Key

Represents the F1 function key.

ASCII F2 Key

Represents the F2 function key.

ASCII F3 Key

Represents the F3 function key.

ASCII F4 Key

Represents the F4 function key.

ASCII F5 Key

Represents the F5 function key.

ASCII F6 Key

Represents the F6 function key.

ASCII F7 Key

Represents the F7 function key.

ASCII F8 Key

Represents the F8 function key.

ASCII F9 Key

Represents the F9 function key.

ASCII F10 Key

Represents the F10 function key.

ASCII F11 Key

Represents the F11 function key.

ASCII F12 Key

Represents the F12 function key.

ASCII PrintScreen Key

Represents the PrintScreen function key.

ASCII Scroll Lock Key

Represents the Scroll Lock function key.

ASCII Pause Key

Represents the Pause function key.

ASCII Insert Key

Represents the Insert function key.

ASCII Home Key

Represents the Home function key.

ASCII PageUp Key

Represents the PageUp function key.

ASCII Delete Key

Represents the Delete function key.

ASCII PageDown Key

Represents the PageDown function key.

ASCII End Key

Represents the End function key.

ASCII Right Arrow Key

Represents the Right Arrow function key.

ASCII Left Arrow Key

Represents the Left Arrow function key.

ASCII Down Arrow Key

Represents the Down Arrow function key.

ASCII Up Arrow Key

Represents the Up Arrow function key.

ASCII Num Lock Keypad

Represents the Num Lock function key on the keypad.

ASCII Slash Keypad

Represents the Slash key on the keypad.

ASCII Asterisk Keypad

Represents the Asterisk key on the keypad.

ASCII Hyphen Keypad

Represents the Hyphen key on the keypad.

ASCII Plus Keypad

Represents the Plus key on the keypad.

ASCII Enter Keypad

Represents the Enter key on the keypad.

ASCII 1 Keypad

Represents the '1' key on the keypad.

ASCII 2 Keypad

Represents the '2' key on the keypad.

ASCII 3 Keypad

Represents the '3' key on the keypad.

ASCII 4 Keypad

Represents the '4' key on the keypad.

ASCII 5 Keypad

Represents the '5' key on the keypad.

ASCII 6 Keypad

Represents the '6' key on the keypad.

ASCII 7 Keypad

Represents the '7' key on the keypad.

ASCII 8 Keypad

Represents the '8' key on the keypad.

ASCII 9 Keypad

Represents the '9' key on the keypad.

ASCII 0 Keypad

Represents the '0' key on the keypad.

ASCII Period Keypad

Represents the Period key on the keypad.

Function Key Mapping

Left Ctrl Press

Configures the press action for the Left Control key.

Left Shift Press

Configures the press action for the Left Shift key.

Left Alt Press

Configures the press action for the Left Alt key.

Middle GUI Press

Configures the press action for the Middle GUI key.

Right Ctrl Press

Configures the press action for the Right Control key.

Right Shift Press

Configures the press action for the Right Shift key.

Right Alt Press

Configures the press action for the Right Alt key.

Right GUI Press

Configures the press action for the Right GUI key.

Left Ctrl Release

Configures the release action for the Left Control key.

Left Shift Release

Configures the release action for the Left Shift key.

Left Alt Release

Configures the release action for the Left Alt key.

Left GUI Release

Configures the release action for the Left GUI key.

Right Ctrl Release

Configures the release action for the Right Control key.

Right Shift Release

Configures the release action for the Right Shift key.

Right Alt Release

Configures the release action for the Right Alt key.

Right GUI Release

Configures the release action for the Right GUI key.

Overview

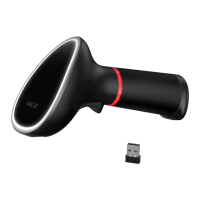
This document outlines the features and functionalities of a Wireless 2D Barcode Scanner, focusing on its wireless operation. The manual provides comprehensive instructions for configuring various aspects of the scanner, from basic output modes to advanced data editing and key function assignments.

Function Description

The Wireless 2D Barcode Scanner is designed for efficient data capture, offering both immediate and inventory data transfer modes. It supports multiple communication interfaces, including 2.4G, Bluetooth HID, Bluetooth BLE, and Bluetooth SPP, providing flexibility for different application environments. The scanner can be configured to output data via USB when connected, or simultaneously through USB and a wireless mode.

Output Mode: The scanner offers two primary output modes:

  • USB priority output: When the USB cable is connected, data is exclusively output via USB. This ensures a stable and direct connection for data transfer.
  • Output at the same time: This mode allows simultaneous data output through USB and either 2.4G or Bluetooth (depending on the selected communication mode). If the 2.4G or Bluetooth transmission fails, an alarm will be triggered, alerting the user to potential data loss.

Data Transfer Mode: The device supports two data transfer mechanisms:

  • Immediate Mode: In this mode, scanned data is uploaded instantly. It's important to note that if the transmission fails, the data will not be saved, emphasizing the need for a reliable connection.
  • Inventory Mode: This mode automatically saves scanned barcodes. Users can then scan specific setting codes to view statistical data or upload the saved information at a later time.
  • Automatic storage mode: This is a variation of the inventory mode where data is automatically saved if the scanner moves out of range. To retrieve this data, users must scan the "upload all data" setting code.

Communication Mode: The scanner supports various communication protocols to suit different host systems:

  • 2.4G Mode: This is a common wireless mode, often used with a dedicated dongle.
  • Bluetooth HID Mode: This mode allows the scanner to function as a Human Interface Device, making it compatible with a wide range of Bluetooth-enabled devices. Pairing with a new device requires scanning the "Bluetooth HID pairing" setting code.
  • Bluetooth BLE Mode: For applications requiring low-power Bluetooth transmission, users need to download or develop specific BLE software.
  • Bluetooth SPP Mode: Similar to BLE, this mode requires downloading or developing low-power Bluetooth SPP transmission software for its functionality.

USB Interface Type: The scanner can connect to a host via USB in two ways:

  • USB-HID: This is the default mode, allowing the scanner to emulate a keyboard for direct data input.
  • USB-VCOM: This mode emulates a serial port, often used for applications requiring more control over data flow.

USB-HID Data Type: When operating in USB-HID mode, the scanner can be configured to:

  • Transfer keyboard function keys: This allows the scanner to send specific keyboard commands.
  • Send ASCII: This enables the scanner to send raw ASCII character data.

Inventory Mode Features: Within Inventory Mode, users have options for managing saved data:

  • Clear All Saved Data: This function erases all barcodes stored in the scanner's memory.
  • Statistical Information: This allows users to view statistical data related to the scanned barcodes.
  • Upload All Data: This initiates the transfer of all saved barcodes to the connected host.

Sound Set: The scanner provides configurable sound feedback:

  • Mute: Disables all sound alerts.
  • High, Medium, Low: Adjusts the volume of the scanner's beeps and alerts.

Sleep Time Set: To conserve battery life, the scanner's sleep timer can be adjusted:

  • No Sleep: The scanner remains active indefinitely.
  • 10S, 30S, 1Min, 2Min, 5Min, 10Min, 30Min: These options set the duration after which the scanner will enter sleep mode if inactive.
  • Sleep Now: Immediately puts the scanner into sleep mode. A special procedure is described: "Keep pressing the button until you hear the first beep for about 8 seconds, release the button and the scanner will enter sleep."

GS (Group Separator) Characters Conversion: The scanner offers options for handling Group Separator (GS) characters:

  • None: No conversion is applied to GS characters.
  • GS converts to : Converts GS characters to the literal string "".
  • GS converts to |: Converts GS characters to a vertical bar "|".
  • GS converts to ]: Converts GS characters to a right square bracket "]".
  • GS converts to ^]: Converts GS characters to a caret followed by a right square bracket "^]".

Letter Case Conversion: The scanner can modify the case of scanned characters:

  • Normal Letter Case: Maintains the original case of the scanned data.
  • All Uppercase: Converts all letters to uppercase.
  • All Lowercase: Converts all letters to lowercase.
  • Case Inversion: Inverts the case of all letters (uppercase becomes lowercase, and vice versa).

Language Set: The scanner supports various keyboard layouts for different regions, ensuring correct character mapping:

  • USA, German, France, Italy, Canadian, Spain, Sweden, Belgium, TurkeyF, TurkeyQ, Italian14, Netherlands, Finland, Serbia, Hungary, Latin America, Poland, Norway, Japan.

Bluetooth HID Transfer Rate: The speed of data transfer over Bluetooth HID can be adjusted:

  • Fast, Medium, Low, Ultra-low speed.

Data Editor: The data editor provides advanced functionalities for manipulating scanned data before output.

Suffix Terminator Character Setting: This feature allows users to append a specific character or sequence to the end of each scanned barcode:

  • Suffix-None: No terminator is added.
  • Suffix-Enter: Adds an Enter key press after the barcode.
  • Suffix-Line: Adds a Line Feed character after the barcode.
  • Suffix-Tab: Adds a Tab character after the barcode.
  • Suffix-Enter&Line: Adds both an Enter and a Line Feed character.

Hidden Character Settings: This powerful feature allows users to hide specific characters from the beginning or end of a barcode.

Hide Front Character: This function hides characters from the front of the barcode.

  • Steps:
    1. Scan "Hide front character".
    2. Define the starting position (XX) of the characters to be hidden using two data codes (e.g., '0', '4' for the 4th bit).
    3. Define the number of characters (YY) to hide from that position using two data codes (e.g., '0', '5' for 5 characters).
    4. Scan "Saved and Finished Set".
  • Example: To hide "DEFGH" from "ABCDEFGHIJKLMN" (making it "ABCDIJKLMN"):
    1. Scan "Hide front character".
    2. 'E' is the 4th bit, so scan '0', '4' from the data code table.
    3. "DEFGH" is 5 characters, so scan '0', '5' from the data code table.
    4. Scan "Saved and Finished Set".
  • Shortcut settings: Pre-defined options to hide the first 1, 2, 3, 4, 5, 6, 7, or 8 bits.

Hide Back Character: This function hides characters from the back of the barcode.

  • Steps:
    1. Scan "Hide back character".
    2. Define the starting position (XX) from the end of the barcode (penultimate digit) using two data codes.
    3. Define the number of characters (YY) to hide forward from that position using two data codes.
    4. Scan "Saved and Finished Set".
  • Example: To hide "DEFGH" from "ABCDEFGHIJKLMN" (making it "ABCDIJKLMN"):
    1. Scan "Hide back character".
    2. 'H' is the 7th bit from the end, so scan '0', '7' from the data code table.
    3. "DEFGH" is 5 characters, so scan '0', '5' from the data code table.
    4. Scan "Saved and Finished Set".
  • Shortcut settings: Pre-defined options to hide the back 1, 2, 3, 4, 5, 6, 7, or 8 bits.

Add Prefix and Suffix Settings: These features allow users to add custom characters or sequences to the beginning or end of scanned data.

Add Prefix Setting:

  • Steps:
    1. Scan "Add Prefix setting".
    2. Define the insertion point (XX) using two data codes. The first setting can be omitted, defaulting to "0", "1".
    3. Scan the ASCII codes of the characters to be added.
    4. Scan "Saved and Finished Set".
  • Example: To add "12345" before 'F' in "ABCDEFGHIJKLMN" (making it "ABCDE12345FGHIJKLMN"):
    1. Scan "Add prefix".
    2. 'F' is the 6th character, so scan '0', '6'.
    3. Scan the ASCII codes for '1', '2', '3', '4', '5' (which are '31', '32', '33', '34', '35').
    4. Scan "Saved and Finished Set".

Add Suffix Setting:

  • Steps:
    1. Scan "Add Suffix Setting".
    2. Define the insertion point (XX) from the end of the barcode (penultimate digit) using two data codes. The last setting can be omitted, defaulting to "0", "1".
    3. Scan the ASCII codes of the characters to be added.
    4. Scan "Saved and Finished Set".
  • Example: To add "12345" after 'E' in "ABCDEFGHIJKLMN" (making it "ABCDE12345FGHIJKLMN"):
    1. Scan "Add Suffix Setting".
    2. 'E' is the 10th last character, so scan '1', '0'.
    3. Scan the ASCII codes for '1', '2', '3', '4', '5' (which are '31', '32', '33', '34', '35').
    4. Scan "Saved and Finished Set".

Add Ctrl, Shift, Alt, GUI Function Key: This advanced feature allows the scanner to output control, shift, alt, or GUI (Windows key) functions, either individually or in combination.

  • Important Note: "When there is a press, there must be a release. Press and release must be used in pairs. Otherwise, there will be hot key issues such as data not uploading and computer lock screen."
  • Available Keys: L-Ctrl Press/Release, L-Shift Press/Release, L-Alt Press/Release, M-GUI Press/Release, R-Ctrl Press/Release, R-Shift Press/Release, R-Alt Press/Release, R-GUI Press/Release.
  • Keypad Functions: The manual also lists various keypad functions (0-9, /, *, -, +) and standard keyboard functions (F1-F12, PrintScreen, Scroll Lock, Pause, Insert, Home, PageUp, Delete, PageDown, End, RightArrow, LeftArrow, DownArrow, UpArrow, Num Lock).

Usage Features

The scanner is designed for user-friendly configuration through barcode scanning. Each setting is represented by a unique barcode, which, when scanned, activates the corresponding function. This method eliminates the need for complex software interfaces for basic setup.

  • Factory Default Setting: A dedicated barcode allows users to restore all settings to their original factory defaults, providing a quick way to troubleshoot or reset configurations.
  • Version Number: A barcode is provided to display the current firmware version of the scanner.
  • Data Code Table and ASCII Code Table: These tables are essential for advanced data editing, allowing users to input specific numerical or ASCII values to define positions, lengths, or custom characters for prefix/suffix addition and character hiding.

Maintenance Features

The manual implicitly suggests several maintenance-related features:

  • Restoring Factory Defaults: This is a crucial maintenance step for troubleshooting and resolving configuration issues.
  • Clearing Character Settings: For both prefix/suffix and hidden character settings, the manual notes that scanning only the initial setting code (e.g., "Add Prefix setting") and the final "Saved and Finished Set" code without intermediate steps will clear the current settings. This provides a way to undo custom data manipulations without a full factory reset.
  • Sleep Mode: The configurable sleep time and "Sleep Now" function contribute to battery longevity, reducing the frequency of charging and extending the overall lifespan of the device.

Overall, the Wireless 2D Barcode Scanner is a versatile tool with extensive configuration options, designed to adapt to various data capture and integration requirements. Its barcode-based configuration system simplifies setup, while advanced data editing features provide powerful customization capabilities.

Sunlux XL-9600 Specifications

General IconGeneral
Scan Rate100 scans per second
Interfaces SupportedUSB, RS-232, Keyboard Wedge
Storage Temperature-20°C to 60°C
InterfaceUSB
Supported BarcodesCode 39, Code 128, Interleaved 2 of 5, Codabar
Operating Voltage5V DC
Operating Current100mA
Humidity5% to 95% (non-condensing)
TypeHandheld Laser Barcode Scanner

Related product manuals