5. If needle is not on red line, loosen cap screw on
side of honing dial bracket and slide Honing Dial up
as far as it will go. Then move it down so that needle
makes one full turn. Continue moving indicator down
until needle is on red line. Tighten cap screw to hold
Honing Dial in this position.
6. Push Feed Dial in. Needle should return to red
line when Feed Dial is released.
7. If needle does not return to red line or if
sluggish: Remove Honing Dial from machine.
8. Make sure the honing dial plunger is clean and
works freely. Reinstall Honing Dial and adjust as
above.
9. If needle is still sluggish, clean and lubricate
body assembly.
CUTTING PRESSURE CONTROL
To check Cutting Pressure Control, proceed as follows:
CAUTION
Remove honing tool before checking or adjusting.
Also adjust the numbered set setscrews on the
spindle nose so that spindle nose is visually
concentric with spindle flange.
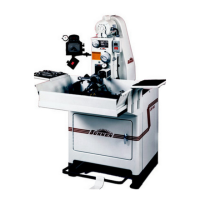
1. Hold Light Pressure Control Fork back so it does
not touch Collar during entire heavy pressure check
(see Figure 4-5).
NOTE: Turn Disconnect Switch on left side of Belt
Guard to OFF position, then open doors.
2. Rotate Feed Dial all of the way in either direction;
then back off six turns.
3. Set Heavy Cutting Pressure Control to zero.
4. Set Light Cutting Pressure Control to zero.
5. Push Feed Dial in and release very slowly. Honing
dial needle should read at some point greater than 5
on dial.
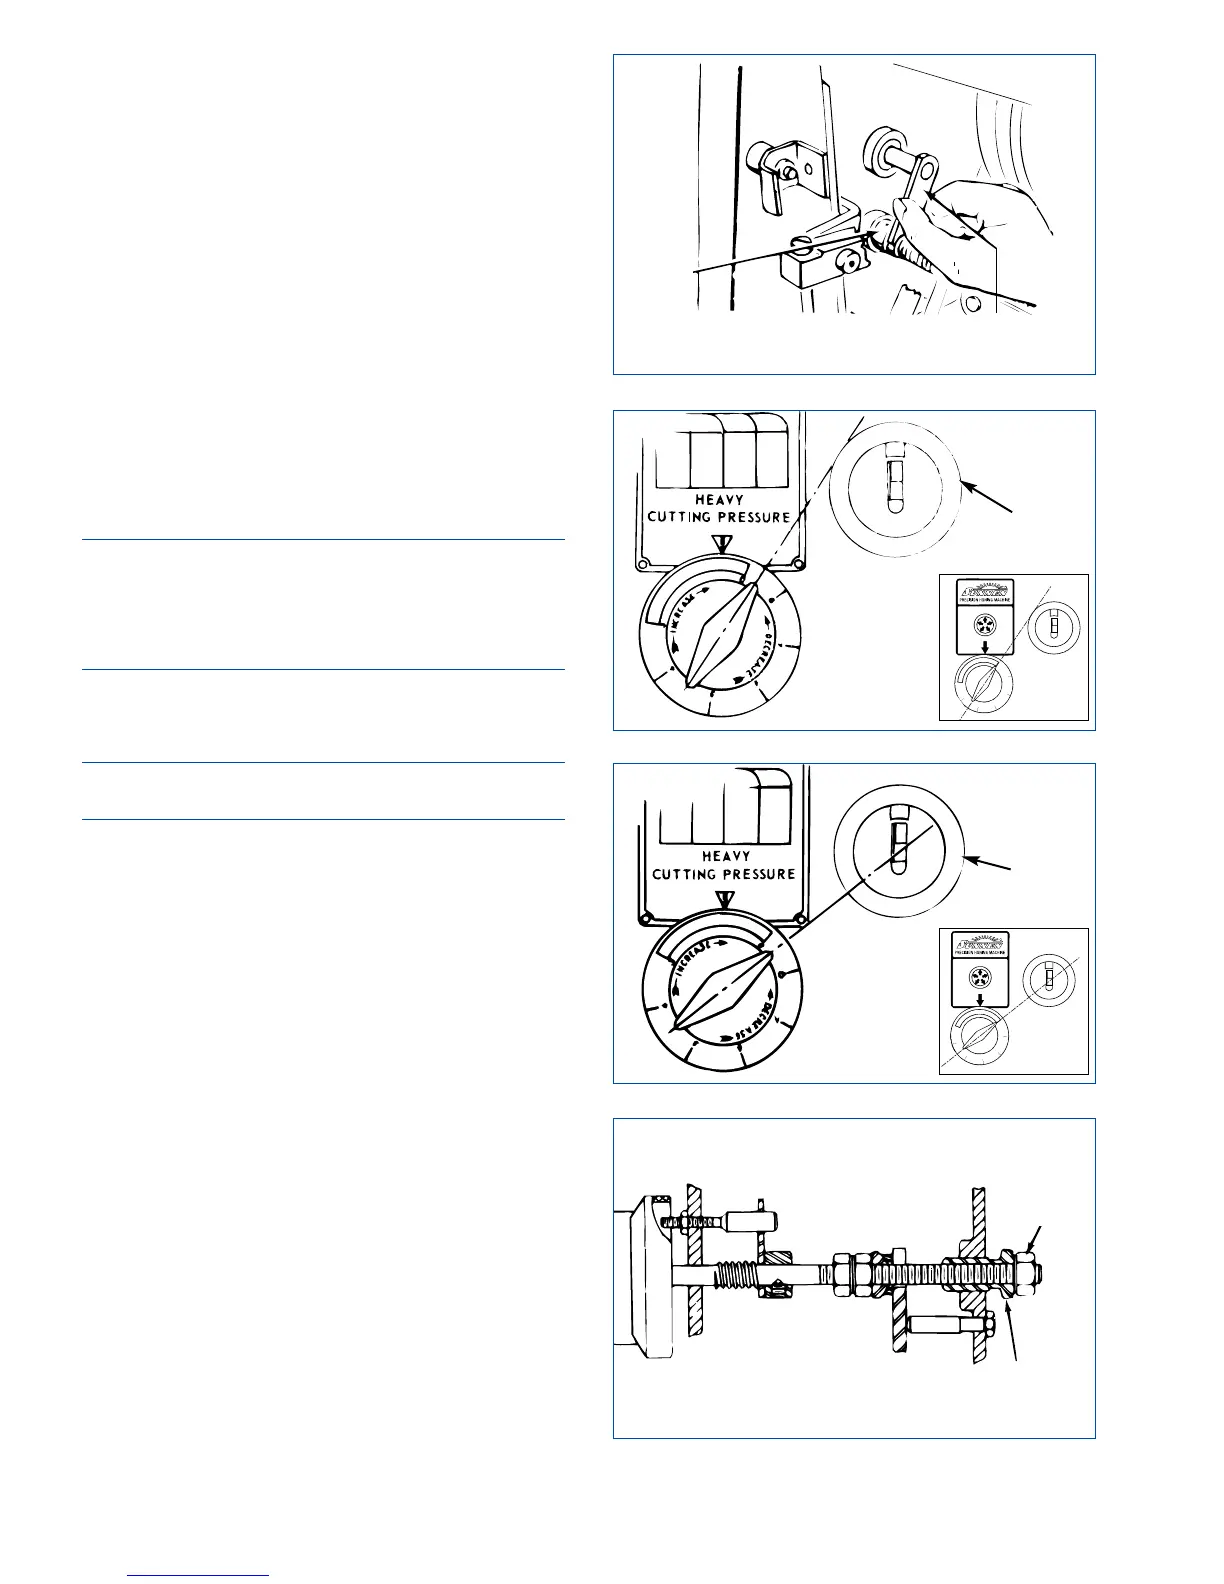
6. Rotate Heavy Cutting Pressure Control so handle
is in line with upper surface of Spindle Nose
(see
Figure 4-6)
. Honing dial needle should move to
between 4 and 5.
7. Continue rotating Heavy Cutting Pressure Control
until handle is in line with spindle centerline
(see
Figure 4-7)
. Honing dial needle should move past
zero to the red line.
If everything is okay, skip to
step 25.
To adjust, proceed with
step 8.
8. Turn machine OFF.
9. Make sure Feed Dial is not at either extreme end
of travel.
10. Loosen Locknut (A) on Light Cutting Pressure
Control shaft
(see Figure 4-8).
20
FIGURE 4-5, Light Pressure Control Fork
FIGURE 4-6, Heavy Cutting Pressure Control
FIGURE 4-7, Heavy Cutting Pressure Control
FIGURE 4-8, Light Cutting Pressure Control
SPINDLE
NOSE
LOCKNUT
(A)
COLLAR
LIGHT CUTTING
PRESSURE
CONTROL FORK
SPINDLE
NOSE
THREADED
SLEEVE (B)