Pantone 1375 C
RGB: 255, 158, 27
CMYK: 0, 38, 89, 0
HEX: #FF9E1B
Gray 49%
Sunsation Instructions Manual
11
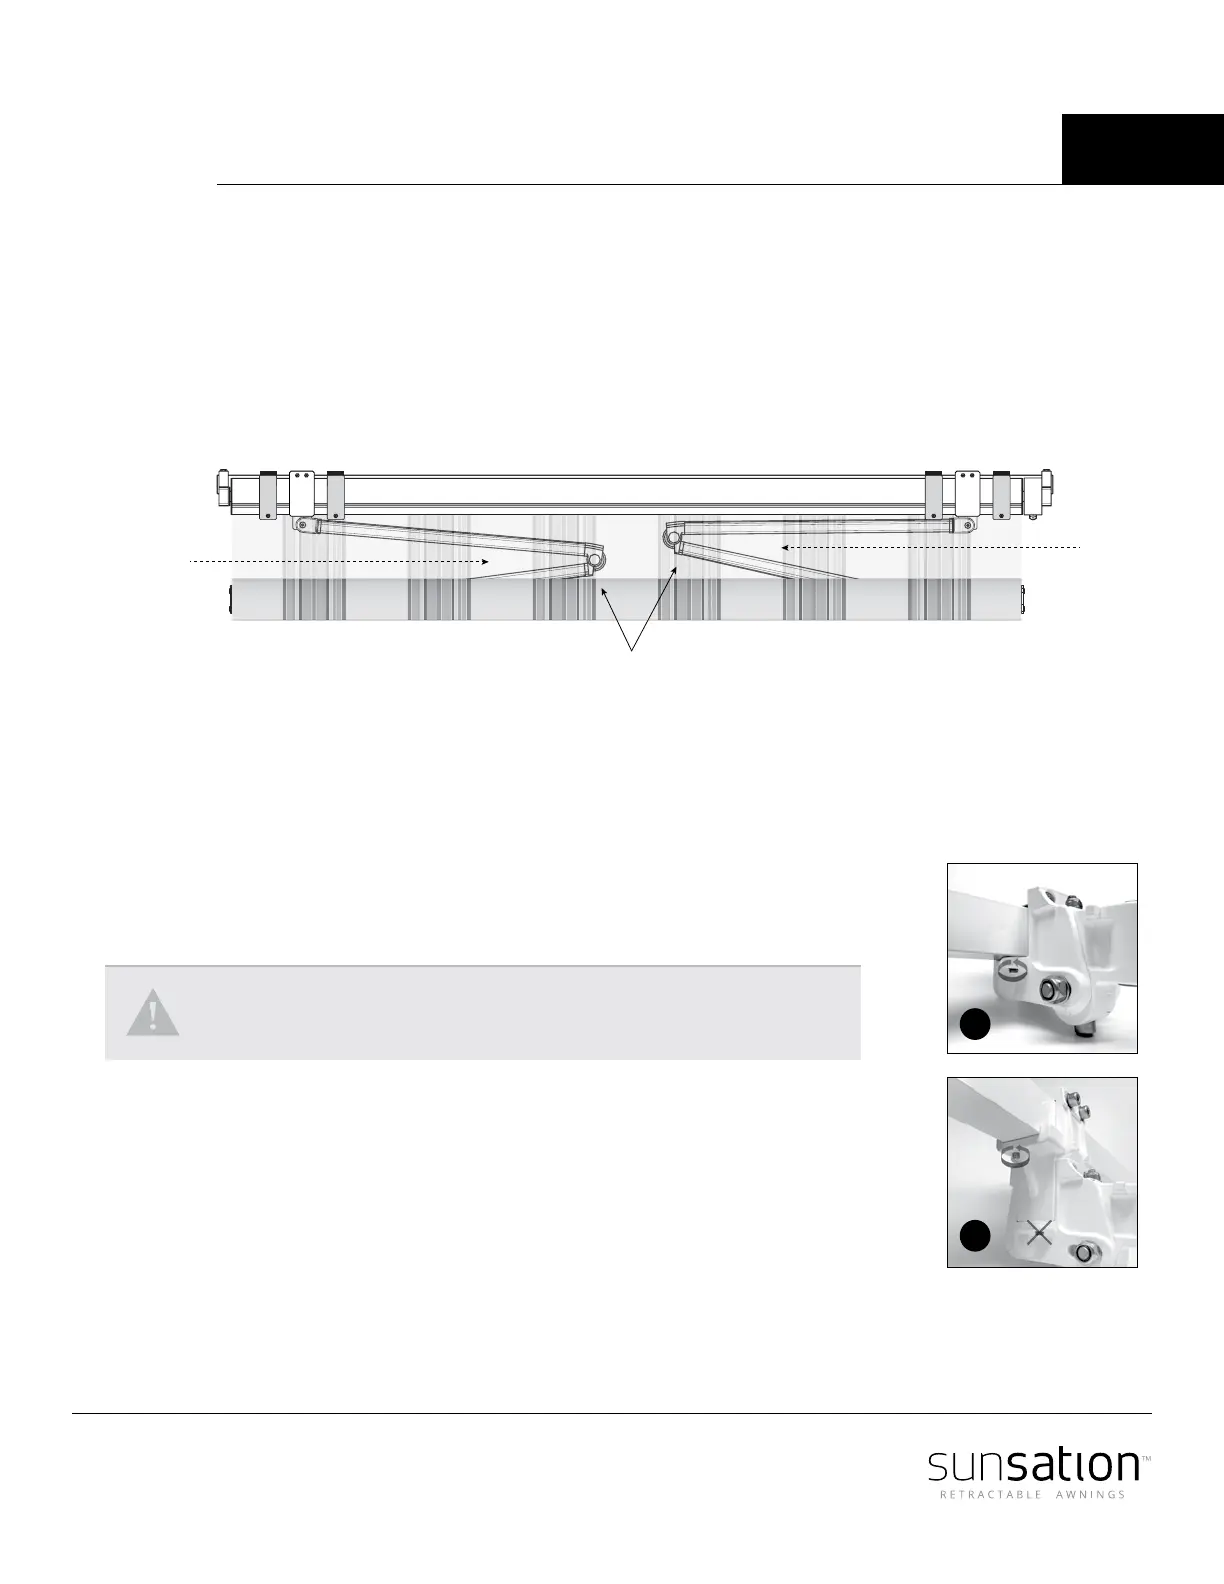
Arm alignment
Every awning is perfectly aligned and tested before it leaves the Sunsation facility. After
installing you will need to check for both arms to be aligned. If they are not aligned, you will
need to roll down the awning completely and adjust the fabric. (this is only if the fabric was sewn
at Sunsation, otherwise you will need to adjust the arms, which is usually not recommended).
Fabric adjustment
Using example (picture above) when the left arm is outwards
1. Extend the awning to its full projection, continue opening until the roller
tube is uncovered
2. Pull and slide the FABRIC on the ROLLER TUBE towards the RIGHT side.
3. Roll up the Awning, the problem should be solved.
The same is for the opposite side. If the right arm is outwards, you'll pull/slide
the fabric on the roller tube towards the left side.
Warning: DO NOT screw into the roller tube, it WILL damage the motor
and WILL NOT be eligible for motor warranty repair or replacement.
Arm up and down (vertical) adjustment (SUN 3500 cross arm)
If the arms doesn’t align vertically, which arms can rub onto each other,
you'll need to lift the upper arm, and/or to lower the lower arm.
There are 2 screws on the pitch control, under the square bar (one on the right side
and one the left side) (picture 1).
For the lower arm, use the 2 screws on the extension bracket, close to square
bar. NOT the screws from the lower bracket (picture 2). Do not overtighten.
To raise the right arm, turn the left screw counterclockwise, and turn the right screw clockwise.
To raise the left arm, turn the right screw counterclockwise, and turn the left screw clockwise.
Note: always turn the counterclockwise rst and then turn the clockwise.
Wall bracket
Arm shoulder / Pitch control
Wall bracket
Support addedNo Support
Awning arms aren't aligned when its rolled up
Uneven wall
Additional wall bracket (if necessary)
1
2