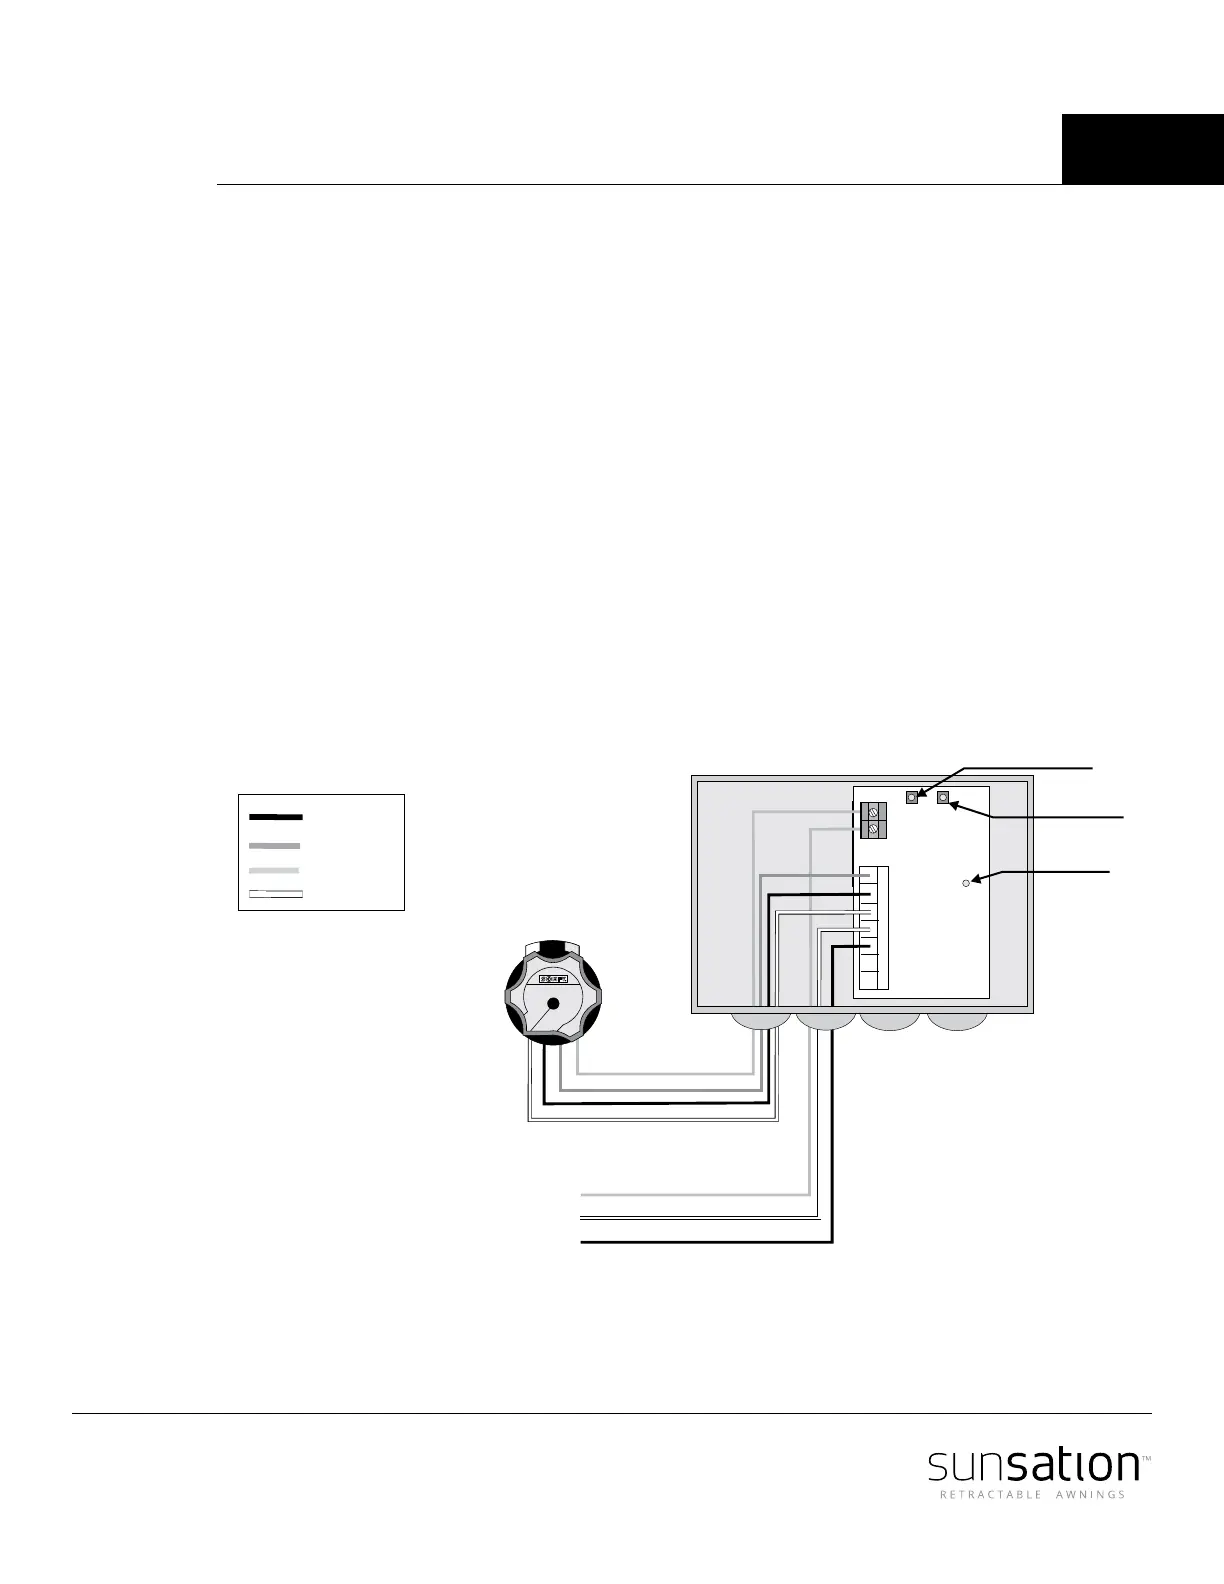
The Universal Receiver should be mounted as close to the motor as possible. If mounted
outside, ensure that the connections are facing down to avoid rain seepage. Avoid
mounting the control against any metallic surface, as this may aect radio reception.
Connect high voltage wires according to the wiring diagram on the next page. Make sure
to use included watertight strain relief ttings to maintain the weatherproong of the
enclosure.
If used, the RTS sensor should be placed close to the awning or shading system to make
sure the wind speed or sun intensity is measured at the product. Guard against installing
the wind sensor too close to an obstruction such as a chimney, gutter or the window
covering itself, which could block the wind and cause erroneous sensor readings. The
sensor should also not be mounted in the shade or be obstructed by trees, to ensure
accurate sunlight readings.
System Set Up
1. With power off, wire the Universal Receiver as indicated above. Turn all circuit breakers on (motors should not move).
2. The motor can be tested using the Sequence button located on the Universal Receiver board. Each press of the switch will sequence through the directions as
follows;
DEPRESS 1 UP DIRECTION
DEPRESS 2 STOP
DEPRESS 3 DOWN DIRECTION
DEPRESS 4 STOP
3. Set the Universal Receiver into programming mode by pressing the programming button until the LED lights (about 2 seconds). The motor will jog.
4. Press the programming button on the Telis transmitter or RTS sensor to be memorized. The programming LED will blink and the motor will jog indicating the
device has been memorized.
5. Operate the motor in the DOWN direction using the radio transmitter.
6. The motorized treatment should move down or out. If this is incorrect, turn off the circuit breakers and reverse the red and black wires of the motor. FAILURE TO
CORRECT THIS ERROR WILL CAUSE DAMAGE TO AWNING BY EXTENDING IT DURING WINDY CONDITIONS.
Operating Procedures
REMOTE ONLY CONTROL
1. Pressing the UP button on the Telis transmitter will move the window treatment up or in. The DOWN button will move the treatment down or out.
2. To stop the motorized treatment at any time, press the MY button on the transmitter.
3. To reach one of the intermediate positions, the window treatment must first be stopped at the upper or lower limit. Pressing the MY button on the transmitter
will move the window treatment to the dedicated position.
WIND ONLY OPERATION
4. If wind monitoring is desired, an Eolis Sensor RTS or Eolis Wirefree must first be memorized into the receiver. Press the programming button on the receiver until
the LED blinks and the motor jogs. Press the programming button on the bottom of the sensor. The programming LED on the receiver will light and the motor
will jog, indicating the sensor has been memorized.
5. Set the desired wind speed on the sensor as specified in the product’s operating instructions.
6. When the monitored wind speed is greater than the setting, the UP direction will activate after 2 seconds. As long as the wind speed remains high, all other
commands will be ignored.
7. When the wind speed drops below the set value, a manual command can be given with the radio transmitter aft
er only one minute.
SUN and WIND OPERATION
8. If sun and wind monitoring is desired, a Soliris Sensor RTS or combination Eolis Wirefree and Sunis must first be memorized into the receiver. Press the
programming button on the receiver until the LED blinks and the motor jogs. Press the programming button on the sensor. The programming LED on the receiver
will light and the motor will jog, indicating the sensor has been memorized.
9. Set the desired wind speed and sun intensity on the sensor as specified in the product’s operating instructions.
10. When the monitored wind speed is greater than the setting, the UP direction will activate after 2 seconds. As long as the wind speed remains high, all other
commands will be ignored.
11. When the measured sun intensity is greater than the set level, a DOWN command is given after a 2 minute delay, assuming no wind is present. If the upper
intermediate position is set, the awning or shade will go to that position. Otherwise, it will go to the lower limit.
12. When the sun intensity falls below the set level, the awning will retract automatically after a 15 - 30 minute delay, assuming no wind present.
 Loading...