Sunsation Instructions Manual
Pantone 1375 C
RGB: 255, 158, 27
CMYK: 0, 38, 89, 0
HEX: #FF9E1B
Gray 49%
18
Set the awning limit
Before begin using the awning, the IN and OUT limits need to be set. Failure to set the
limits may cause damage to the awning or personal injury.
Every complete awning with fabric, the limits are being set before it leaves the Sunsation
facility. Awnings purchased without fabric cannot be set at the Sunsation facility and MUST
be done after inserting the fabric.
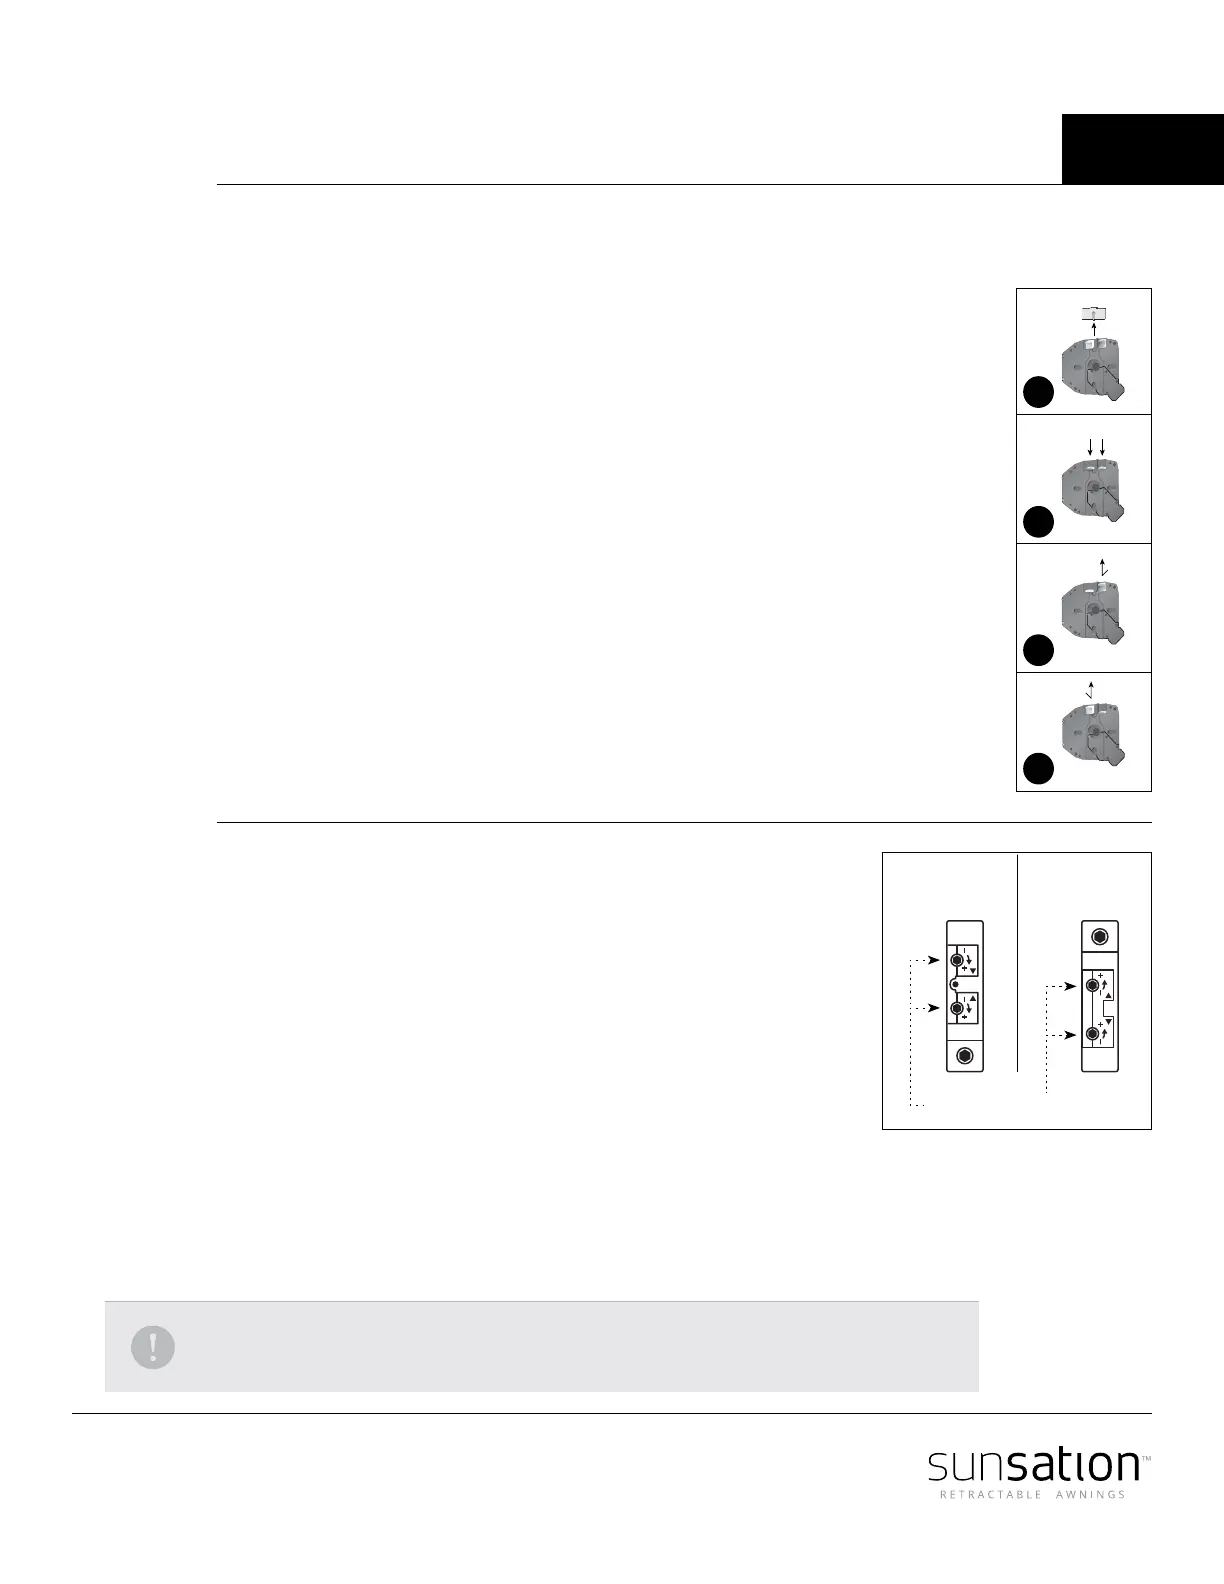
Somfy CMO Motors
Identify the IN limit switch (yellow or white).
If motor is installed on the right side the button closer to the wall is your IN Limit switch
and the button further from the wall is your OUTER limit switch.
Press the switch on the wall or on the Transmitter to close the Awning until you reach the
desired in position, then stop the motor.
Press and release the in limit switch (Y or W) it will pop up (as in picture 3). IN limit is now set.
Repeat the above operation to set the outer end limit switch (as in picture 4).
Replace the protective cap.
Simu Motors
Identify which limit adjustment screw controls the up limit and which controls
the down limit. the arrows by the limits adjustments screws refer to the tube's
rotation. Turning the adjustment screw positive (+) will increase the maximum
travel in the direction that it controls and turning it negative (-) will decrease
the maximum travel.
Run the motor in the selected direction, If the motor stops on its own before
reaching the desired stop, turn the appropriate limit screw positive (+). Every
2 or 3 turns of the limit adjustment screw will allow the motor to travel about
1" further. After every few turns of the limit adjustment screw use the control
switch to move the motor to the new limit position.
When you are approximately at the desired stop, use the control switch to run the motor away from
the limit 2 or 3 feet and then back. This will allow you to see precisely where the limit is set. Make small
adjustments and repeat.
If the motor does not stop on its own at least 6 inches before the desired limit position, stop the motor
with the control switch. Then turn the adjustment screw in the negative (-) direction.
NOTE: The motor has a built-in thermal cut-o. If after several minutes of use the motor will
not run in either direction allow the motor to cool approximately 20 minutes.
1
2
3
4
Motor setting
with wire down
Limit adjustment screws
Motor setting
with wire up