Pantone 1375 C
RGB: 255, 158, 27
CMYK: 0, 38, 89, 0
HEX: #FF9E1B
Gray 49%
Sunsation Instructions Manual
5
Surface Preparation
Proper location of the brackets is the most important aspect of the awning mounting.
They must be fastened to studs, joists, headers or other major structural members. Even
a moderate wind exerts great force on the awning and mounting brackets. This is why it
is most important that all awning mounting brackets be fastened properly and securely.
Proper location will also make it easier to insert the support tube when hanging the awning.
Warning: failure to securely fasten all the brackets to the wall
could result in the collapse of the awning and cause personal injury
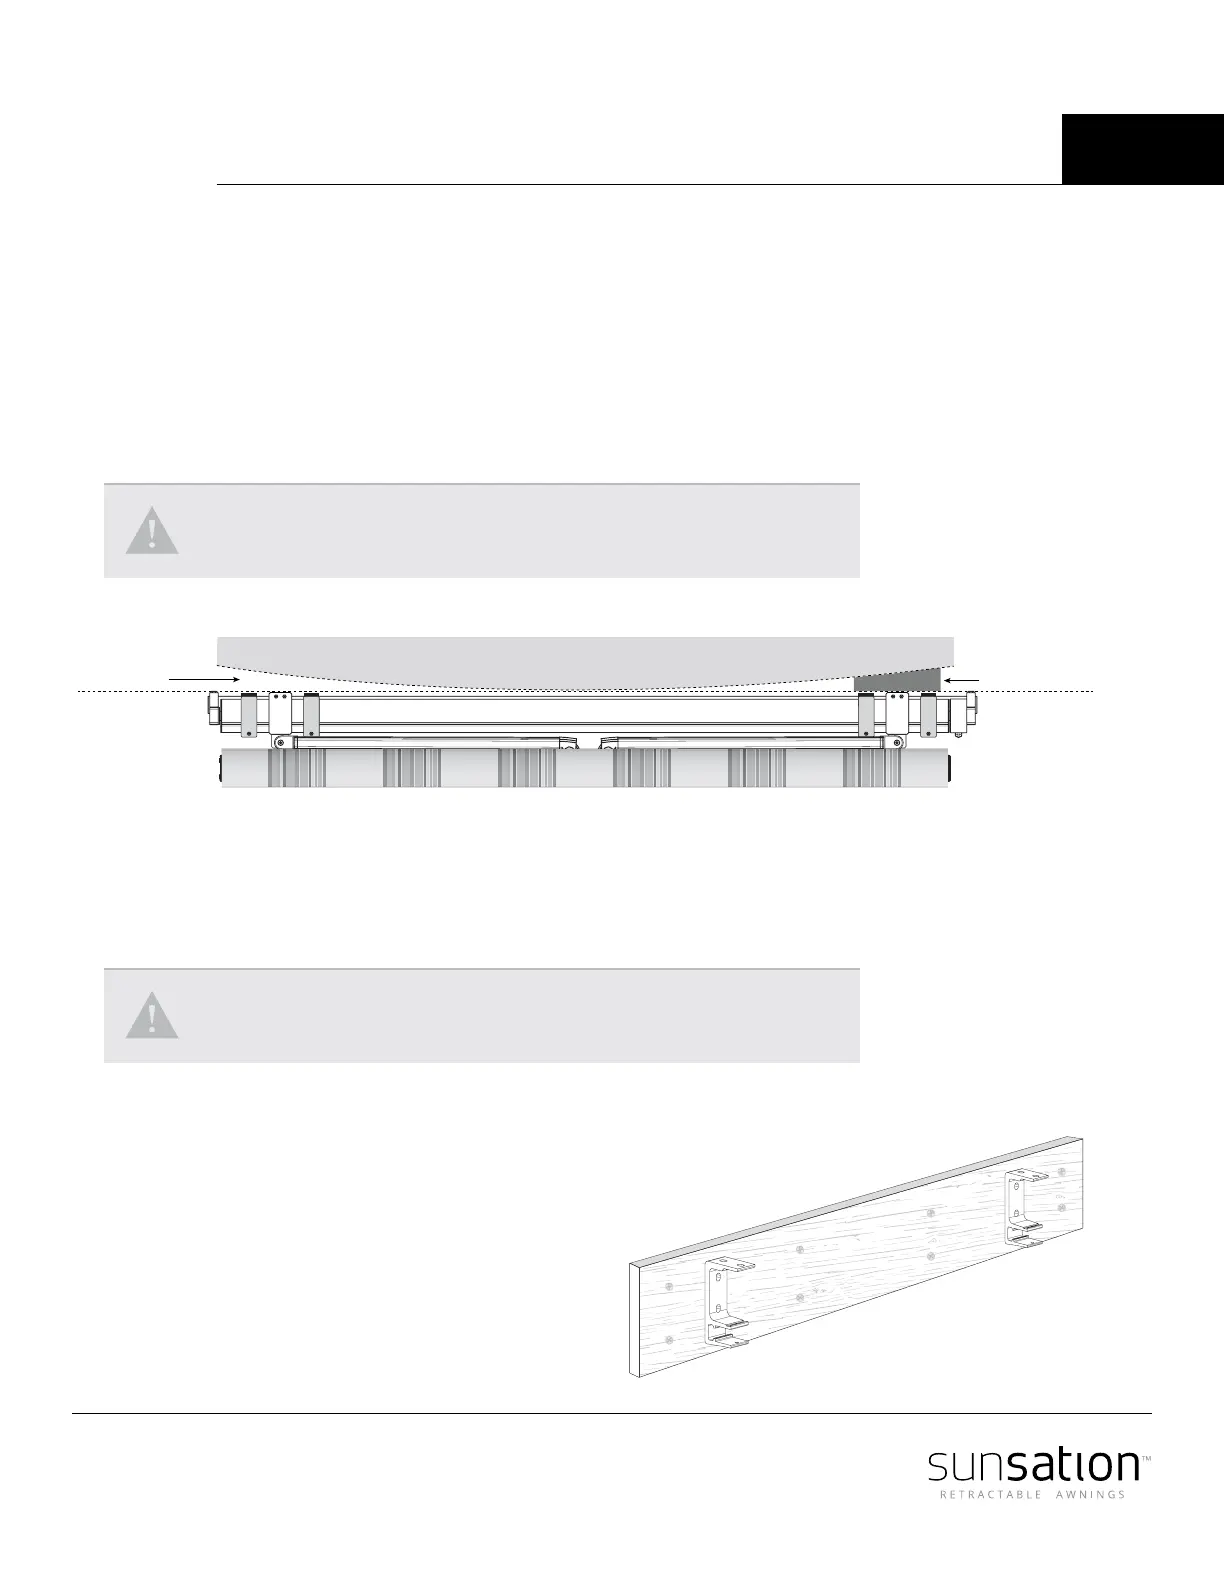
Wall surface
Make sure that the face is structured and not just an unsupported facade. Make sure
the wall is at, by pulling a rope from one side to the other. If the wall is not straight, the
brackets will not align properly (Picture above).
Warning: when the wall is not straight, do NOT force/bend the awning to
reach the wall, it will go o alignment and wont roll properly.
Soft walls
Shingles, vinyl, aluminum siding, clapboards or stucco walls.
The best way to deal with a soft or unleveled walls is to
mount a 2” x 10” pressure treated board (shim)
to the house and fasten the brackets through
the board into the header and studs. Longer
bolts are needed. This is also recommended for
uneven walls.
Wall bracket
Arm shoulder / Pitch control
Wall bracket
Support addedNo Support
Awning arms aren't aligned when its rolled up
Uneven wall
Additional wall bracket (if necessary)
7’ Min.
clearance
Approximate
Incline
Total
height
Deck
Bracket
Rope line
Bracket
Projection
Wall
5’ Projection
15”
Door Door
Short screwLong screw
Wall
Wrong
Wall