Sunsation Instructions Manual
Pantone 1375 C
RGB: 255, 158, 27
CMYK: 0, 38, 89, 0
HEX: #FF9E1B
Gray 49%
6
Mounting the Brackets
Position the bracket on the wall (or on the shim), and mark the top and bottom holes.
Remove the bracket and drill the top hole through the siding block or shim (if appropriate)
and about 3-1/2” into the stud or joist. Using a 1/4” drill bit. This will prevent the framing
from splitting while installing the lag screws. Make sure the bottom hole is plumbed with the
top hole, then drill the bottom hole.
Using a 9/16” socket, install the bracket with the two 3/8” x 4” long lag screws. While
tightening the lag screws, keep the bracket plumb (use level if needed). Do not over tighten
the lag screws; doing so may split the wood framing or weaken the screw.
Brick and concrete
Use a 5/8” Masonry drill bit. Insert 3/8" long lag shield and use 3/8” x 4” long lag screws, or
use 3/8" concrete drop anchors.
The masonry fasteners are ONLY to be installed within the main body of a brick, not within
1/2” of an outer edge of the brick. Fasteners are also not suitable for hollow cinder-block
type construction or wall surfaces that have deteriorated.
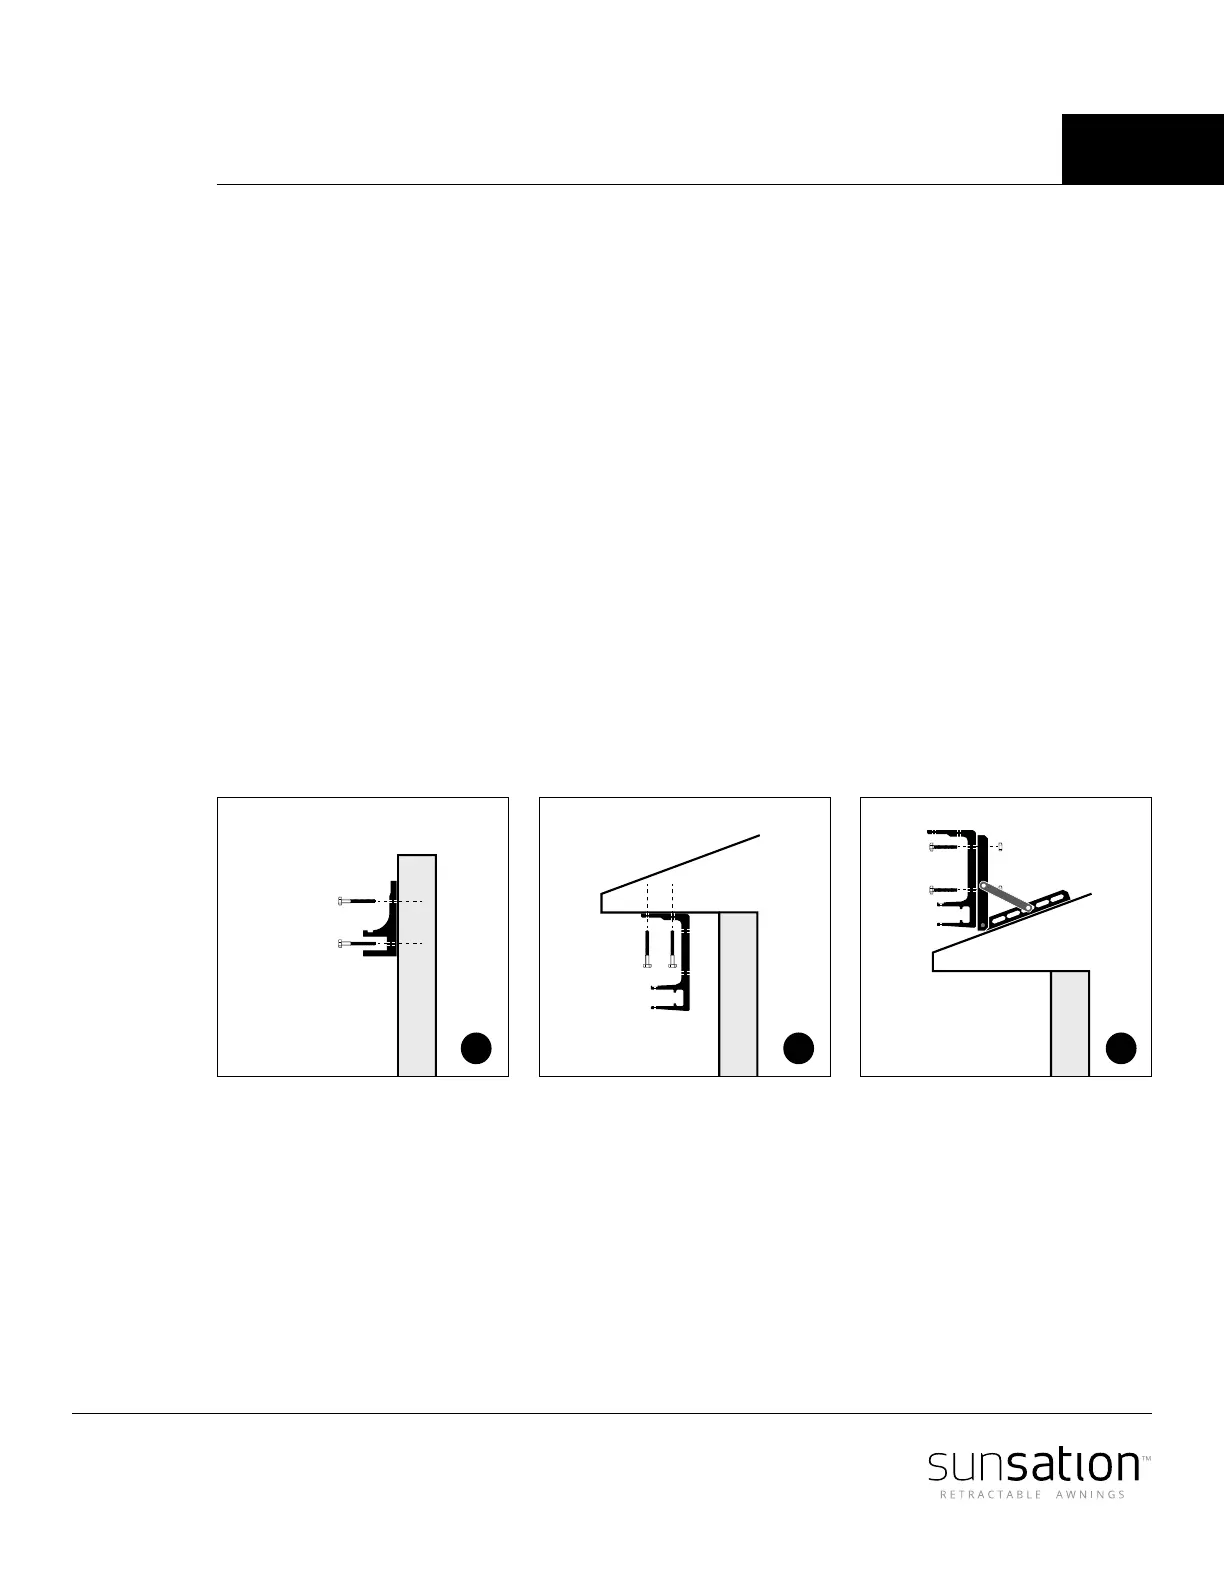
Standard Mounting Brackets
The standard mounting brackets (Picture 1) can only be used for wall and roof mounting.
Hood and Sot Mount Brackets
These brackets are designed to be used for awnings with a hood and for sot mounting
(Picture 2), it can also be used for regular wall mounting. For roof mounting, an additional
adjustable bracket is needed (Picture 3).
Wall
Roof
Soffit Wall
Wall
Roof
Wall
Roof mount
with adjustable
bracket
Wall
Wall
Roof
Soffit Wall
Wall
Roof
Wall
Sot
mount
bracket
Wall
Wall
Roof
Soffit Wall
Wall
Roof
Wall
Wall
Wall mount
standard
bracket
1 2 3