Pantone 1375 C
RGB: 255, 158, 27
CMYK: 0, 38, 89, 0
HEX: #FF9E1B
Gray 49%
Sunsation Instructions Manual
7
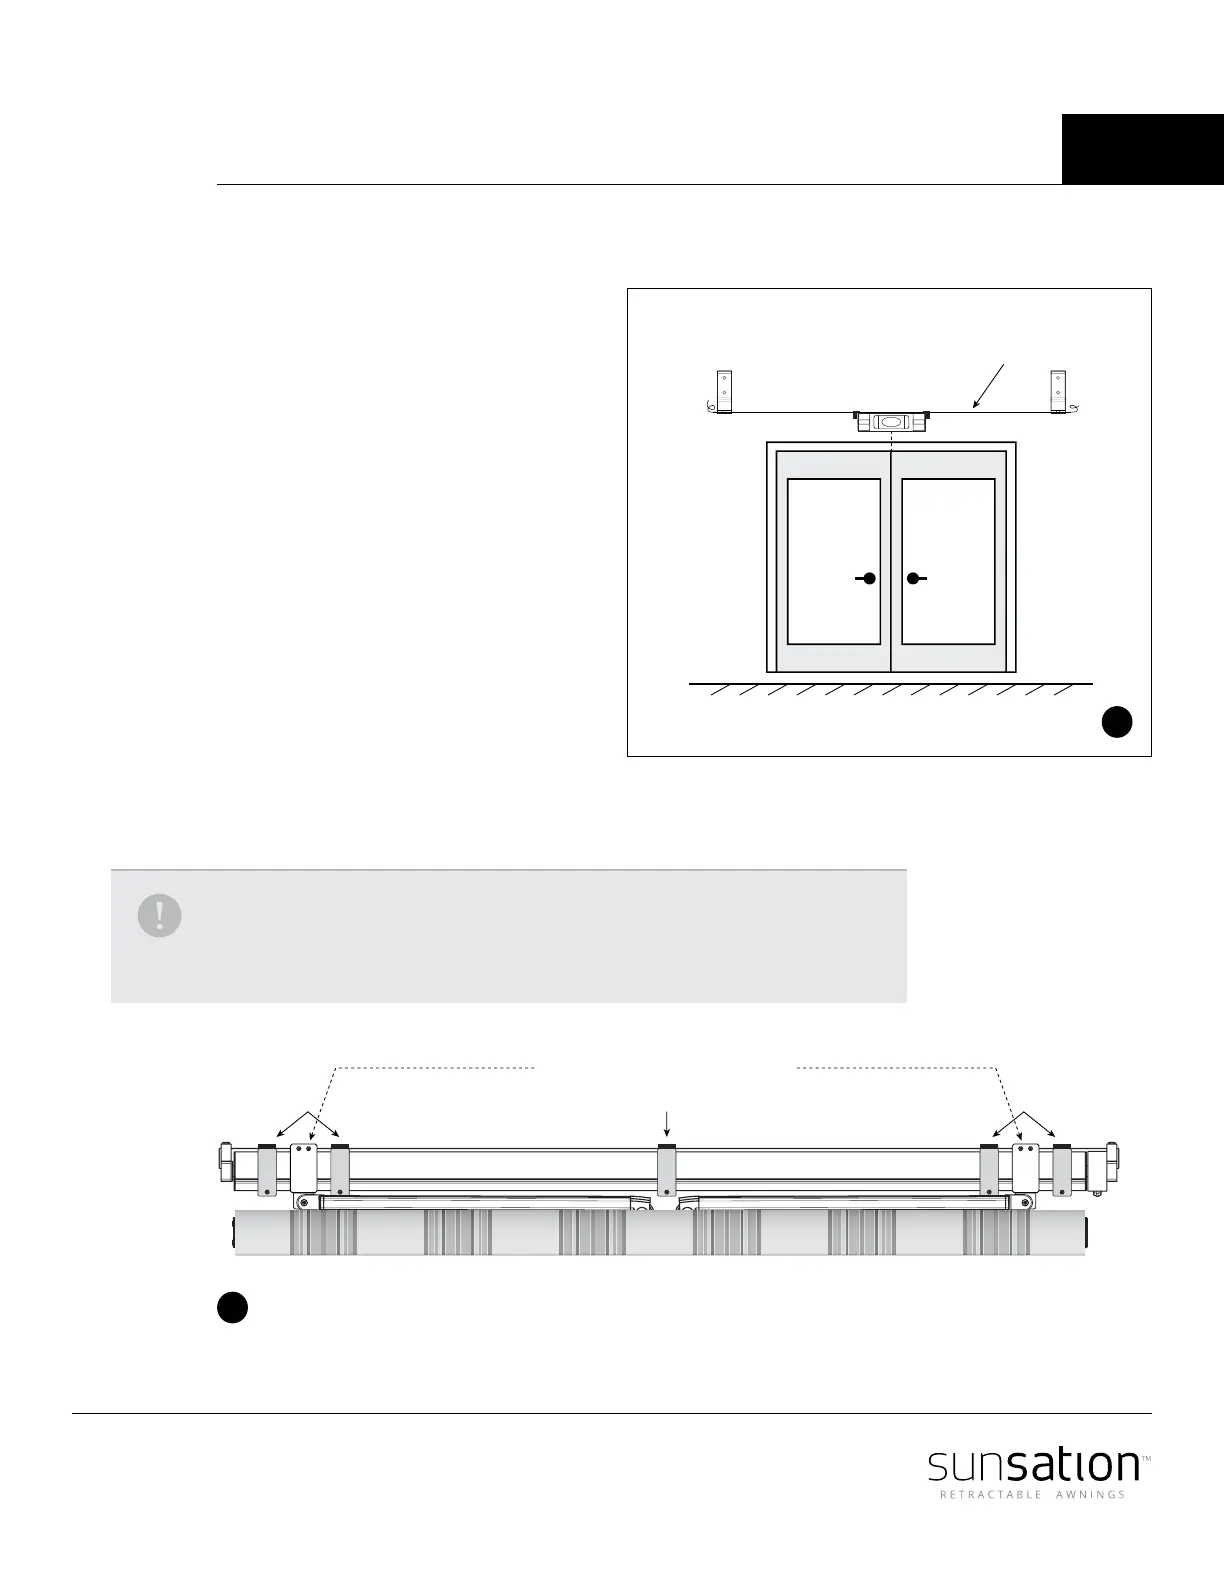
Bracket Positioning
For proper alignment, pull a rope line on
the wall to other side where the other
bracket will be placed, and use a rope
line level to make sure it is 100% straight
(Picture 1).
Repeat the same process to all brackets.
Two brackets to be placed on both sides of
each arm, within 10" of the arm shoulder
(Picture 2). The same rule also applies to all
other arms (for larger awnings). All other
brackets should be spread out equally.
If the awning has a fabric center support,
make sure not to locate a wall bracket
where it will interfere with the center
support. All brackets must be mounted into
studs or structural members.
The same rule also applies to Sot
mounting brackets.
Note: If the awning has a fabric center support, it should be installed on a fabric
seam as close to the center of the unit as possible. Adjust the cradle so neither
front or back edge touches the fabric as it rolls in and out.
7’ Min.
clearance
Approximate
Incline
Total
height
Deck
Bracket
Rope line
Bracket
Projection
Wall
5’ Projection
15”
Door Door
Short screwLong screw
Wall
Wrong
Wall
Wall bracket
Arm shoulder / Pitch control
Wall bracket
Support addedNo Support
Awning arms aren't aligned when its rolled up
Uneven wall
Additional wall bracket (if necessary)
2
1