Sunsation Instructions Manual
Pantone 1375 C
RGB: 255, 158, 27
CMYK: 0, 38, 89, 0
HEX: #FF9E1B
Gray 49%
8
Putting up the awning
Finally you’re ready to put up the awning into the
brackets. Make sure to tighten all the nuts so the
awning is safe. Put white plastic caps over the nut to
protect the fabric from scratching.
5mm allen key
7’ Min.
clearance
Approximate
Incline
Total
height
Deck
Bracket
Rope line
Bracket
Projection
Wall
5’ Projection
15”
Door Door
Short screwLong screw
7’ Min.
clearance
Approximate
Incline
Total
height
Deck
Bracket
Rope line
Bracket
Projection
Wall
5’ Projection
15”
Door Door
Short screwLong screw
Wall
7’ Min.
clearance
Approximate
Incline
Total
height
Deck
Bracket
Rope line
Bracket
Projection
Wall
5’ Projection
15”
Door Door
Short screwLong screw
Wall
Wrong
Wall
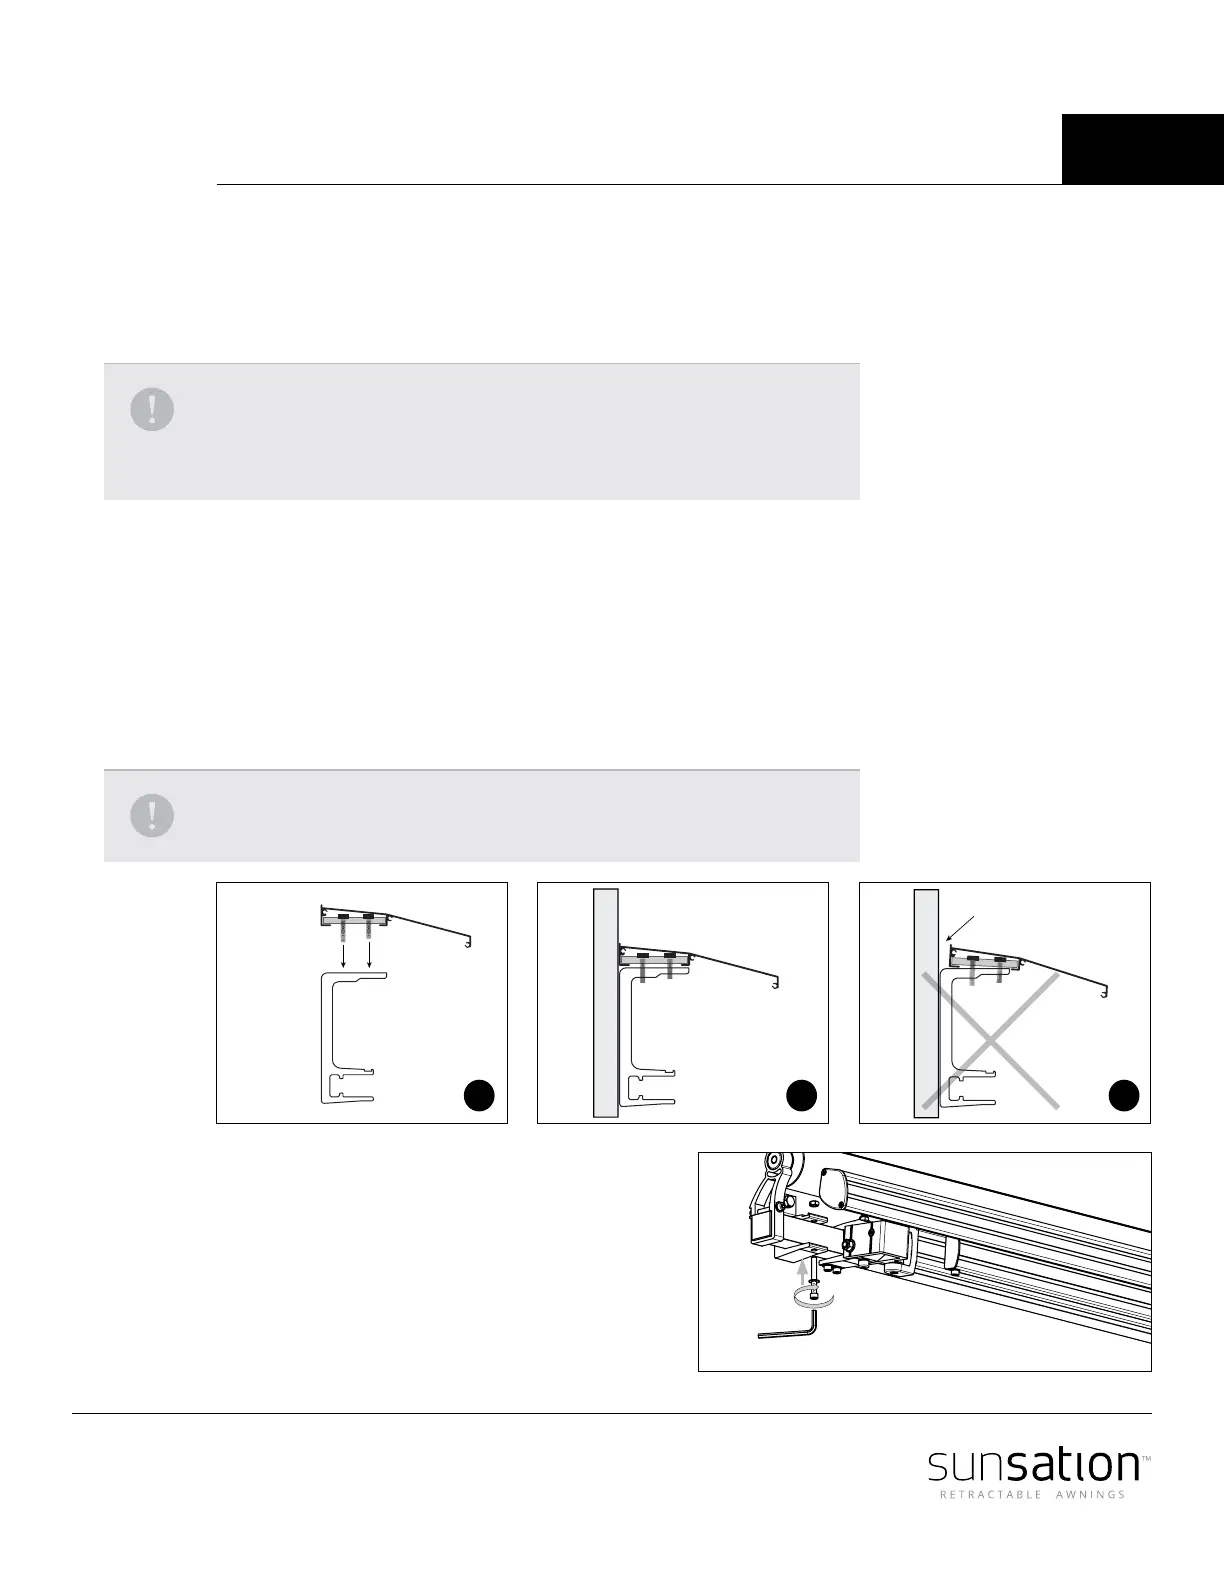
1 2 3
Adding the Awning Hood
Note: While Somfy motors are designed for outdoor usage, they are NOT
waterproof. An awning with a motor requires a hood to protect the motor
from water damage. Awnings without a hood, WILL NOT be eligible for motor
warranty repair or replacement.
You will need to install the hood before installing the awning. Insert the 2 provided screws
in the plastic, make sure the longer screw is positioned closer to the wall and the shorter
screw outwards (Picture 1). Then slide the plastic (with the screws) into the hood raceway.
Proceed with adding the two side covers and fasten it with the provided screws.
Then carefully lower the hood onto the brackets and guide the bolts through the
appropriate holes on the brackets. Then, using the supplied nuts and washers, carefully
tighten the nuts and attach end covers.
Make sure that the top edge of the hood is ush to the wall (Picture 2), on each bracket,
otherwise it may result in a crooked hood (Picture 3) and may eventually damage the fabric.
Note: Improper hood installation may also cause damage to the Awning,
fabric and to the motor.