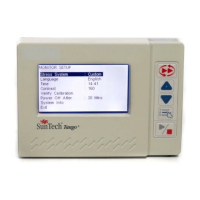
Checking calibration
The Oscar 2 must first be placed into the proper mode. Follow the steps below:
1. Removeandthenreplaceoneofthetwo“AA”batteries.
2. WhiletheLCDisdisplayingthedashes,pressandholddowntheSTART/STOP
key.
3. The unit will display the software version.
4. The unit will display the battery voltage.
5. You will then hear a click as the valves are closed.
6. Youwillnowsee“0mmHg”displayed.
The calibration of the unit can now be checked against a calibrated mercury column.
1. Placeat-tube(part#98-0030-00)betweenthehosefromthemonitorandthe
cuff.
2. Wrapthecuffaroundasuitablysizedcanorbottle.Thisactsasthereservoir
for the unit.
3. Attachthethirdendofthe“T”tubeintoacalibratedmercurycolumn,which
gives you access to the bulb and a reference.
4. Using the bulb of the calibrated mercury column, inflate the cuff to 250 mmHg.
Once the pressure has stabilized at this level, the LCD should match the mercury
column by ±2.0 mmHg.
5. Check the unit against the column every 50 mmHg from 250 to 50 mmHg and
the unit should be within ±2.0 mmHg. If not, the unit needs to be returned to
the service department for recalibration or repair.
NOTE: To return the Oscar 2 to it’s normal mode, remove and replace one
of the batteries.
The Oscar 2 does not contain any user serviceable internal parts and should only
be opened by an authorized service representative. To return for service, please
send to your nearest SunTech office listed on the Limited Warranty page
21, care of Support and Service.
20



 To Next Page