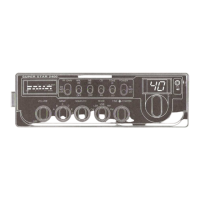
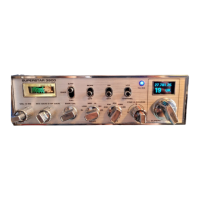
Channel Selection
The transceiver is capable of operation on 240 channels which are divided
into 6 groups of 40 channels A, B, C, D, E and F. These groups are selected
with the Band Selector switch as the following.
Band switch
Position Frequency Range
A 26.065 to 26.505 MHz
B 26.515 to 26.955 MHz
C 26.965 to 27.405 MHz
D 27.415 to 27.855 MHz
E 27.865 to 28.305 MHz
F 28.315 to 28.755 MHz
After the band to which the channel you desire to operate belongs is selec-
ted, rotate the Channel selector to find the channel. Rotating the channel
selector clockwise or counterclockwise by 1 detent will tune the transceiver
10 Khz upscale or downscale. I.e. If you desire to operate on 27.405 MHz
first set the Band selector switch to `c`, then turn the channel selector to
the position at which the channel readout shows `40`
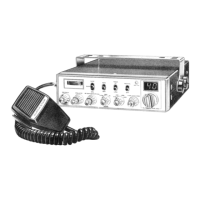
Operation
(1) Turn the Volume control clockwise to apply power to the transceiver.
The S-RF meter should be illuminated.
(2) Rotate the Squelch control counterclockwise fully.
(3) Set the CB-PA switch to CB position. Now background noise or transmi-
ssion should be heard.
(4) Select the mode of reception AM, SSB, FM, or CW.
(5) Set the RF Gain switch to DX position.
(6) Select the channel desired.
(7) To transmit, depress the transmit switch on microphone; to receive, re-
lease the switch.
RF Gain Switch Adjustment
Normally, this control should be set to DX position to provide maximum re-
ceiver sensitivity for long range reception. However, when communicating
with a nearby station, you may find that the strong signal from this station
may cause overloading of your receiver. In such a case, you can use this
switch to reduce the receiver sensitivity and thus prevent any overloading
and distortion that may occur as a result of the extremely strong incoming
signals. First set the switch to Mid position and if this position will not pro-
vide a sufficient reduction of overloading condition, set to Local position.
9