12
E
D
B
F
G
C
Threading the Machine
Make sure that the presser foot is raised and the needle
is in its highest position.
3ODFHWKHWKUHDGRQWKHVSRROSLQDQG¿WWKH
appropriately sized spool cap.
3XOOWKHWKUHDGLQWRWKHULJKWWKUHDGJXLGH%IURP
IURQWWREDFNDQGWKHOHIWWKUHDGJXLGH&IURPEDFN
to front. Pull the thread between the tension discs
'
3. Thread down through the right-hand threading slot
and then upwards through the left-hand threading
slot.
4. Bring the thread from the right into the take-up
OHYHU(DQGGRZQLQWKHOHIWKDQGWKUHDGLQJVORW
LQWRWKHORZHUWKUHDGJXLGH)DQGWRWKHQHHGOH
WKUHDGJXLGH*
5. Thread the needle.
AB
12
43
C
E
D
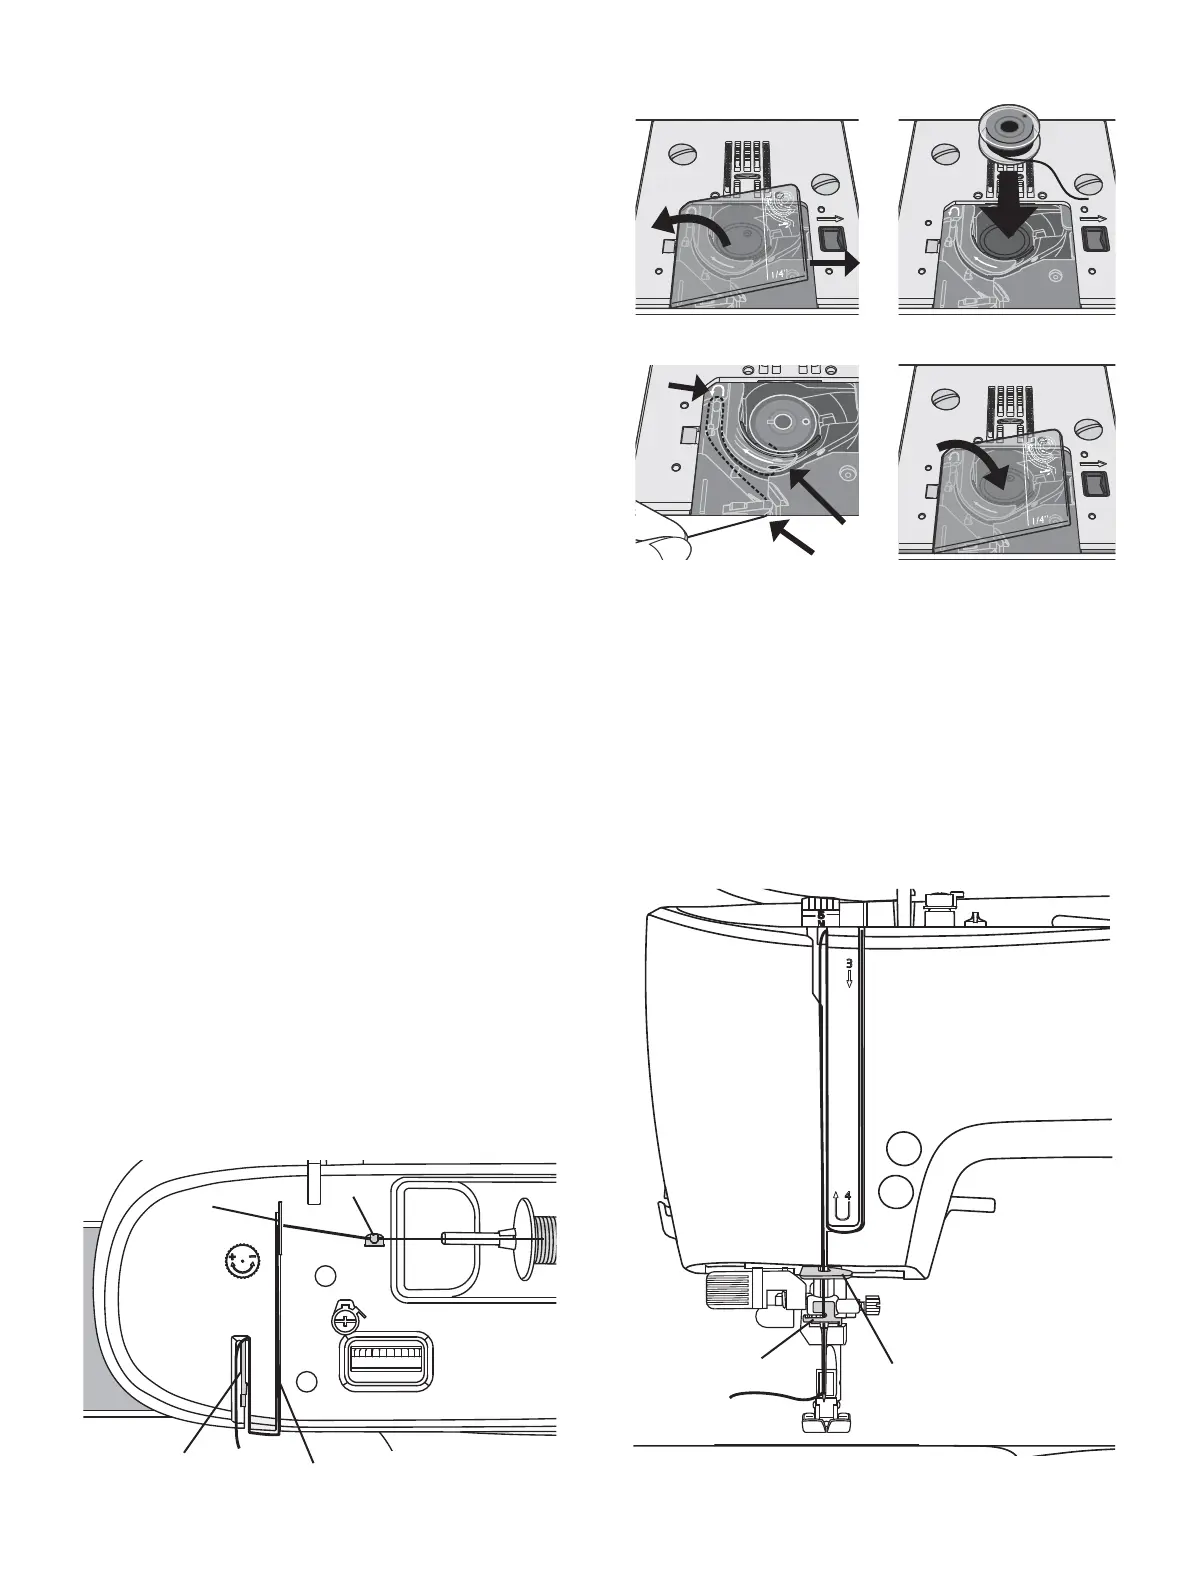
Inserting the Bobbin
Make sure that the needle is fully raised and the machine
is turned off before inserting or removing the bobbin.
2SHQWKHEREELQFRYHUE\SXVKLQJWKHUHOHDVHEXWWRQWR
WKHULJKW$5HPRYHWKHFRYHU%
1. Insert the bobbin in the bobbin case with the thread
running in a counterclockwise direction.
3XOOWKHWKUHDGWKURXJKWKHVOLW&
:LWKD¿QJHUKHOGJHQWO\RQWRSRIWKHEREELQGUDZ
the thread at the arrow markings into the stitch plate
WKUHDGJXLGHIURP&WR'
4. Pull the thread at the arrow markings into the stitch
SODWHWKUHDGJXLGHIURP'WR(
5. To cut off excess thread pull thread back over the
FXWWLQJRIIEODGHDWSRLQW(
6. Replace the bobbin cover.
 Loading...