9
A
B
C
Preparations
Unpacking
3ODFHWKHER[RQDVWHDG\ÀDWVXUIDFH/LIWWKH
machine out of the box, remove the outer packaging
and lift off the machine carrying case.
2. Remove all outer packing material and the plastic
bag.
Note: Your sewing machine is adjusted to provide the
best stitch result at normal room temperature. Extreme
hot and cold temperatures can affect the sewn result.
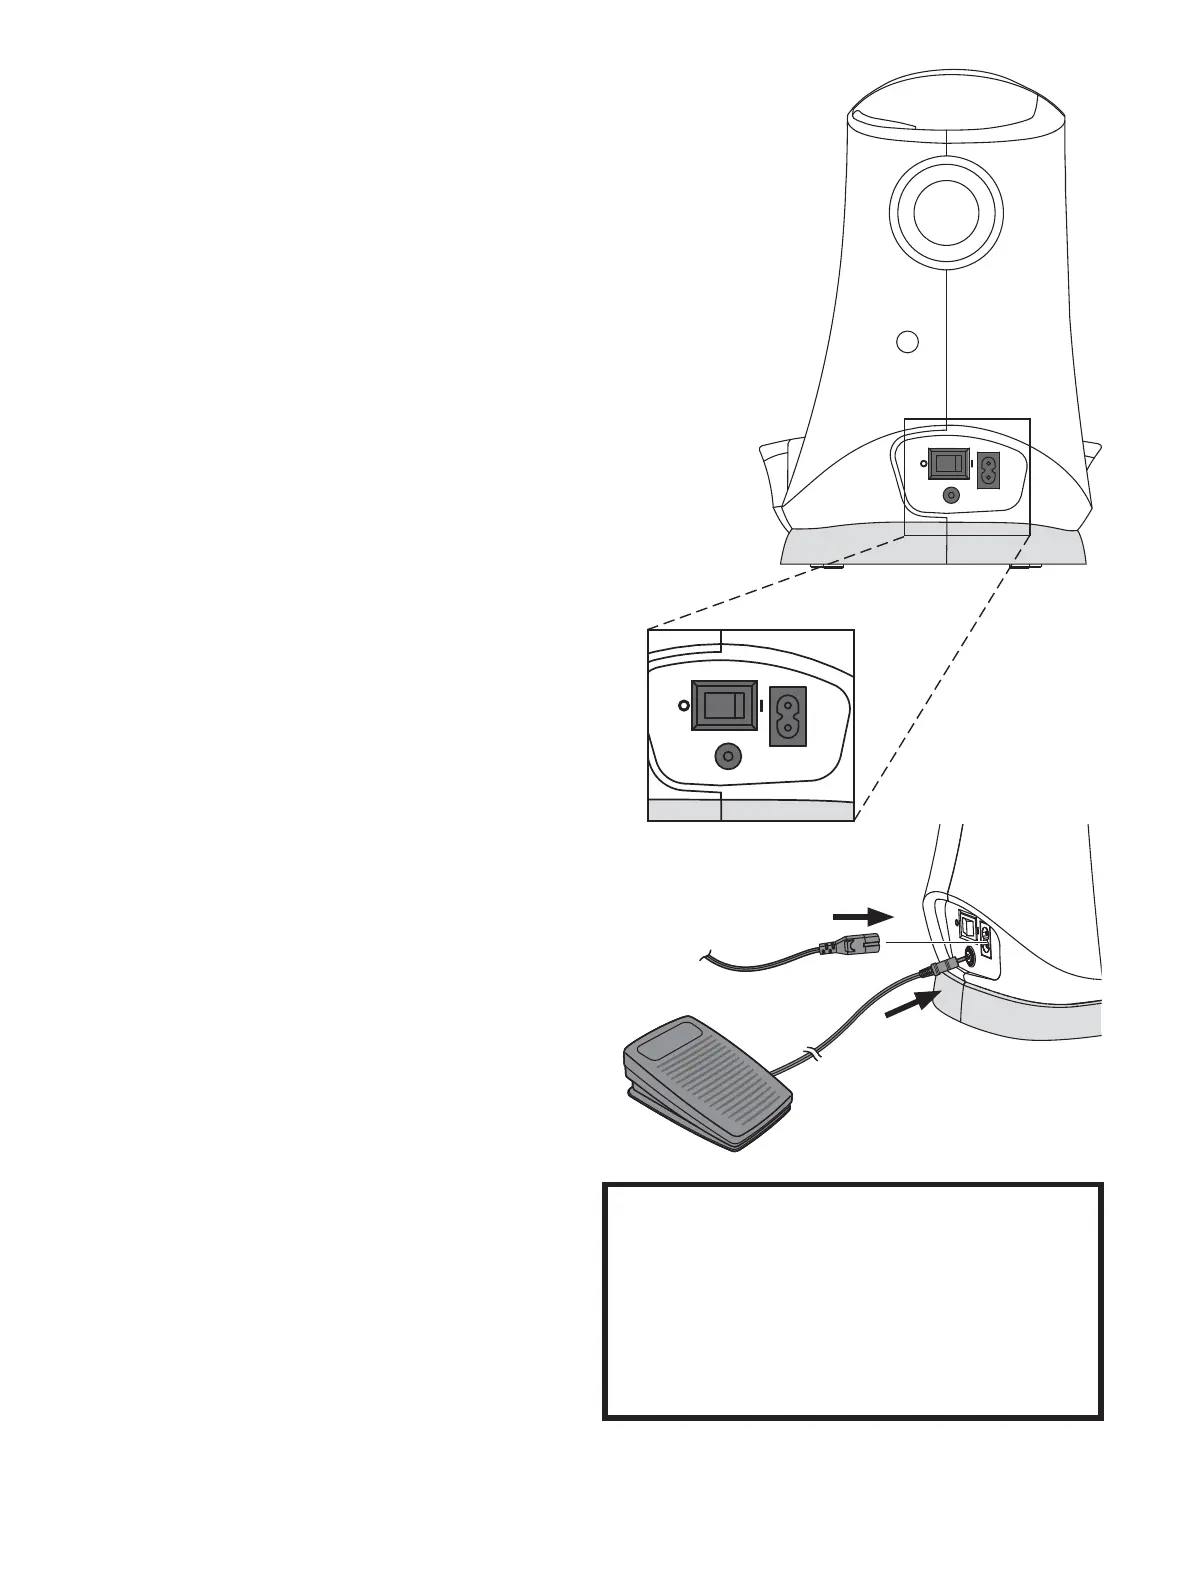
&RQQHFWWRWKH3RZHU6XSSO\
$PRQJWKHDFFHVVRULHV\RXZLOO¿QGWKHSRZHUFRUGDQG
the foot control.
1RWH&RQVXOWDTXDOL¿HGHOHFWULFLDQLILQGRXEWDVWR
how to connect the machine to the power source. Unplug
the power cord when the machine is not in use.
For this sewing machine, foot control model C-9002
manufactured by CHIENHUNG TAIWAN., LTD must
be used.
1. Connect the foot control cord to the front socket on
WKHERWWRPULJKWVLGHRIWKHPDFKLQH$
2. Connect the power cord to the rear socket on the
ERWWRPULJKWVLGHRIWKHPDFKLQH%3OXJWKHFRUG
into the wall socket.
3UHVVWKH212))VZLWFKWR21WRWXUQRQSRZHU
DQGOLJKW&
3DFN$ZD\$IWHU6HZLQJ
6ZLWFKWKHPDLQVZLWFKRII
Note: After switching off, residual power may still
remain in the machine. This may cause the light to stay
on for a few seconds while the power is consumed. This
LVQRUPDOEHKDYLRUIRUDQHQHUJ\HI¿FLHQWDSSOLDQFH
2. Unplug the cord from the wall socket and then from
the machine.
3. Unplug the foot control cord from the machine.
Wind the cord around the foot control for easy
storage.
3ODFHDOODFFHVVRULHVLQWKH5HPRYDEOH6WRUDJH
&RPSDUWPHQW6OLGHWKH5HPRYDEOH6WRUDJH
Compartment on to the machine around the free
arm.
5. Place the foot control in the space above the free
arm.
6. Put on the hard cover.
For the USA and Canada
7KLVVHZLQJPDFKLQHKDVDSRODUL]HGSOXJRQHEODGH
ZLGHUWKDQWKHRWKHU7RUHGXFHWKHULVNRIHOHFWULF
VKRFNWKLVSOXJLVLQWHQGHGWR¿WLQDSRODUL]HGRXW-
OHWRQO\RQHZD\,IWKHSOXJGRHVQRW¿WIXOO\LQWKH
RXWOHWUHYHUVHWKHSOXJ,ILWVWLOOGRHVQRW¿WFRQWDFW
DTXDOL¿HGHOHFWULFLDQWRLQVWDOOWKHSURSHURXWOHW'R
not modify the plug in any way.