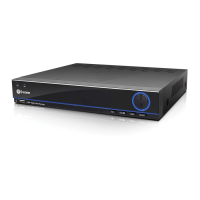
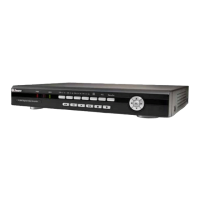
Front Panel of the DVR
1) USB 2.0 Port: For connecting the USB mouse, USB external
storage to the DVR for backup, or for applying new rmware.
2) Play/Pause: Opens the playback interface from the live
viewing mode. Pauses playback or resumes playback from
paused.
3) Display: Enters split-screen view, where the screen shows
one or four (2 x 2) video feeds at once.
4) Menu/ESC: Opens the DVR’s menu, or goes back one step
from a submenu.
5) Select: As the name suggests, it selects an option or item
from a menu.
6) D-pad: For navigating around menus when you’re not using
the mouse. (Why aren’t you using the mouse? It’s awesome.)
7) Power LED: Will be lit whenever the DVR is supplied power
and turned on.
8) HDD LED: Will ash whenever the DVR is writing to/reading
from the installed hard drive.
Installation Guidelines
• Do not expose the DVR to moisture. Water is
the arch-enemy of electrical components and
also poses a high risk of electric shock.
• Avoid dusty locations. Dust has a tendency to
build up inside the DVR case, leading to a high
risk of failure or even re.
• Only install the DVR in a well ventilated
space. Like all electronics, the circuitry and hard
drive in the DVR produce heat, and this heat
needs a way out.
• Do not open the DVR case except to install/
swap the hard drive inside. There are no user
serviceable parts inside.
• Never open the case whilst the DVR is
plugged in, and never turn the DVR on whilst
the case is open.
• Use only the supplied power adapter. Other
adapters may cause damage to the DVR or
cause a re.
• Do not cut or modify any cable for any reason.
Doing so will void your warranty, as well as pose
a great risk of re or electrical shock.
• Do not expose the DVR to sudden bumps or
shocks (for example, being dropped). The DVR
is as robust as possible, but many of the internal
components are quite fragile.
• Remember that the DVR is, in all likelihood,
going to be left on 24 hours a day, 7 days
a week. Keep this in mind when choosing a
location for installation.

 Loading...