W3.260419
We reserve the right to alter specifications. 7www.swegon.com
horizontal when the top of the frame goes against
the nuts. Fit the ceiling mounting frame through the
selected holes towards the nuts of the threaded rods
and lock the frame into position with nuts from under-
neath. Adapt the installation height so that the locking
screws in the mounting frame’s front section will extend
sufficiently far below the ceiling.
Important
If you improperly tighten the ceiling mounting
frame, this could turn the frame and the venti-
lation unit will not have room inside the frame.
!
!
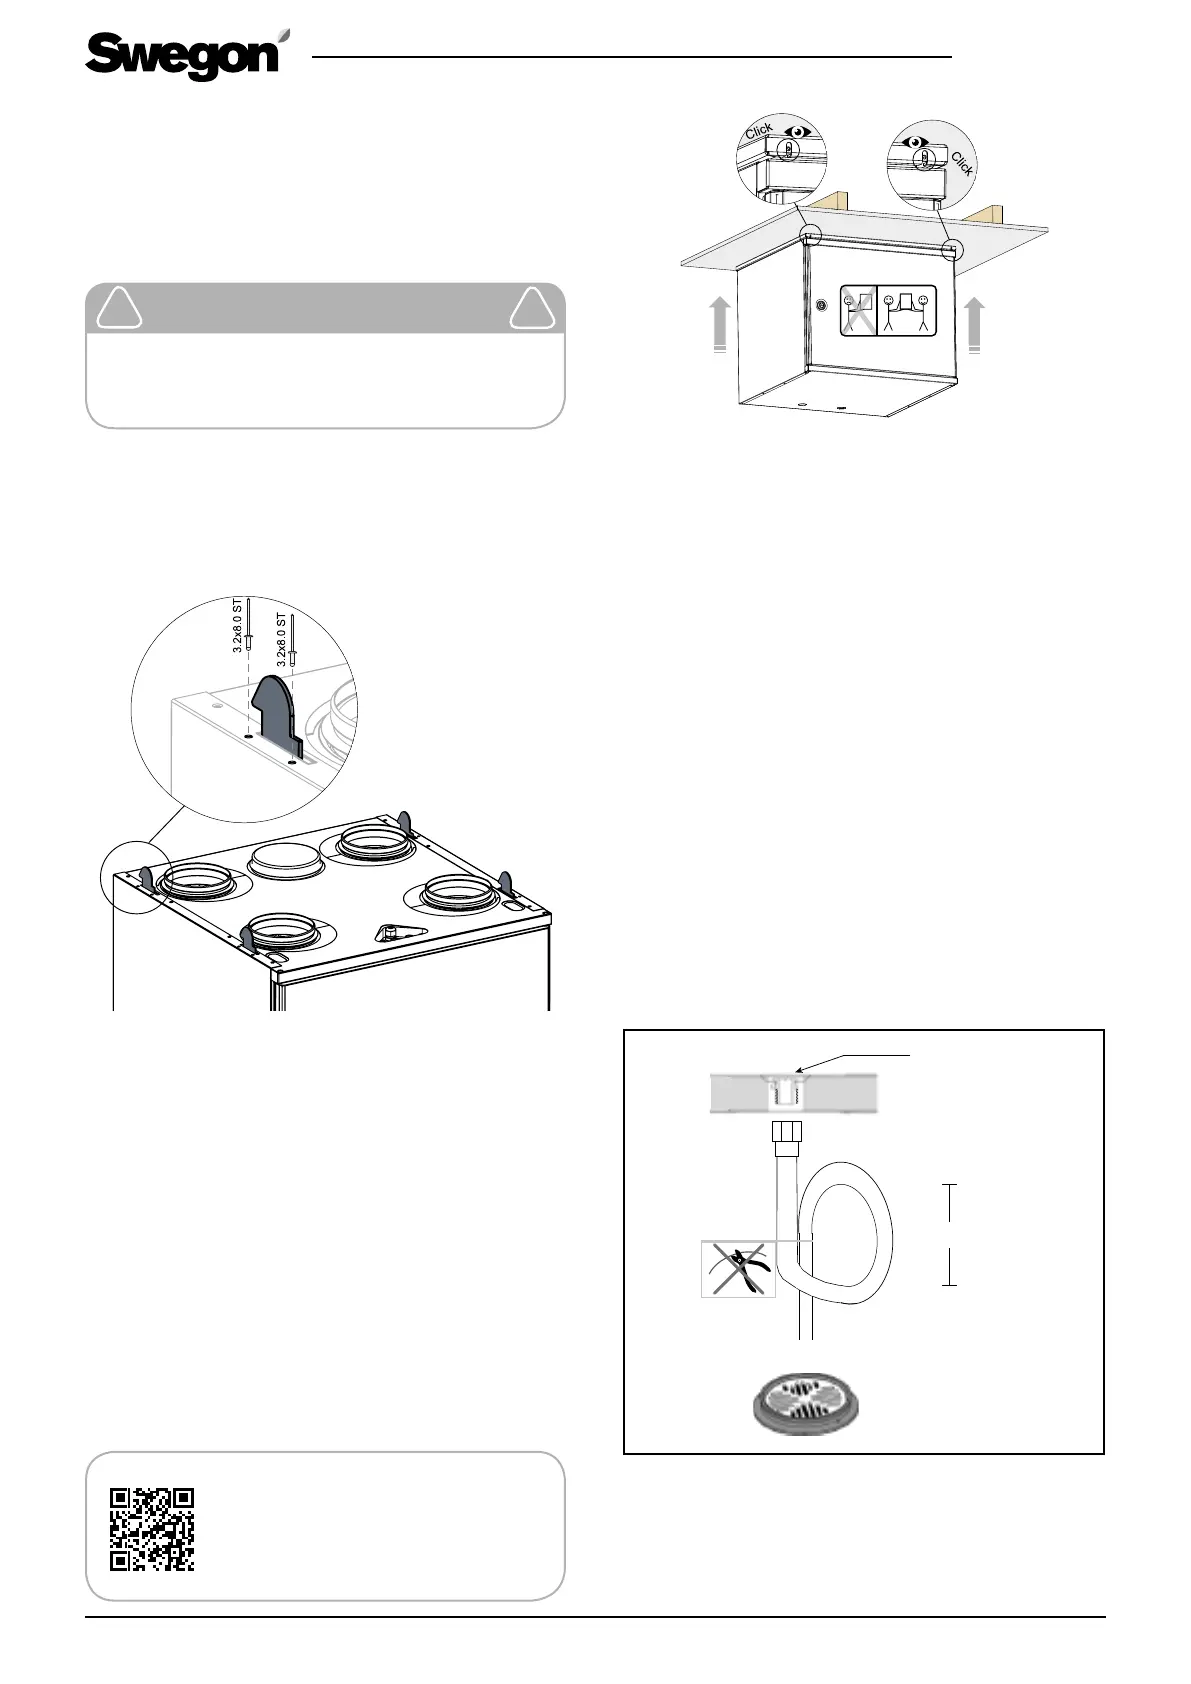
Run the mounting hooks through the assembly open-
ings above the ventilation unit and secure them with
tension rivets. Position the hooks so that the sharp point
is facing the rear side of the ventilation unit.
The hooks must absolutely not be secured with riv-
ets directly above the ventilation unit.
Run the power supply and data cables, and on the
Econo model the water pipes, through the ceiling
mounting frame.
Screw the adjustment feet in position on the lower edge
of the rear wall of the ventilation unit before lifting the
unit onto the frame. The ventilation unit’s heat exchang-
er can be removed to make it easier to lift the unit. See
the ”Servicing” Section.
Lift the ventilation unit so that the hooks go through
the fastening holes in the mounting frame. The ventila-
tion unit is locked in place when the ends of the locking
rails are touching the front plate of the mounting frame
and can be seen from the openings on the front edge of
the frame. (see picture)
Finally adjust the position of the ventilation unit using the
adjustment feet, so that the unit tilts backwards by a few
degrees. However, make sure that the ceiling mounting
frame isn’t rotated too much.
The pipe connections of the Econo model should be ar-
ranged inside the ventilation unit. The connection work
will be facilitated if you temporarily remove the heat
exchanger and filter from the unit. Connect the inlet flow
pipes to the thermostat (3/8” female threads) and the re-
turn pipe in the coupling with ∅15 mm on the ball valve.
2.2 Condensate discharge
Connect the discharge hose to the ventilation unit’s
condensate discharge connection (3/8" male threads).
The condensate is led off to a floor drain or the like us-
ing a hose (accessory, CDH3), or a hose or pipe with an
inner diameter of at least 12 mm. The hose must not be
led off directly to the drain. The tube must not have a
second water trap or be run horizontally. The damming
height of the water trap should be at least 100 mm.
A hose to lead off the condensate is available as an ac-
cessory (CDH3). The hose has a ready-made loop that
serves as a water trap.
200 mm
3/8" male thread
There is a metal water trap available as an accessory
(UVL).
Check that the condensate discharge outlet is not
clogged and check its outflow by pouring water on
the bottom of the ventilation unit. The condensate
Detailed installation
instructions:
www.swegon.com
x
 Loading...