19
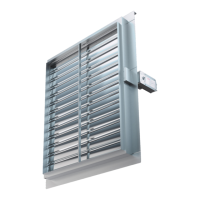
FIRE DAMPER - FD
PRODUCT OVERVIEW
DIMENSIONS
INSTALLATIONS
ACTUATORS
ACCESSORIES
REPLACEMENTS
MAINTENANCE AND OPERATION
Possible damper orientations
1
2
3
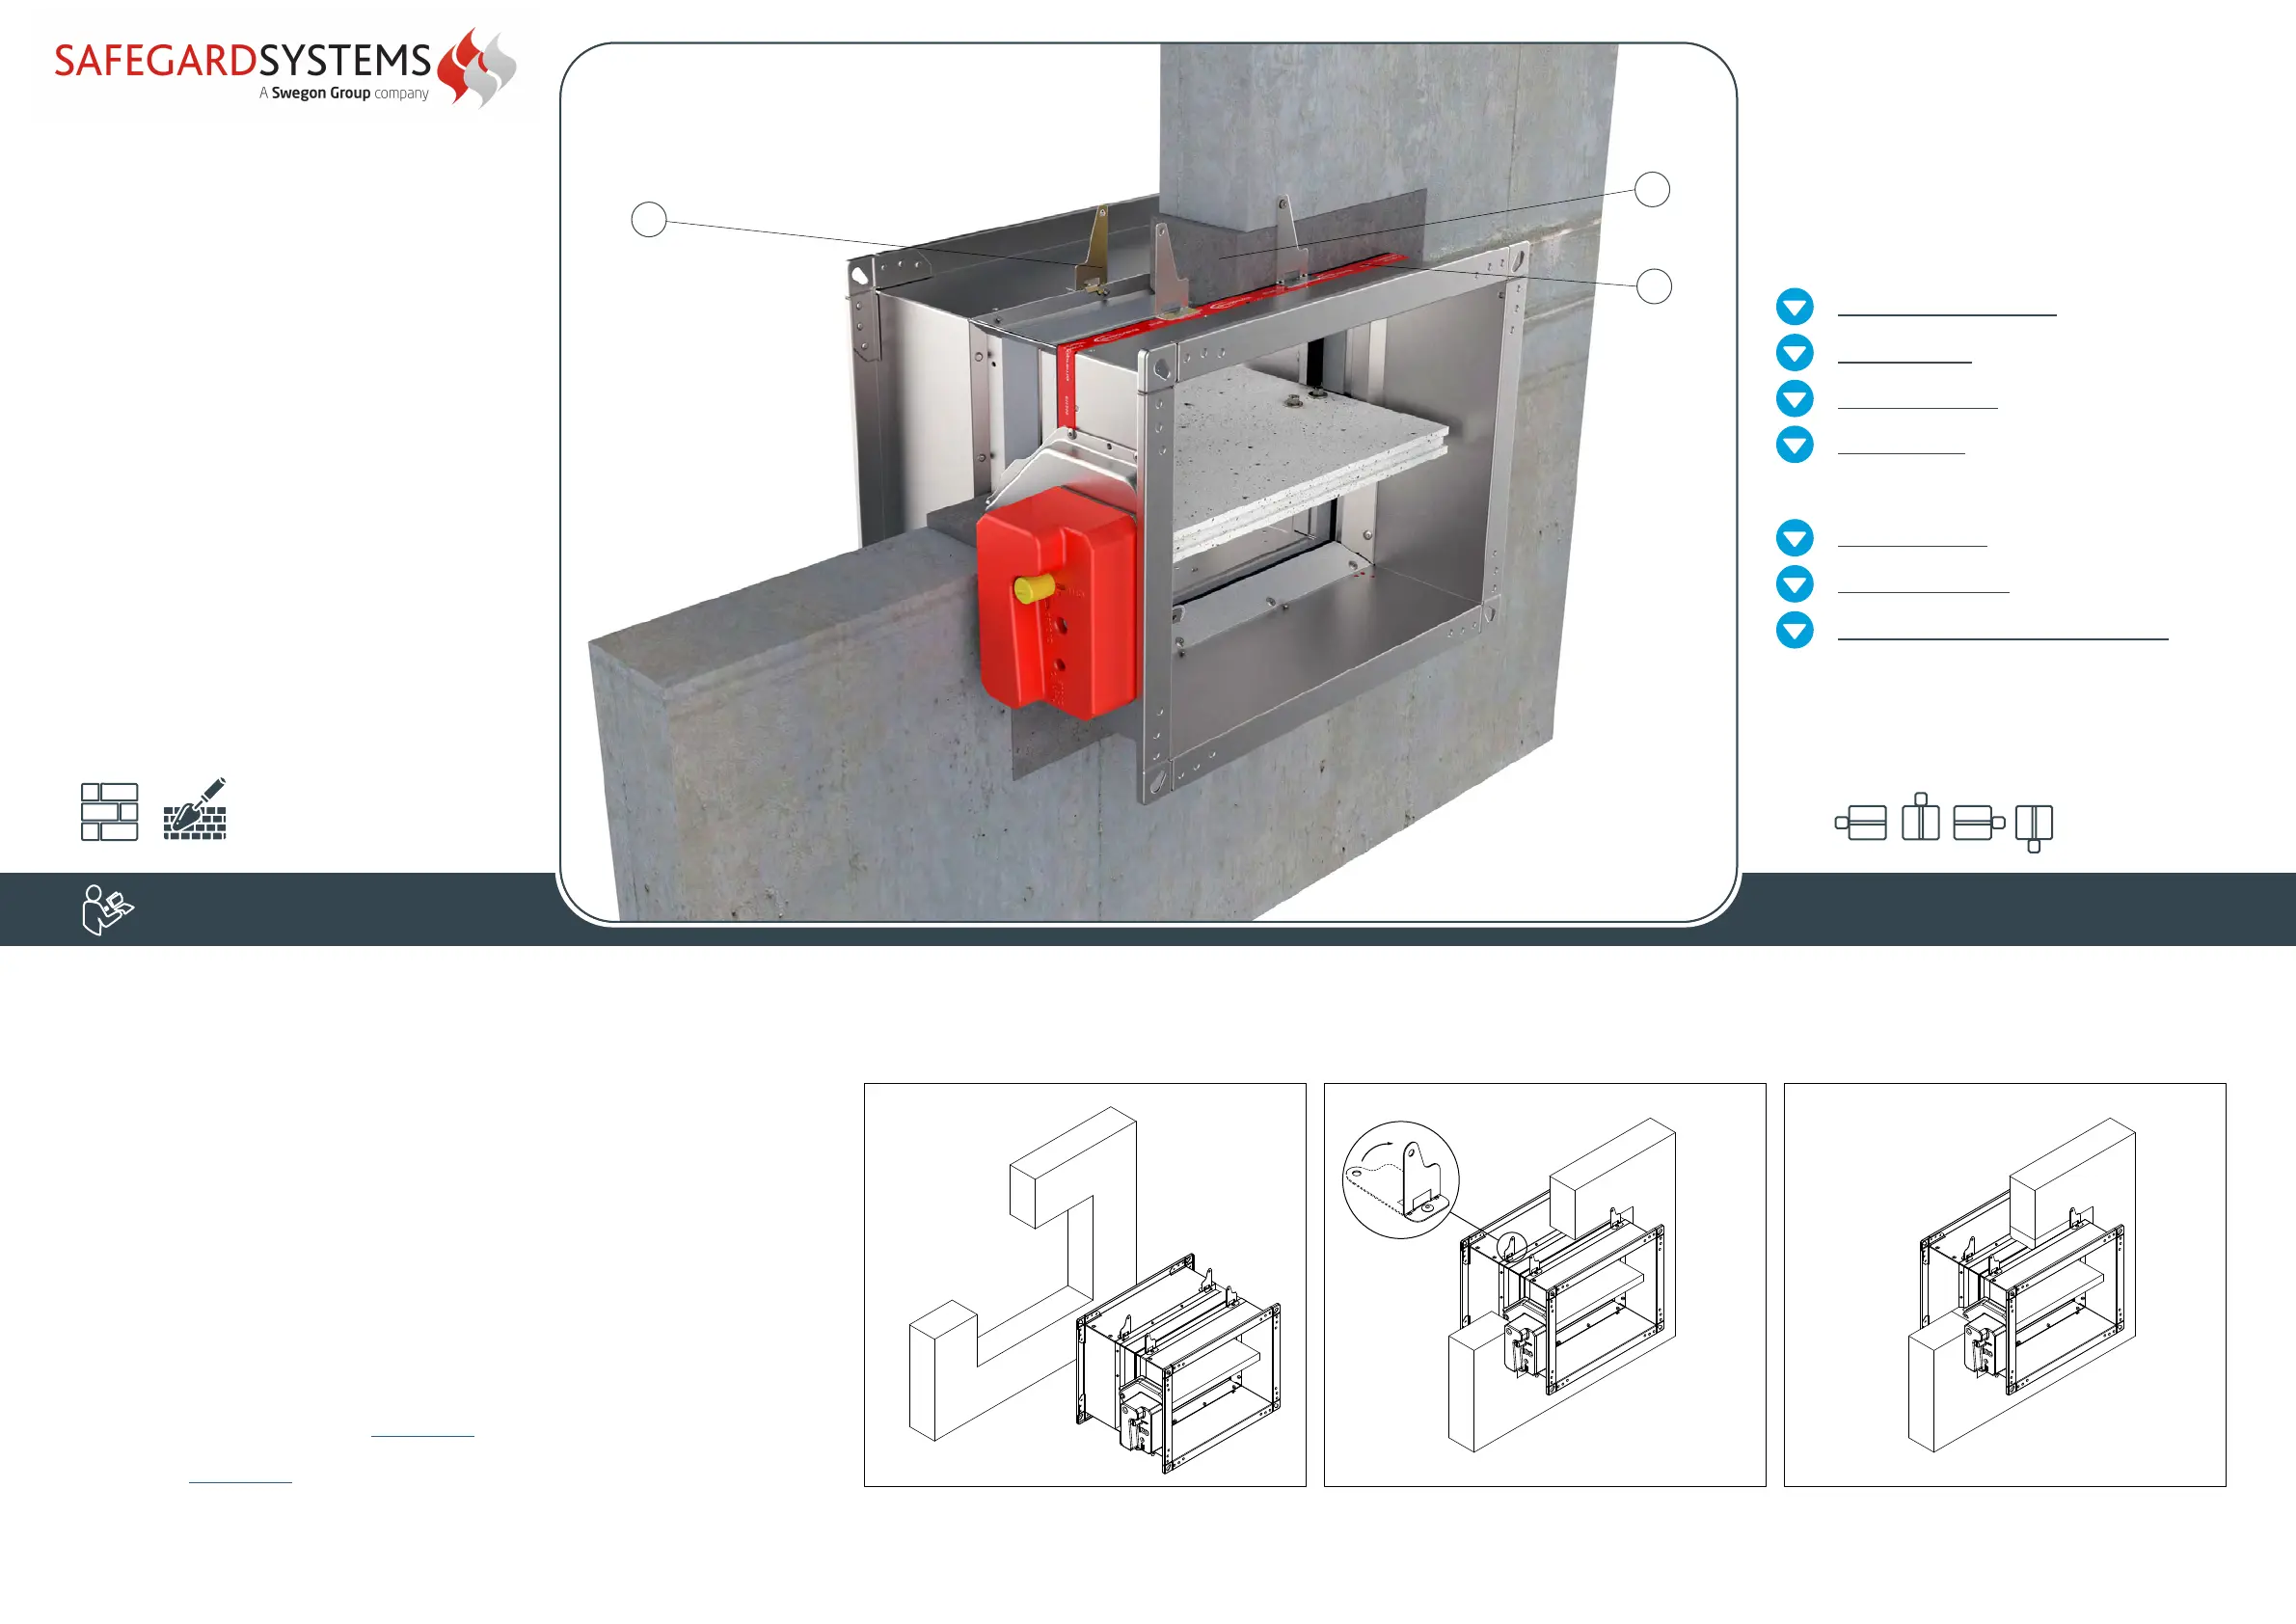
INSTALLATION
B
A
C
Rigid wall installation
(mortar sealing)
The wall is composed of concrete blocks
(minimum density of 550 kg/m³) or
reinforced concrete (minimum density of 2200 kg/m³)
and with a minimum thickness of 100 mm.
Installation material:
mortar (C).
1. Recommended wall opening for the fire
damper installation is B (H) + 80 mm or more
(up to 50% more). Bend the fixing bracket (A)
90°. Place the damper in the opening up to the
wall limit mark (B) on the damper.
Damper blade must be closed during the
installation!
2. Fix the fire damper to the wall with the screws.
Bracket screw hole is 6 mm in diameter.
3. Fill the space between the damper and the
wall with mortar (C).
*Multiple fire dampers can be installed next
to each other or ceiling/wall with the minimal
distance of 30 mm between them, see page 45.
* Build the support for installation according to
the drawing, see page 46.
Test the operation of the damper blade!
Always ensure the damper is sufficiently supported
 Loading...