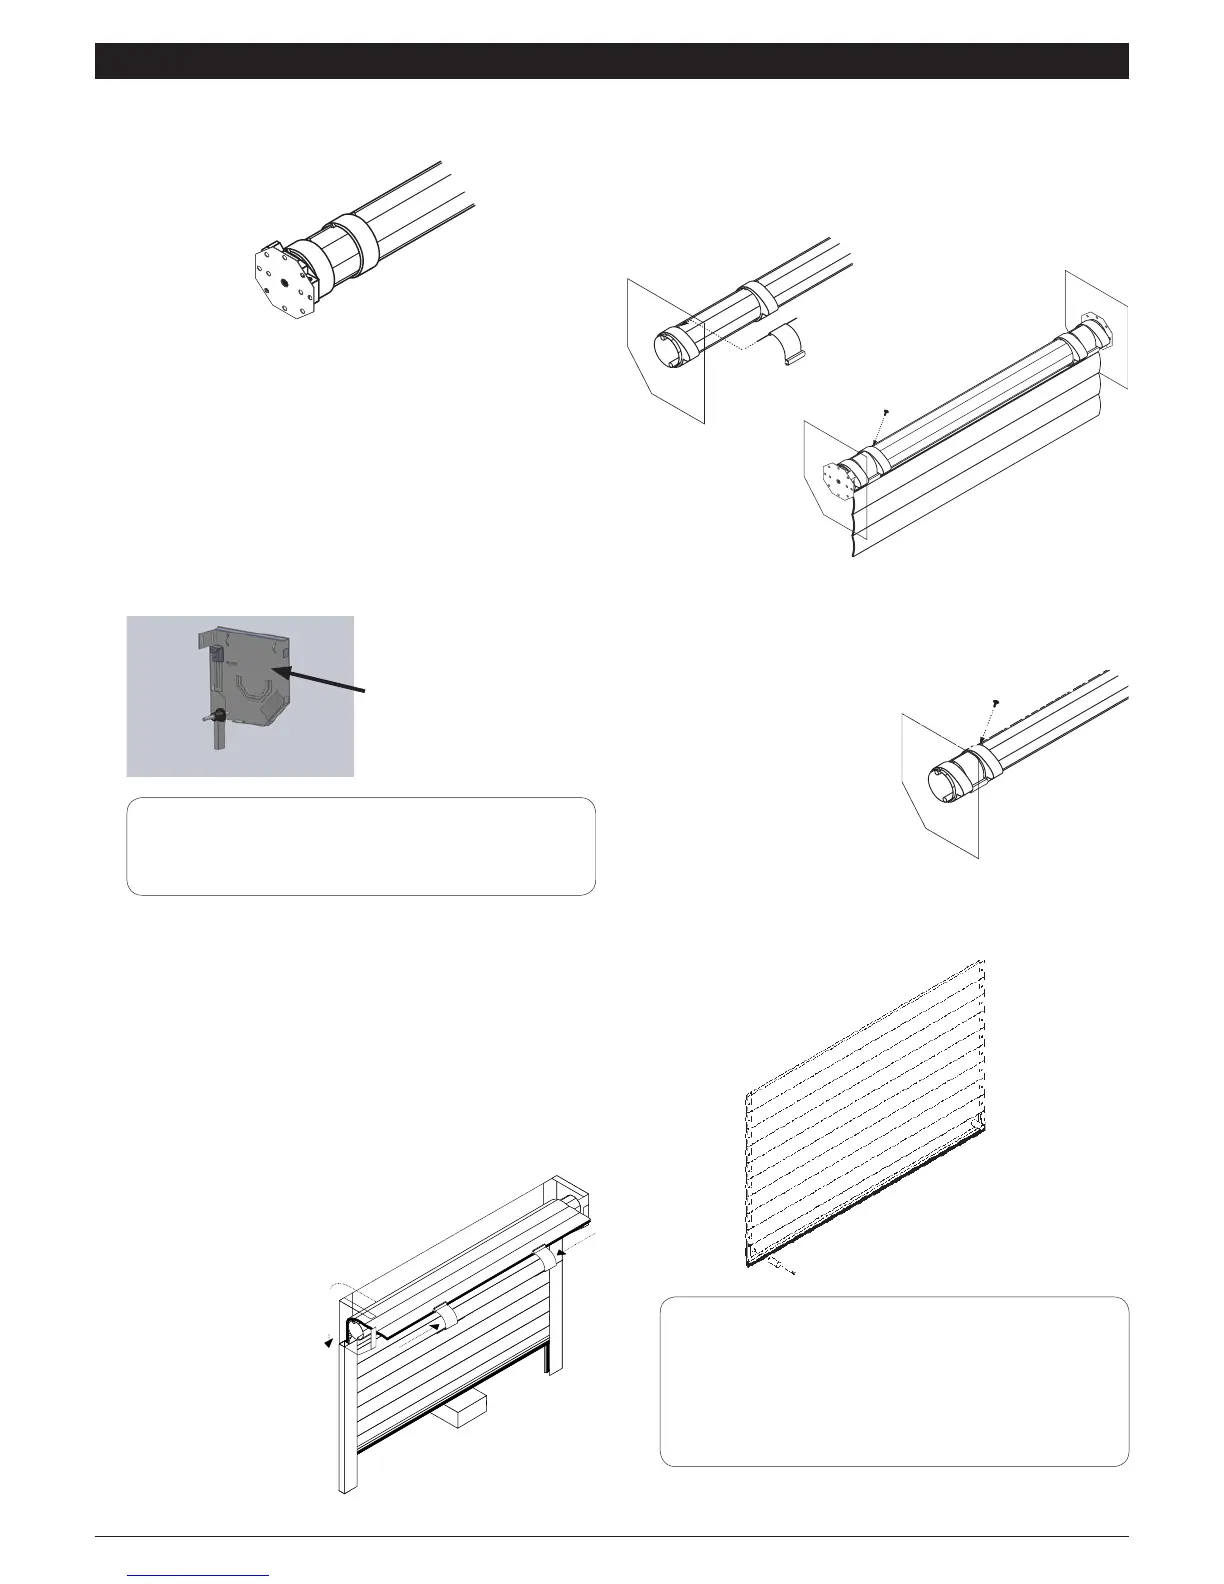
07. INSTALL THE CURTAIN IN THE GUIDES, ATTACH TO AXLE & FIT STOPS
i. Check that there are at least 3 pairs of collars on the axle and
that they are facing the correct direction – see Drawing D.
The outside collars must be right at the ends of the axle and
the third pair in the middle.
If 4 or more pairs are fitted then two of the additional pairs
need to be fitted approx. 700mm in from the outside pair.
(N.B. the outside collars are held in place by the motor collar
at one end and the dummy end at the other. Intermediate
pairs will have one collar pre-positioned at the factory with a
securing rivet already in place).
Before loading the curtain into the guide rails ensure that the
locking blocks are located at the top of the end plate.
Wrap bubble wrap around the axle to protect the curtain and
continue with remaining instructions.
ii. Lift coiled curtain up level with axle and feed bottom of
curtain over axle and into guide
iii. Slowly unroll curtain and gently lower onto a tool box or block
N.B. Do not allow the curtain to free fall over the axle as this
will result in damage to the curtain
iv. Slide the locking/attachment arms on to the top slat
For the above see
Drawing A
v. Position unattached end of locking/attachment arm so
that the fixing bar lines up with locating holes in the two
collars (rotate axle with override if necessary) and slide collars
together making sure pre-positioned collar is tight against
rivet – see Drawings B & C
vi. Fix ‘loose’ collars in position by placing a 4.8mm x 9.3mm x
12mm pop rivet tight up against the outside edge of the collar
in the rounded cut-out in the axle. There is no need to drill a
hole – see Drawing D
N.B. Make sure rivets are
secure
vii. Use override to raise door
sufficiently to remove
toolbox/block. Leave door
in partially open position
viii. Secure stops to captive nuts
in bottom slat with bolts provided – see Drawing E
N.B. It is essential to fit stops for health and safety reasons
Drawing D
(view from outside)
Drawing C
(view from outside)
Drawing B
(view from outside)
Locking Block
After a door has been installed, during normal operation,
the door will settle causing the fully open and fully closed
positions to move slightly from the original positions.
LPS 1175 Compliance
All doors which have been ordered to comply with LPS
1175 will have been supplied with a silver label stating
the product name, the manufacturer and the security
level the door achieved. This label must be attached to
the guide rail for the door to be compliant.
Drawing A
(view from inside)
 Loading...