34
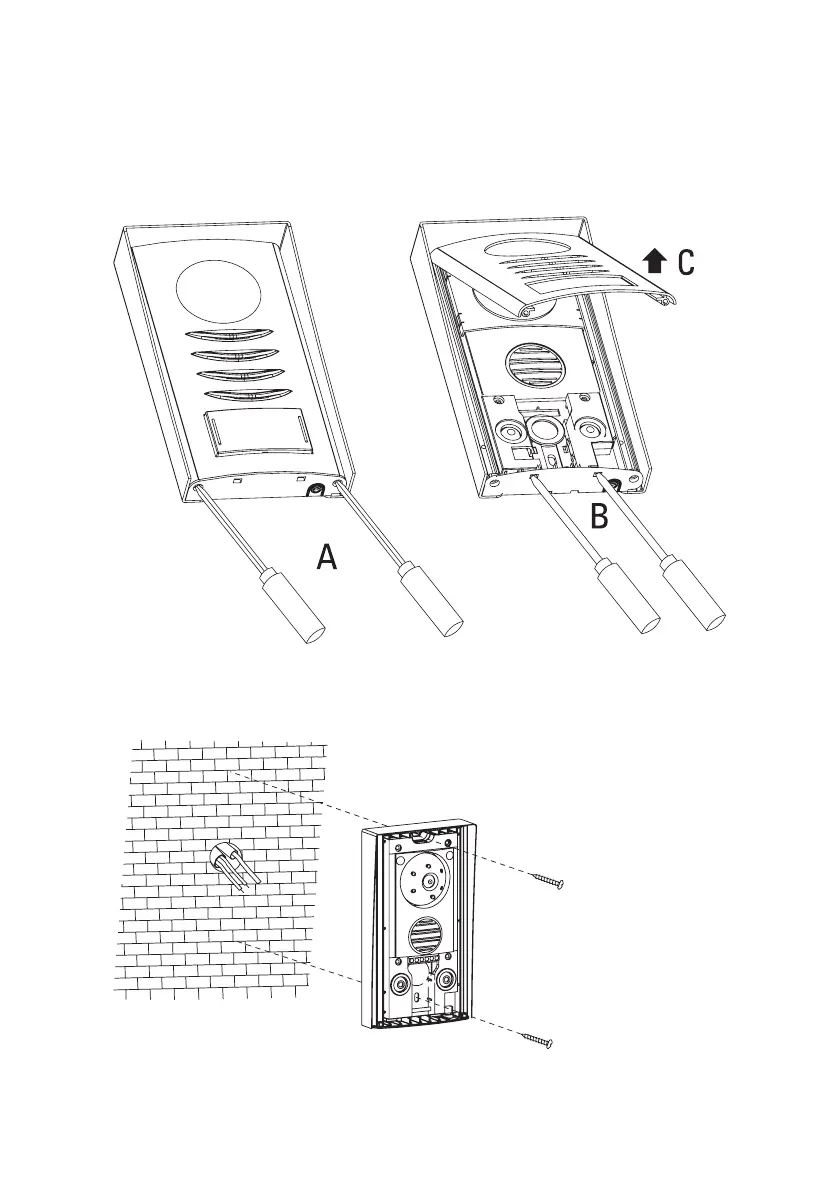
d) Installation of the outdoor unit
• Firstturnoutthetwoattachmentscrews(19)forthefrontplatewithaPhillips-headscrewdriver,seegure“A“.
• Carefullypushaatscrewdriverintothetwoopenings,seegure“B“;thisloosenstheclampholderofthefront
plate.
Fold up the front plate a little (C) and take it off.
• Guide the connection cables through the rubber seal (26).
• Attach the outdoor unit to the wall with two suitable screws and, if required, dowels. The camera must be on top
asshowninthegure.