11
Chapter 2: Hardware Setup
4
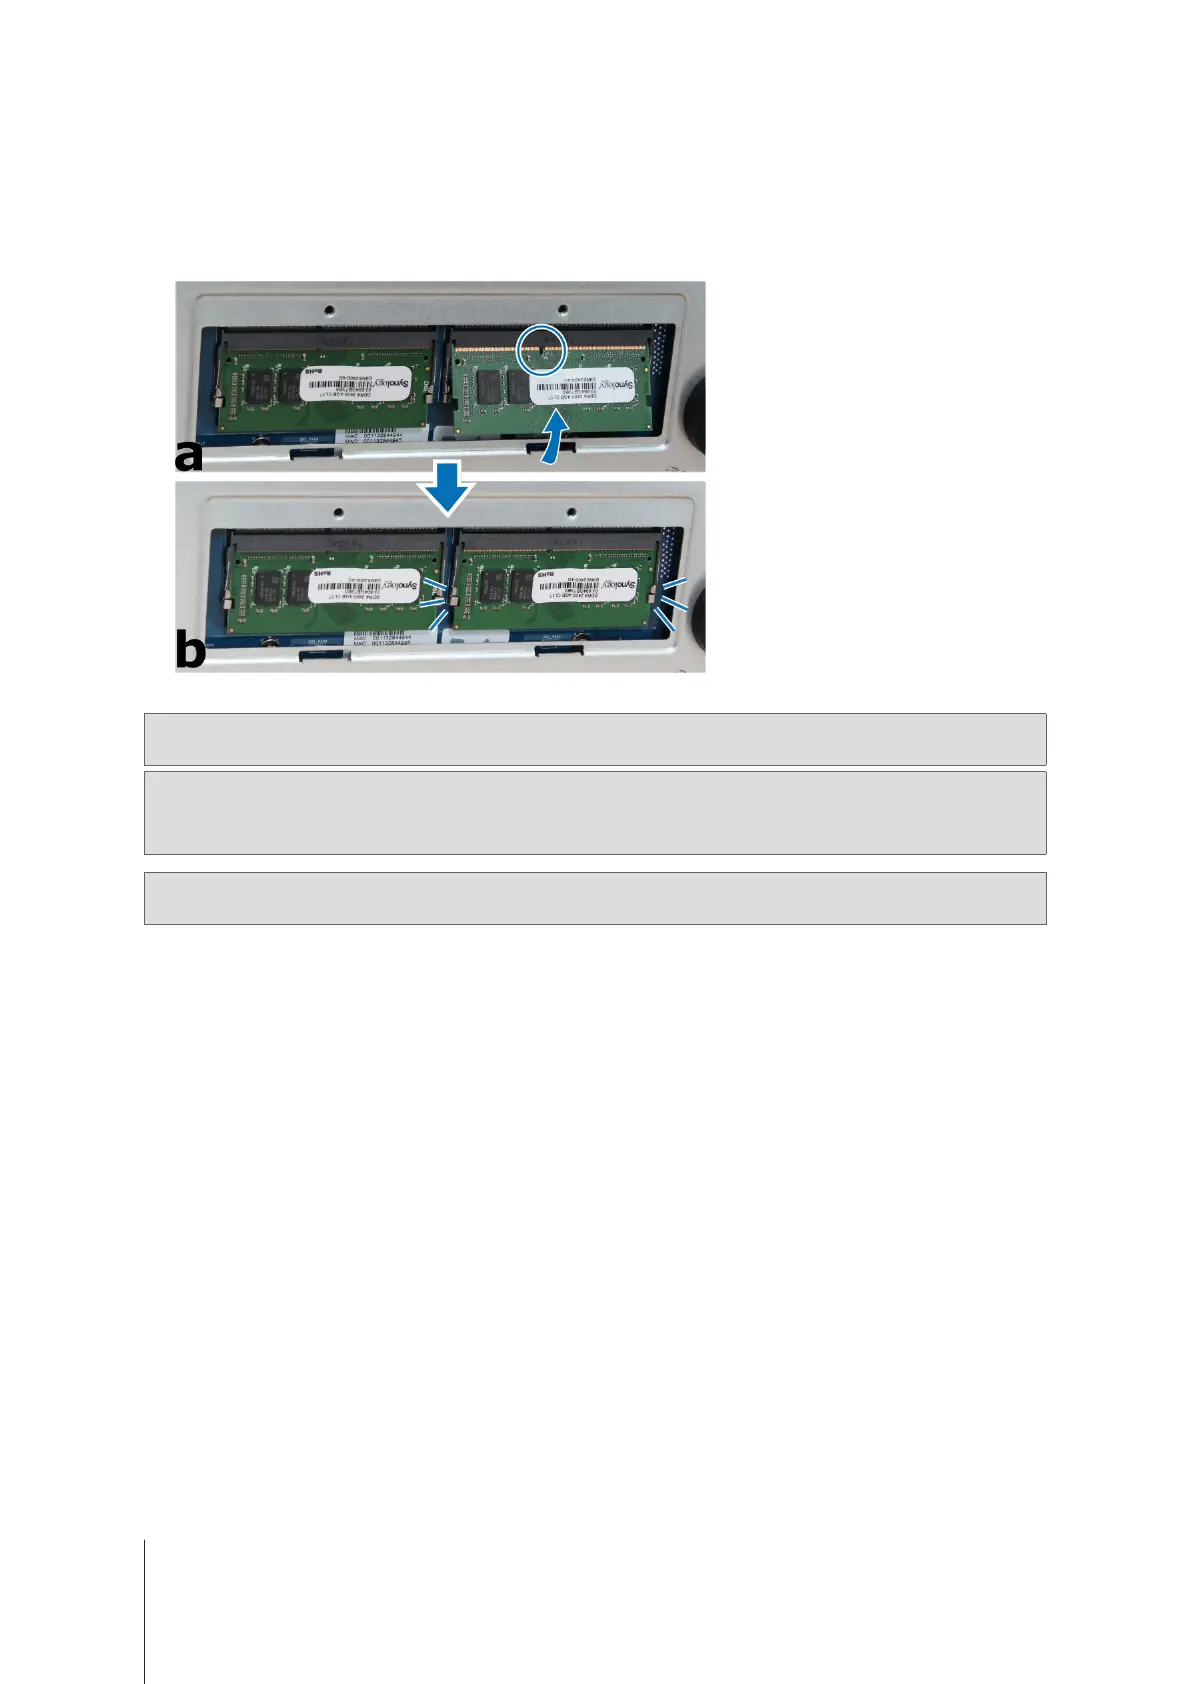
Insert the new memory module in the slot:
a
Align the notch on the gold edge of the module with the notch in the memory slot.
b
Tilt the card and insert the module into the slot. Make sure the module is properly inserted.
c
Push the memory module with moderate pressure into the memory slot until you hear a click.
Important:
You must utilize the same type of memory on all slots. The default memory is non-ECC SO-DIMM DDR4.
If you expand utilizing ECC SO-DIMM DDR4 memory, you must remove the original.
Note:
• Hold the memory module by its edges, and do not touch the gold connectors.
• When memory capacity is changed, the device will perform a memory check upon the next start up. This will
prolong the start up time by up to ten minutes. This behavior is normal and will only occur once.
Note:
Synology oers RAM modules
1
for memory upgrade. For more information, please visit
www.synology.com/
products/accessories/ram_railkit
.
5
Replace the bottom lid. Replace and tighten the 2 screws you removed in step 3.
6
Reconnect the cables you removed in step 1, and then press and hold the power button to turn on your
DiskStation.
To make sure DiskStation recognizes the new memory capacity:
1
Install DiskStation Manager (DSM). (See the next chapter for more information.)
2
Log in to DSM as
admin
or a user belonging to the
administrators
group.
3
Check
Total Physical Memory
in
Control Panel
>
Info Center
.
If your DiskStation does not recognize the memory or does not start up successfully, conrm that the memory is
installed correctly.
1
Synology will not provide complete product warranty or technical support if non-Synology RAM modules are used for memory upgrade.