Installation |
7
1. Prepare the surface where the unit is to be mounted. Make sure that the surface is flat, vertical and that it
supports the weight of the unit. Perform the installation in accordance with local rules and regulations.
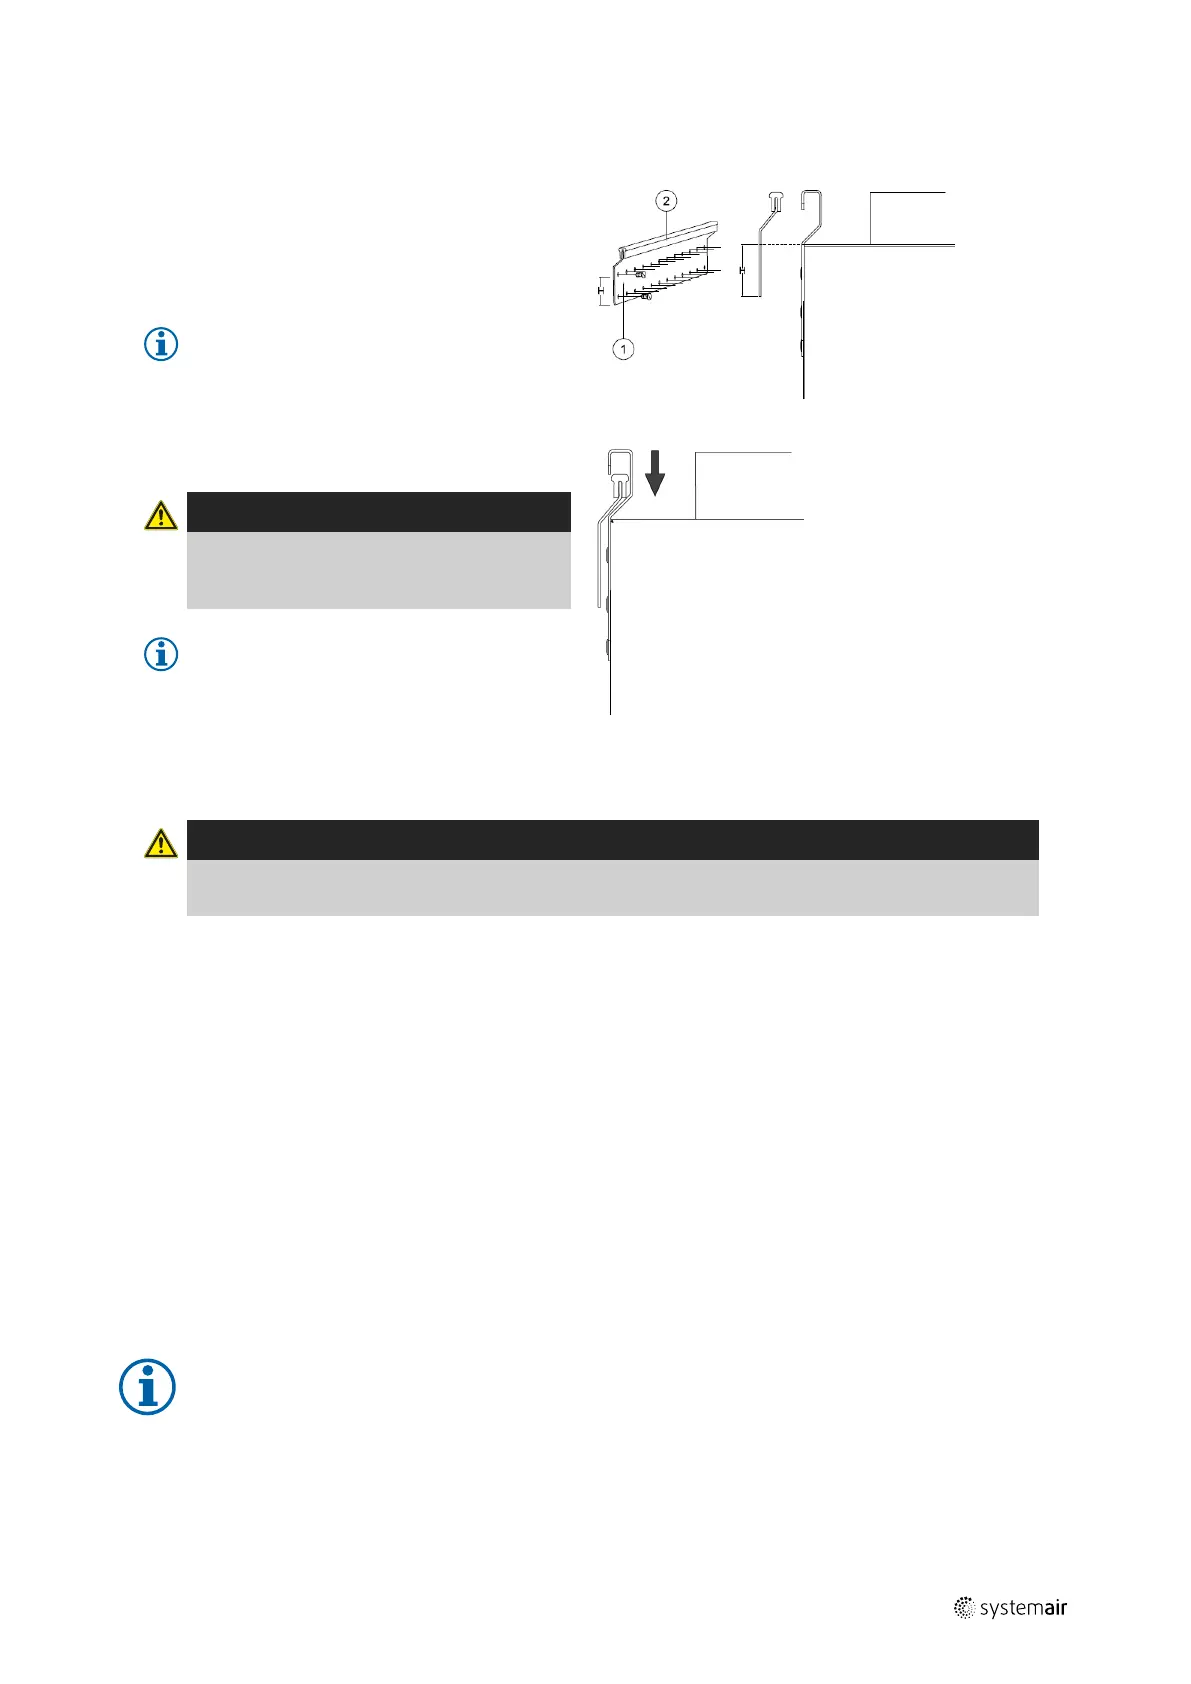
2. Fit the mounting bracket (1) with the anti-vibration
pad (2) to the wall with enclosed screws. Use
appropriate holes to screw the bracket firmly to the
wall. Bottom side of bracket should be 40 mm (H)
below top of unit position.
Note:
Make sure that the mounting bracket is
completely horizontal once mounted on the
wall. Check with a spirit level.
3. Lift the unit in place
Warning
Beware of sharp edges during mounting and
maintenance. Use protective gloves.
Consider the unit weight when mounting!
Note:
Make sure that the unit is completely vertical
and horizontal once mounted on the wall.
Check with a spirit level.
4. Connect the unit to the duct system. Make sure that all necessary accessories are used to create a functional
ventilation solution.
Warning
The installation of the unit and complete ventilation system must be performed by an authorized installer
and in accordance with local rules and regulations.
5. Remount the heat exchanger if it was removed before the installation. See chapter 6.3.1 steps 4 and 5.
6.3.1 How to remove and remount the heat exchanger
1. Open the front hatch.
2. Disconnect the heat exchanger power supply and the rotor sensor. Both cables are found beside the heat exchanger.
3. Pull out the heat exchanger. Some force may be needed.
4. Remount the heat exchanger. Don’t forget to reconnect the heat exchanger power and sensor cables.
5. Close and lock the front hatch.
6.4 Condensation drainage
In general no condensation drainage is needed for rotational heat exchangers at dry conditions. However, if a lot of hu-
mid air is present in the residence, a condensation drainage might be needed. Drainage connection is available as an ac-
cessory and can be ordered separately. Installation instructions for the drainage are enclosed in the drainage pipes
delivery.
Note:
The drainage connection is plugged in the bottom of the unit at delivery. To use the drainage: remove the
rubber seal and connect the drainage pipe. Connect the drainage pipe to the sewer. The water can not be
led straight to the sewer without a water trap.
211477 | A001

 Loading...