English
RCL
1 2 3 4
22 SYSHRW
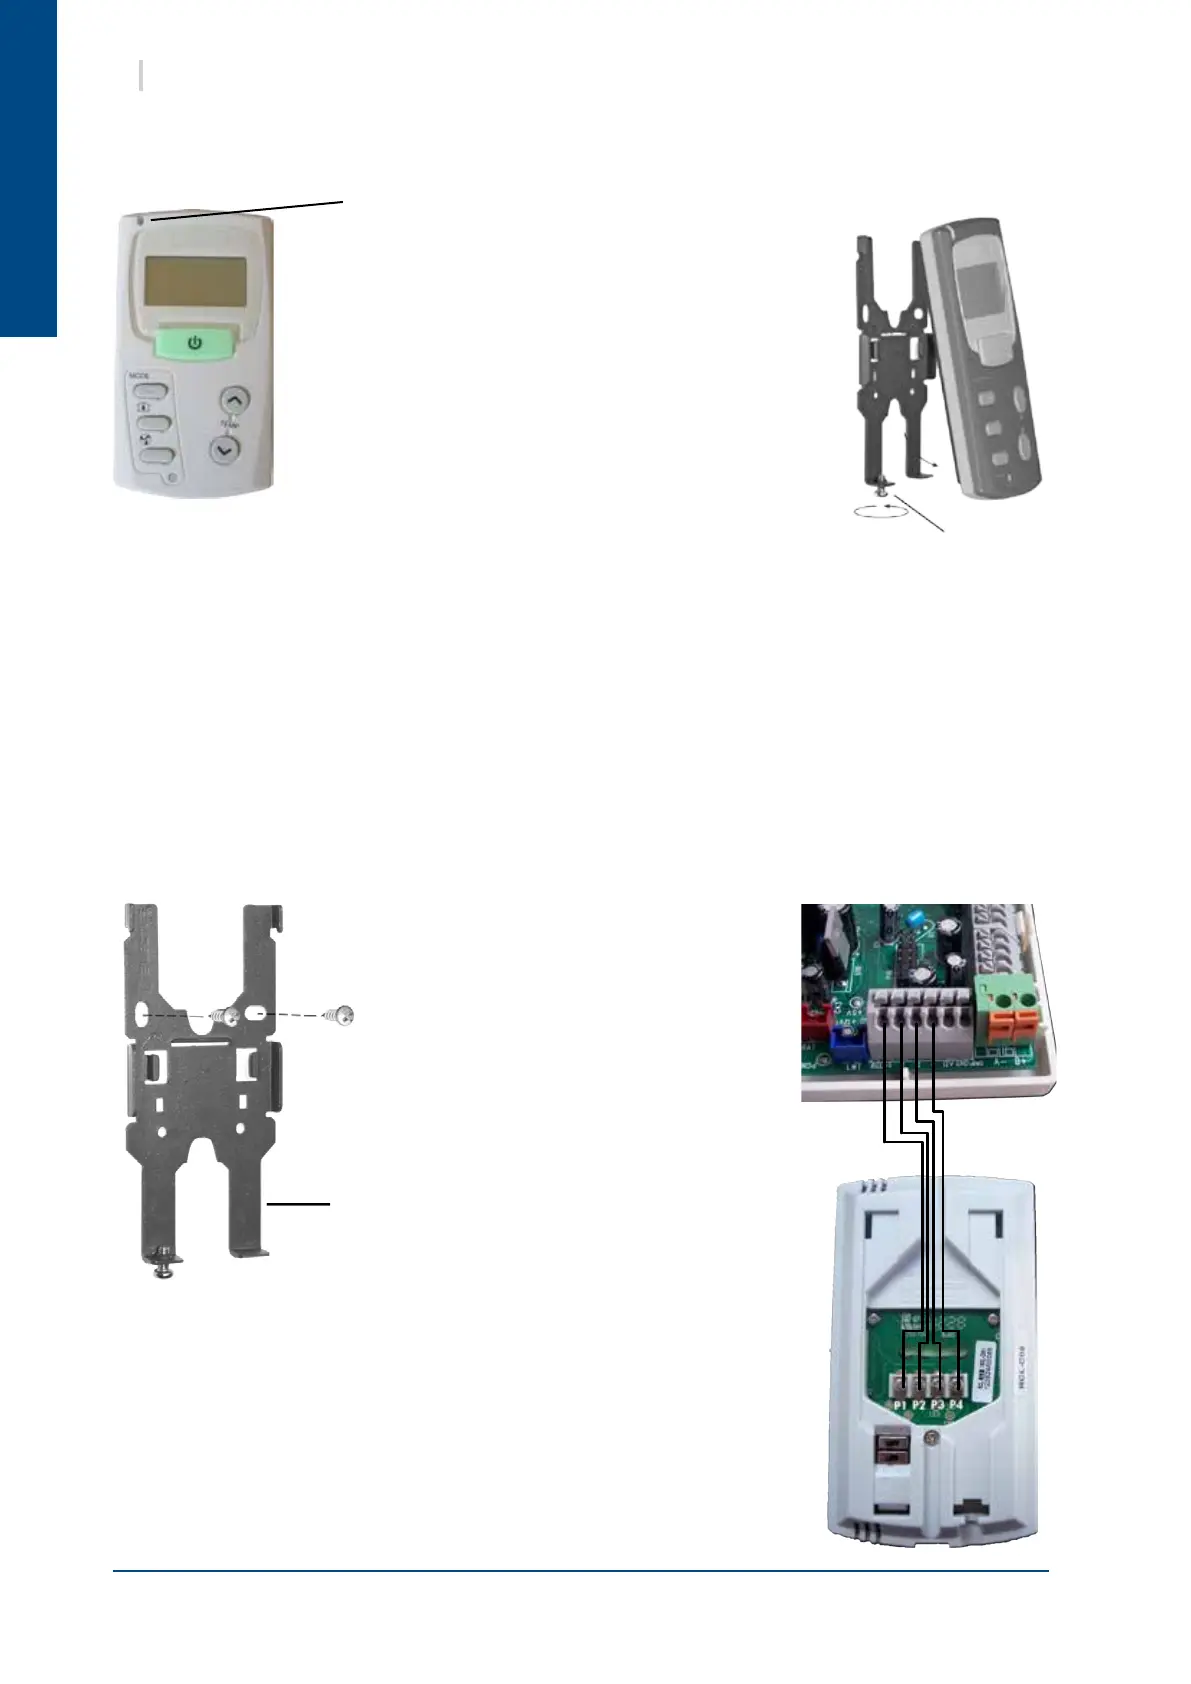
Checking the support bracket :
Ensure that the wall surface is completely at at the point where you wish to install the RCL control, as it
is important that the support bracket is not twisted on installation, because any bending could lead to the
control not clipping together properly and result in operating difculties.
Fitting the support bracket :
² Present the support bracket to the desired location and align it with a spirit level.
² Mark the screw locations.
² Make a hole or install appropriate plugs according to the material (wood, concrete, plasterboard etc.).
² Screw the support bracket to the wall, preferably with round head screws matching the following
characteristics :
- Minimum length : 15 mm,
- Maximum head diameter : 7 mm,
- Maximum thread diameter : 3.5 mm,
- Head protrusion : 3.5 mm.
14. RCL AND µBMS CONTROL MODULES WIRING
14.1. RCL
The RCL control module must be connected in accordance with the diagram
below.
Use twisted pair telephone wire with a section of between 0.12 and 0.5
mm² for wiring the control modules.
Take care to comply with the terminal connection reference numbers.
Unscrew the lower screw on the RCL control.
Separate the RCL control from its support bracket with the
help of a at bladed screwdriver
Support
bracket
Lower
screw
LED