DSC Q Series Getting Started Guide
45
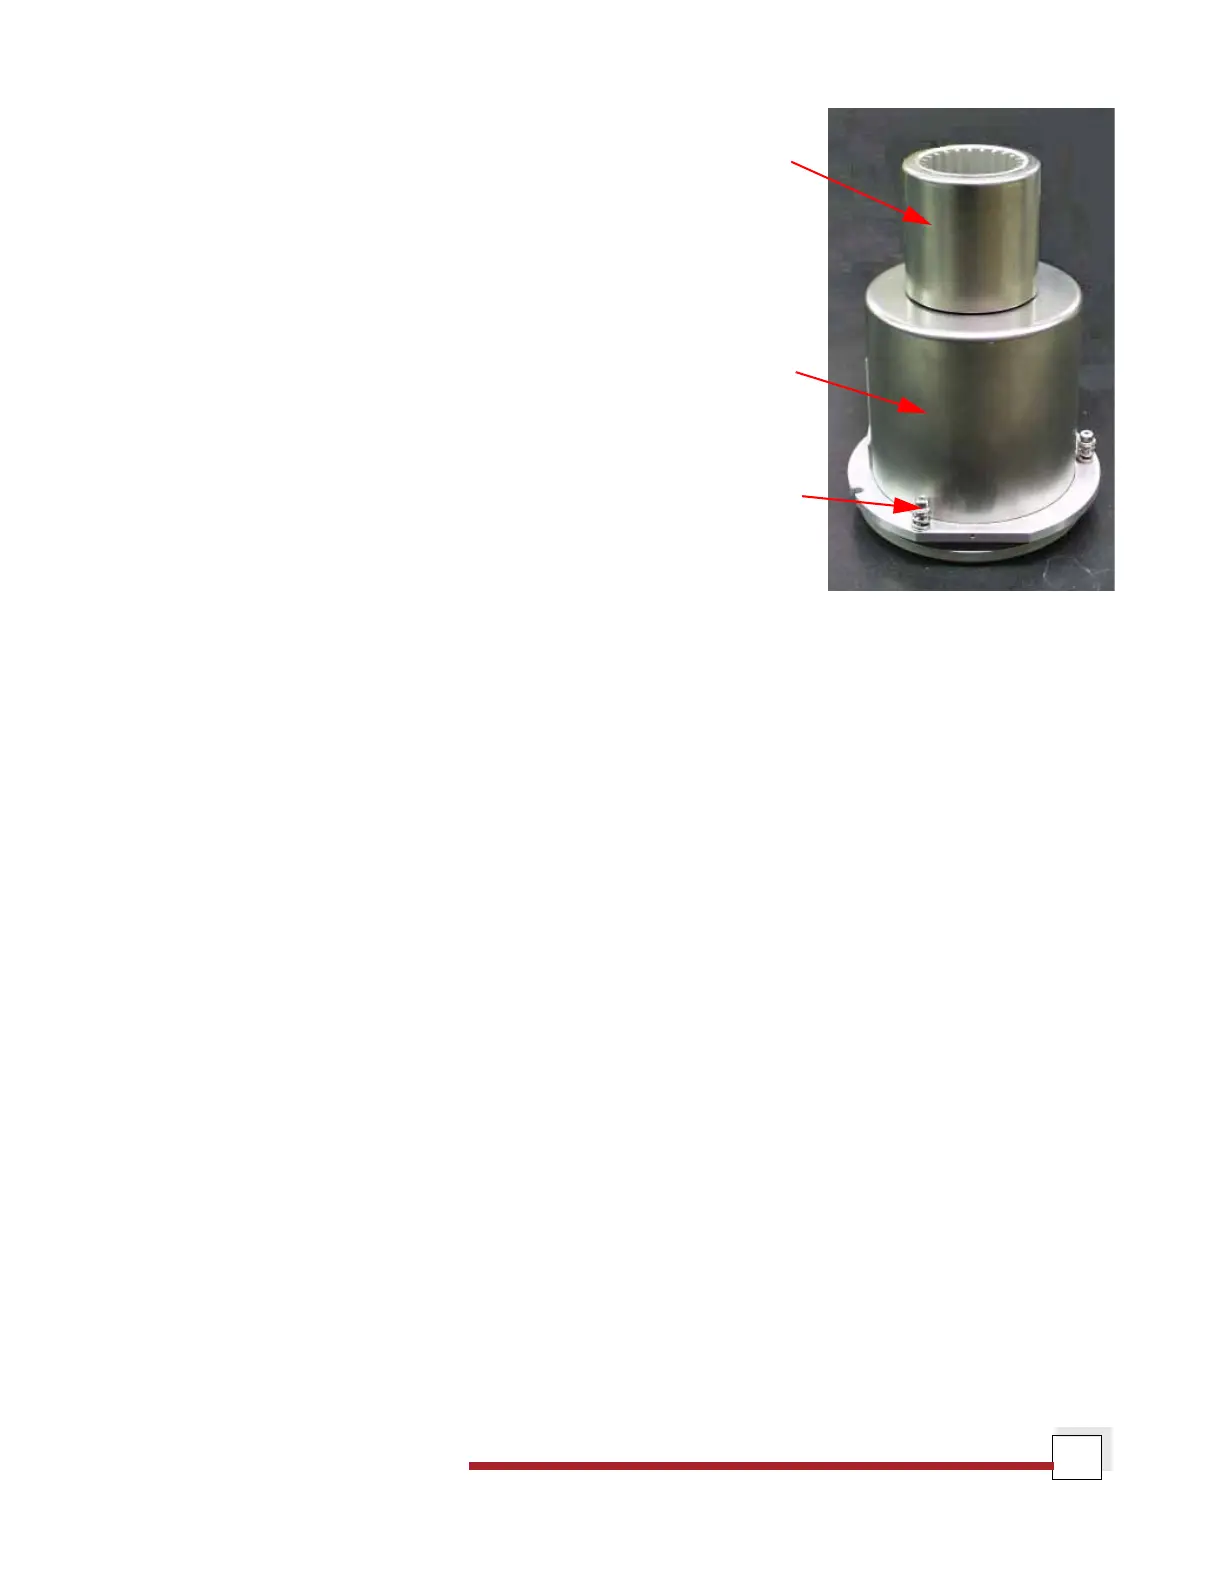
"Stand-Alone" Quench
Cooler and Cooling Head
Quench Cooler
Thermal
Enclosure
Captive Screw
7. Repeat step 6 for the two remaining captive screws.
After you have started each screw, go back and tighten
down all three screws until you feel them touch the
bottom. Do not over tighten.
8. Slide the cover back over the cell and replace the screws
removed originally. Push the plug back into place on
the side of the cover.
9. Connect the base purge line. The system is now ready
to receive the quench cooler.
10. Select the correct cooler type on the Instrument Prefer-
ences/Cooler Page of the DSC instrument control soft-
ware. The AutoLid and Autosampler, if applicable, are
both disabled when using the Quench Cooler.
11. Install the two inner lids over the cell when running
experiments. Then slide the quench cooler into the top
of the thermal enclosure using gloves to handle it, if you
have already poured liquid nitrogen into it.
NOTE: The Quench Cooler may only be
used to obtain Heat Flow T1.