90
Dosing examples:
Dosage cup application
Pre-cleaning
Beginning work with the machine
Cleaning start
Notice:
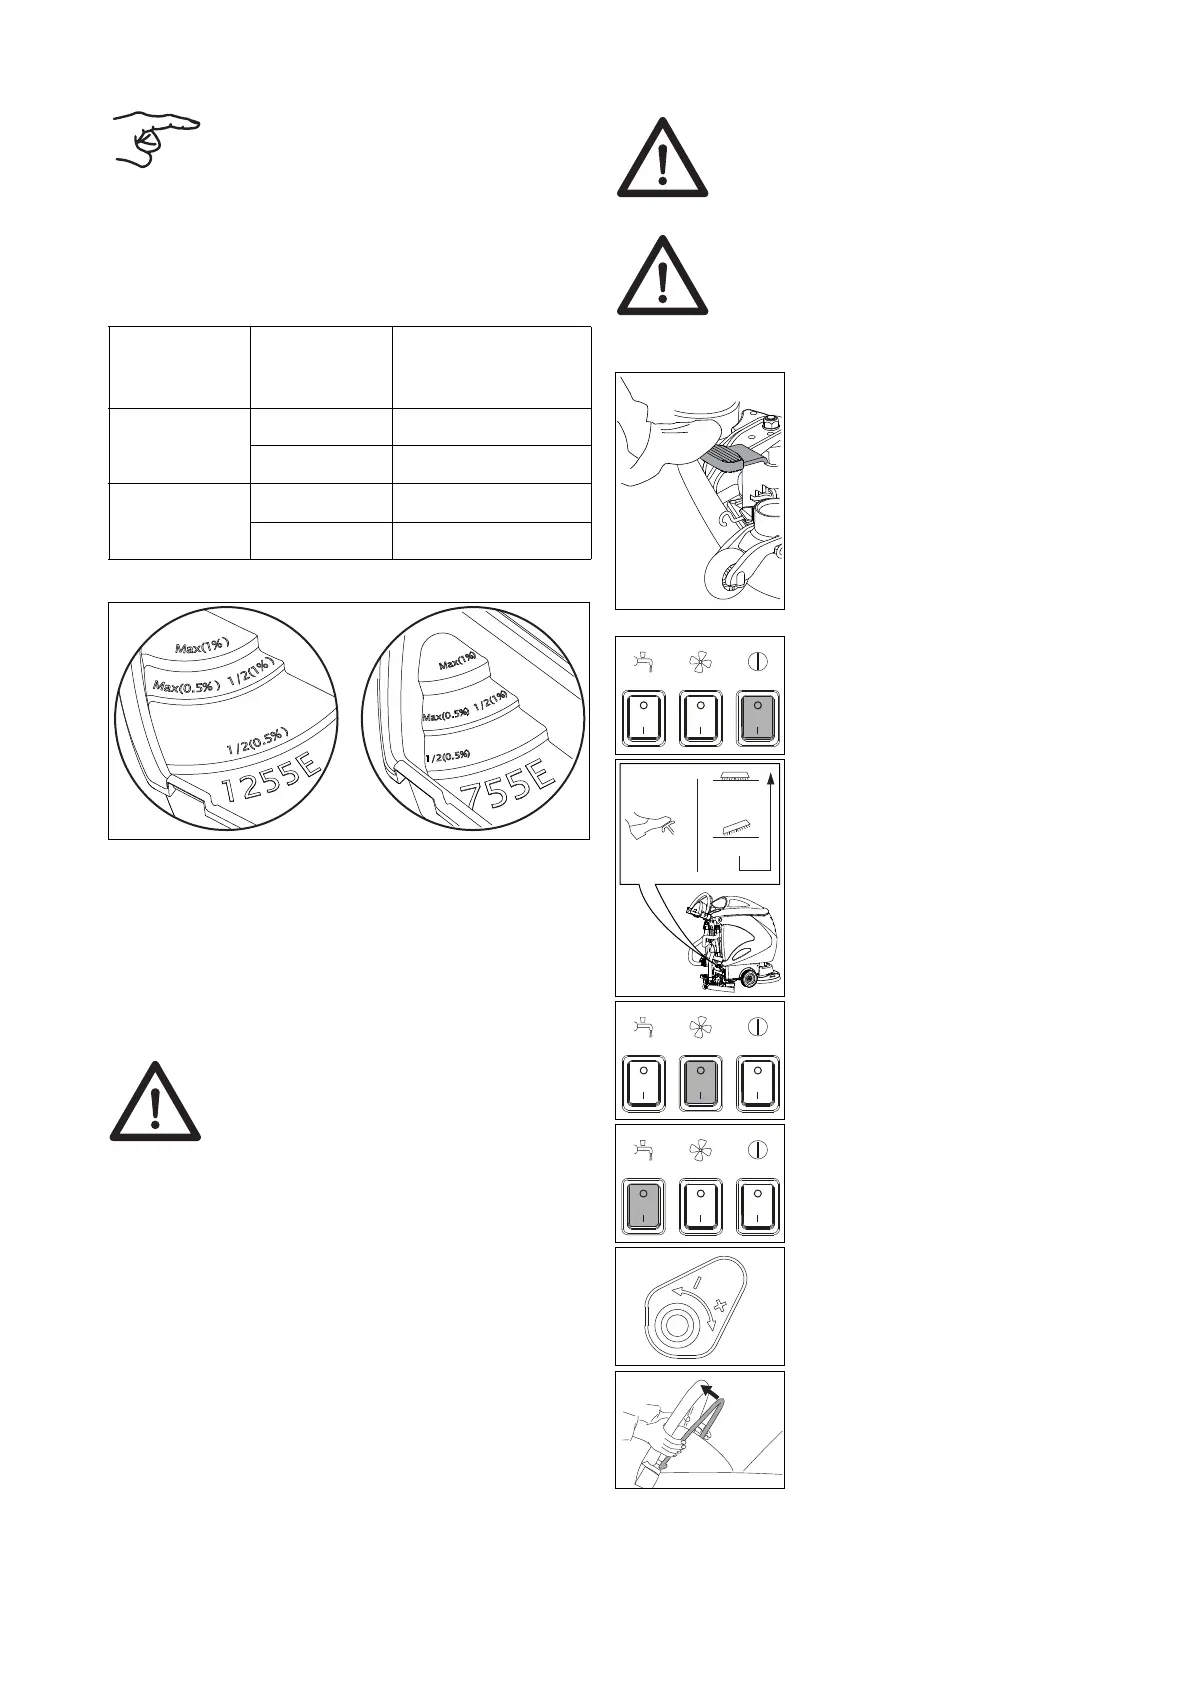
For a precise dosage, use the scale in the
dosage cup.
The filling level mark on the tank corre-
sponds to the mark in the dosage cup. The
type of machine is also noted in the dos-
age cup!
Information on
the packing of
the product
Tank capacity Dosage cup
0.5% 1/2 1 x 1/2
MAX 1 x MAX
1% 1/2 1 x MAX (2 x 1/2)
MAX 2 x MAX
• Fill the product you have measured with the dosage cup
into the fresh water tank.
• Slightly lift the tank cover.
• Push the tank cover support slightly inwards.
• Close the tank lid.
• By pushing gently on the front part of the tank cover you
lock the tank.
Attention:
Remove any objects (wooden, metal parts
etc.) from the cleaning surface.
The objects could be catapulted by the ro
-
tating tool, and thereby cause injuries to
people and damage to the environment.
Attention:
Always wear slip-resistant shoes and ap-
propriate working clothes when working
with this machine!
Attention:
Start familiarization with the machine by
making your first driving attempts in a free
area.
• Lower the squeegee.
• Plug the power supply cord into the mains socket.
• Switch on the machine (key switch).
Switch lights up
• Unlock the foot pedal and lower the
tool slowly.
• Switch off the suction unit.
Switch lights up
• Switch off the water pump.
Switch lights up
• Use the quantity control to dose the
cleaning solution.
• Pull the switch bracket drive on the
driving handle.
The tool starts to rotate and the
cleaning solution supply starts.