Maintenance, Service, and Repair
Steering Page 17
11. Lower the vehicle.
12. Reconnect the main positive and negative cables at the batteries.
13. Remove the blocks from behind the wheels.
14. Release the park brake and test drive the vehicle.
Replacing the Tie Rod
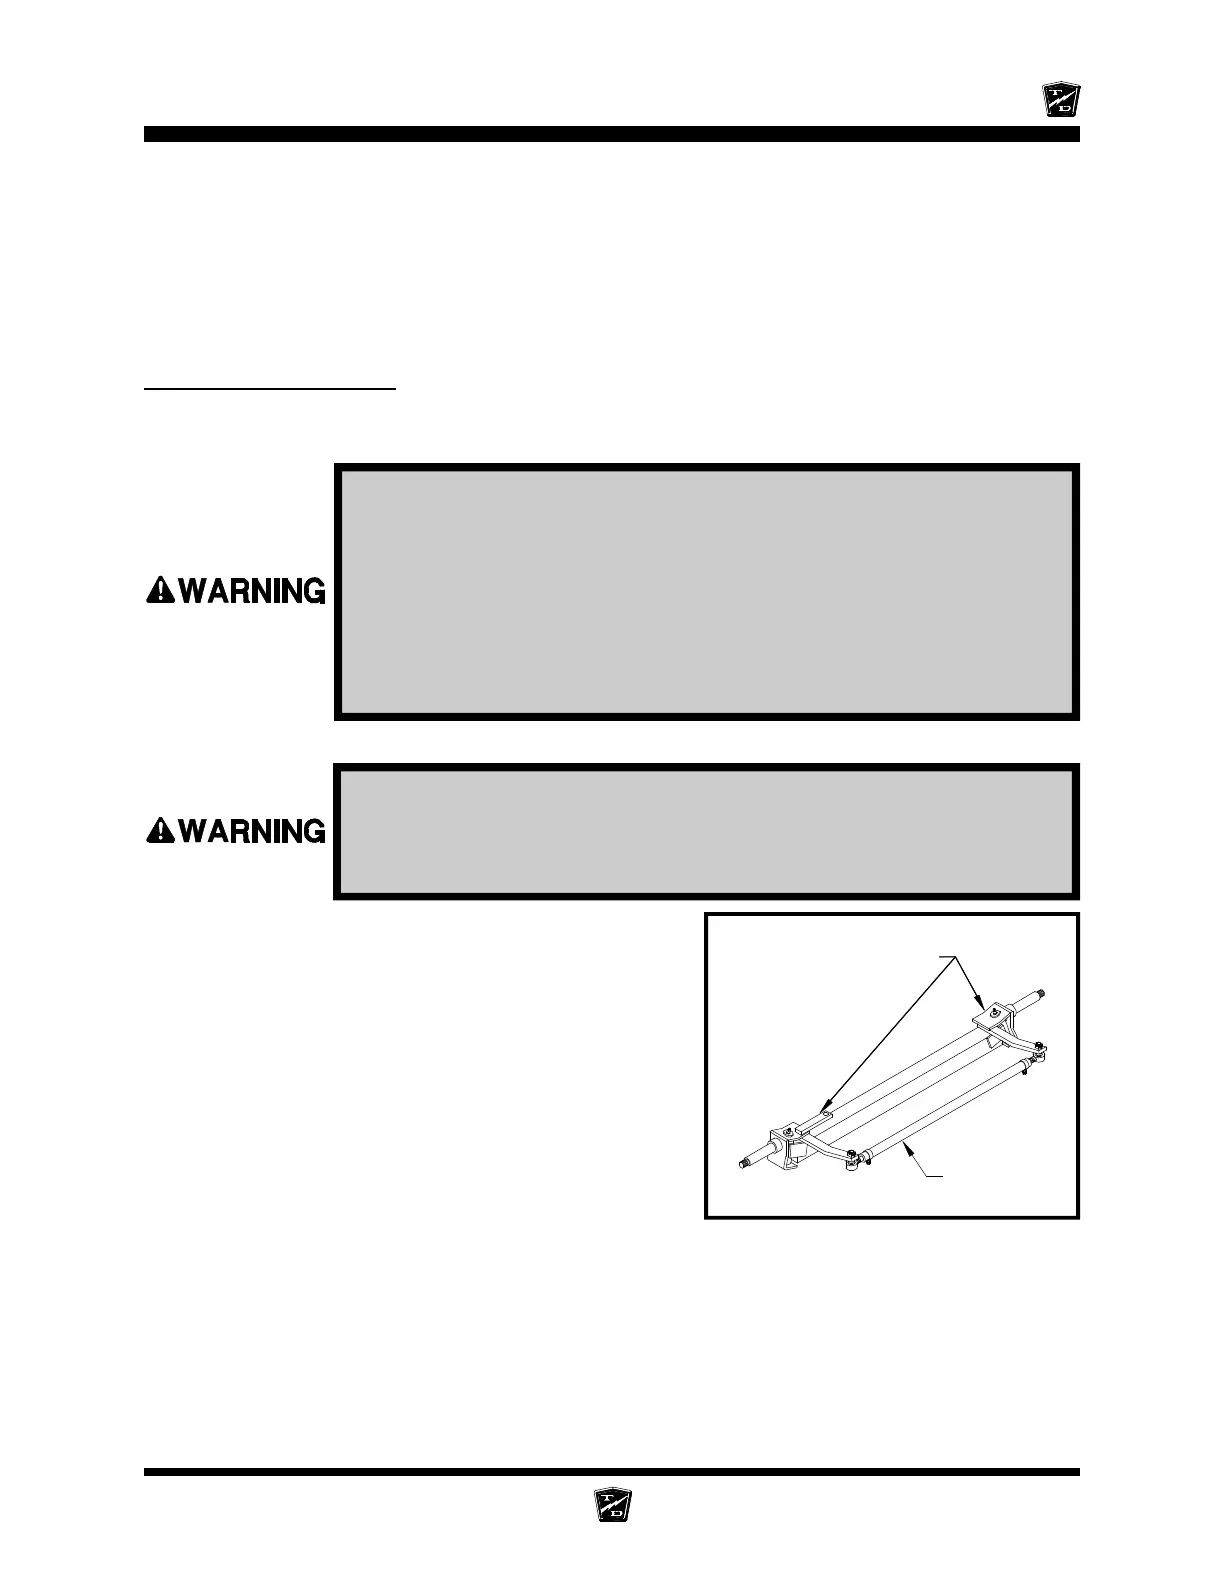
The Tie Rod is the linkage that connects the two steering knuckles together. Refer to the illustration
below..
6. Raise the front of the vehicle and support with jack stands.
7. Remove the ball joints or rod ends from the steering
knuckles.
NOTE: Refer to the Replacing the Ball
Joints section for information
regarding the removal of the ball joints
or rod ends.
8. Remove the tie rod as an assembly.
9. Install in reverse order.
10. Realign the front wheels.
NOTE: Refer to the Steering section for
information regarding realignment of
the front wheels.
11. Lower the vehicle.
12. Reconnect the main positive and negative cables at the batteries.
13. Remove the blocks from behind the wheels.
14. Release the park brake and test drive the vehicle.
1. Make sure the key-switch is in the “OFF” position, then remove the
key.
2. Place the forward-reverse switch in the center “OFF” position.
3. Set the park brake.
4. Place blocks under the rear wheels to prevent vehicle movement.
5. Disconnect the main positive and negative cables at the batteries.
Always use a lifting strap, hoist, and jack stands, of adequate capacity
to lift and support the vehicle. Failure to use lifting and support devices
of rated load capacity may result in severe bodily injury.
Steering Knuckle
Typical Front Axle Assembly







 To Next Page