SECTION 3 PAGE 14
MB-T48-01
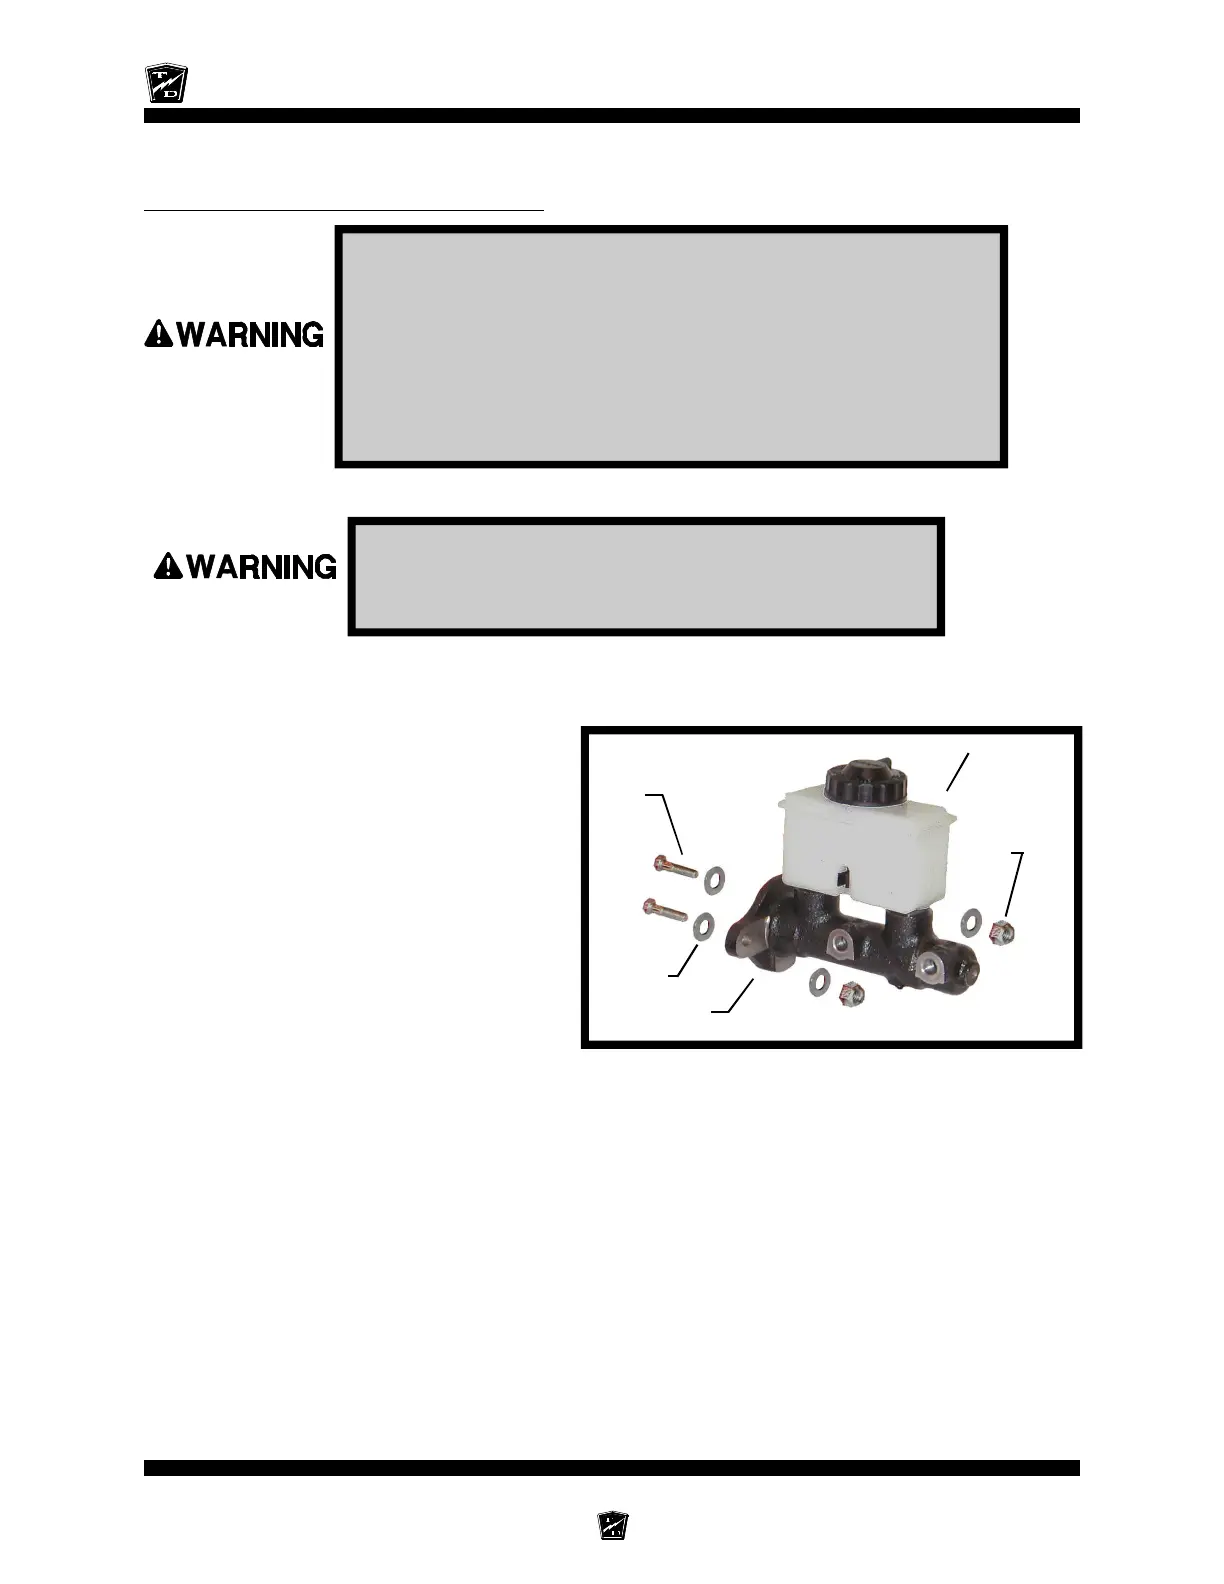
Replacing the Master Cylinder
6. Raise the front of the vehicle and support with jack stands.
7. Remove the cap from the master cylinder and bleed or drain out all of the brake fluid.
NOTE: The Master Cylinder has no internal replacement parts.
8. Remove the brake lines.
9. While supporting the master
cylinder, remove the mounting
bolts.
10. Install the new master cylinder
in reverse order.
11. Reinstall the brake lines.
12. Adjust the master cylinder push
rod so that it is between 1/16-
1/8” away from the master
cylinder plunger with the brake
pedal up.
13. Fill the master cylinder with DOT 3 brake fluid, 1/4” from the top of the master cylinder.
14. Using the appropriate procedure, bleed the brakes and check for leaks.
15. Check the brake fluid level again and fill as needed.
16. Lower the vehicle.
17. Reconnect the main positive and negative cables at the batteries.
18. Remove the blocks from behind the wheels.
19. Release the park brake and test drive the vehicle.
Always use a lifting strap, hoist, and jack stands, of
adequate capacity to lift and support the vehicle. Failure
to use lifting and support devices of rated load capacity
may result in serious bodily injury.
1. Make sure the key-switch is in the “OFF” position, then remove
the key.
2. Place the forward-reverse switch in the center “OFF” position.
3. Set the park brake.
4. Place blocks under the rear wheels to prevent vehicle
movement.
5. Disconnect the main positive and negative cables at the
batteries.
Reservoir
Master Cylinder
Washer
Master
Cylinder
Bolt
Nut
 Loading...