EasyManua.ls Logo

Taylor Soft Serve Little Softy - User Manual

Taylor Soft Serve Little Softy
8 pages
Print Icon
To Next Page IconTo Next Page
Loading...
1
= On/Auto Freeze (Far Right Position)
= Off (Middle Position)
= Wash (Far Left Position)
Guide to Using Ice Cream Machine
1. Sanitize before using according to directions
supplied (page 4)
2. Prime the machine according to directions
supplied (page 5)
3. When finished drain the machine according to
directions supplied (page 6)
4. Rinse the machine according to directions
supplied (page 6)
5. Sanitize the machine as you did in step 1 (page
4)
Items Customer needs to have in
order to Use Ice Cream Machine
Bucket/Container that holds at least 2
gallons
Soft Serve Mix– Appert’s Food Service is
one supplier 320-251-5450 call for choices
Container to drain left over ice cream out
of machine into when done.
PLEASE KEEP MACHINE
UPRIGHT EVEN WHILE
TRANSPORTING
Question and Answer IconNeed help?

Do you have a question about the Taylor Soft Serve Little Softy and is the answer not in the manual?

Summary

Operator Switch Symbols and Definitions

Power Switch Operation

Details the ON/AUTO, OFF, and WASH positions of the operator power switch.

Guide to Using Ice Cream Machine

Operational Steps Overview

Outlines sequential steps for sanitizing, priming, draining, and rinsing the machine.

Operator Parts Identification

Machine Controls and Indicators

Indicator Light, Switches, and Reset

Explains the MIX LOW indicator, Standby switch, and the reset mechanism for overload conditions.

Feed Tube Functionality

Details the role and correct orientation of the feed tube in different operating modes.

Temperature Adjustments

How to Sanitize Ice Cream Machine

Priming the Ice Cream Machine

Standby Mode Operation

Standby Feature Usage

Explains how to use the STANDBY feature to maintain product temperature during idle periods.

Draining Product From the Freezing Cylinder

Rinsing Procedure

Trouble Shooting Guide

No Product Dispensed

Addresses issues related to no product being dispensed and troubleshooting steps.

Machine Not Operating in AUTO

Troubleshoots problems preventing the machine from operating in the AUTO position.

Product Consistency Issues

Covers solutions for product being too stiff or too soft.

Mechanical and Leakage Problems

Resolves issues like scored cylinder walls, drip pan leaks, and draw valve leaks.

Feeding and Overload Issues

Addresses problems with product feeding and the unit going out on overload excessively.

Overview

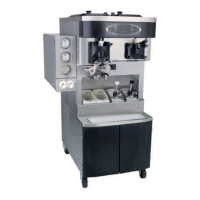
This document describes the operation, maintenance, and troubleshooting of a soft-serve ice cream machine, likely a Taylor model given the references to "Taylor Lube" and "Taylor Service Representative."

Function Description

The device is a soft-serve ice cream machine designed to produce and dispense frozen desserts. It features a hopper for mix, a freezing cylinder, a beater motor for agitation, and a refrigeration system to freeze the mix. The machine is equipped with various controls and indicators to manage its operation.

Important Technical Specifications

While specific numerical technical specifications like power consumption or dimensions are not explicitly listed, the manual highlights several key components and operational parameters:

  • Power: Operates on 120 Volt, requiring a 4-plug extension cord. It is recommended to use a separate 15 amp circuit for proper operation.
  • Mix Capacity: The hopper should always maintain at least 2 inches (5.1 cm) of mix to prevent the freezing cylinder from freezing and causing damage.
  • Output Capacity: The freezer's capacity is mentioned in the context of "out-drawing" it, with a reference to "Two 4 oz. (113.4 gram) servings in one minute" as a potential remedy for product being too soft due to over-dispensing.
  • Components: Key parts include a hopper cover, float-mix level, feed tube, splash shield, drip pan, O-rings (various sizes: 7/8 OD x .103W, 3/4 OD x .103, 2-3/4 OD x .139W), beater, front bearing, bearing guide, door A-1 spout, draw valve, valve lifter arm, door handle, design cap, and stud nut.

Usage Features

The machine offers several features to facilitate its use:

  • Control Switches:
    • Power Switch: A three-position toggle switch:
      • OFF (Middle Position): Turns the machine off.
      • WASH (Far Left Position): Activates only the beater motor for cleaning.
      • AUTO (Far Right Position): Activates both the beater motor and the refrigeration for product freezing and dispensing.
    • Standby Switch: A push-button switch with "IN" and "OUT" positions.
      • OUT (Not Illuminated): Normal product dispensing mode when the toggle switch is in AUTO.
      • IN (Illuminated): Activates STANDBY mode, maintaining safe temperatures for mix in the hopper and freezing cylinder without continuous freezing, preventing product breakdown during long periods of non-use (e.g., early morning hours).
  • Indicator Light - MIX LOW: Located on the front, this light illuminates when the mix hopper has a low supply of mix, signaling the need for a refill.
  • Feed Tube: Meters a combination of mix and air into the freezing cylinder. Its orientation changes based on the operating mode:
    • AUTO Mode: Metering hole should be in the downward position.
    • STANDBY Mode: The tube should be inverted.
  • Reset Mechanism: An automatic shutdown feature in case of overload. To reset, place the toggle switch in OFF, wait 2-3 minutes, press the reset button (located in the side panel), then move the toggle switch to WASH to observe performance, and finally to AUTO.
  • Priming: A procedure to prepare the machine for first use or after cleaning, involving filling the hopper with fresh mix to force out sanitizing solution.

Maintenance Features

Regular maintenance is crucial for the machine's performance and hygiene:

  • Sanitizing: A detailed procedure is provided for sanitizing the machine before first use and after each cleaning cycle. This involves mixing sanitizing powder with warm water, pouring it into the hopper, agitating with the WASH setting, and draining.
  • Draining Product: Instructions for draining leftover product from the freezing cylinder before cleaning, recommending softening the product by placing the toggle switch in OFF ahead of time.
  • Rinsing: A procedure to rinse the machine with cool, clean water after draining product, involving scrubbing the hopper and mix inlet hole, and draining the rinse water until clear.
  • Part Replacement: The manual lists various O-rings (e.g., on beater drive shaft, draw valve) that require replacement every 3 months.
  • Lubrication: Emphasizes the use of food-grade lubricant (e.g., Taylor Lube) for components like the beater drive shaft and draw valve.
  • Troubleshooting Guide: A comprehensive table outlining common problems, probable causes, and remedies, covering issues like no product dispensed, machine not operating in AUTO, product too stiff or too soft, scored freezing cylinder walls, excessive leakage, draw valve leaking, product not feeding, and excessive overloads.
  • Checklist of Items to be Returned: Ensures that all essential components (Stainless Feed Tube, White Plastic Float Mix Level, Splash shield, Black 120 Volt 4-Plug extension cord, and the instruction sheet) are returned with the machine, with a warning about replacement charges for missing parts.

The document stresses the importance of following local health codes and recommends contacting an authorized Taylor Service Representative for temperature adjustments or complex issues. It also includes a crucial note to keep the machine upright, even during transport.

Taylor Soft Serve Little Softy Specifications

General IconGeneral
BrandTaylor
ModelSoft Serve Little Softy
CategoryIce Cream Maker
LanguageEnglish

Related product manuals