Do you have a question about the Taymor CONCIERGE 100 and is the answer not in the manual?
Precautions against using abrasives, chemicals, and liquids on the lockset.
Guidelines to prevent personal injury, damage, and warranty voiding during use.
Instructions for cleaning and maintaining the lockset's finish and functionality.
Step-by-step guide for marking the door using the provided template for installation.
Procedure for marking and drilling pilot holes based on backset selection.
Using template marks to guide drilling and chiseling for the latch and faceplate.
Instructions for preparing the door jamb and installing the strike plate.
Details on changing latch faces and adjusting the latch backset.
Procedure for installing the latch into mortised areas or as a drive-in type.
Steps for inserting the cylinder and passing the IC wire to the interior side.
Guide for installing the interior mounting plate and ensuring proper alignment.
How to determine if the door is left-handed or right-handed.
Instructions for adjusting the interior turn piece based on door handing.
Steps for removing the battery cover, connecting wires, and installing batteries.
Explanation of LED indicator lights for different lock states and errors.
Explanation of audio signals for different lock states and errors.
Indicator for low battery status and the need for replacement.
Details on the programming code, its length, and usage.
Information on user entry codes, including length, limits, and management.
Troubleshooting steps if the lock cannot be operated manually after installation.
Diagnosing a bump felt during manual turning of the thumbturn or key.
Steps to resolve issues where the keypad buttons do not respond.
Troubleshooting when unable to change the programming code.
Guidance on the type of batteries recommended for optimal performance.
Information on how long the lockset can operate on a single set of batteries.
| Power Source | Battery |
|---|---|
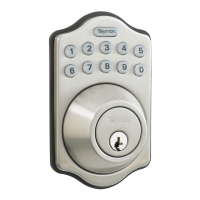
| Finish | Satin Nickel |
| Connectivity | Bluetooth |
| Handing | Reversible |
| Strike Plate | Included |
| Keyed Alike | No |
| ANSI Grade | Grade 2 |
| Backset | 2-3/8" or 2-3/4" |
| Door Thickness | 1-3/8" to 1-3/4" |