TDK-Micronas GmbH Page 16 of 23
4 Software
The Joystick Module is delivered with a Labview based Visualization Environment. The software allows
for communication to the sensor, representation of Magnetic Field components and 3D modeling of the
Joystick position. Three different communication devices can be used with this software, the Micronas
preferred TDK SPI Programmer, TDK Magnetic Sensor Programmer V1.x or an Arduino
1
.
Note: 1. See Arduino Assembly Guide 3.1.3
4.1 Sensor Configuration
4.1.1 Configuration Note
The sensor delivered is set to the factory default values. Therefore for proper operation a programming
sequence needs to take place. For simplicity a programming process is described at step 4 of paragraph
4.2. By executing this steps the sensor used will be programmed using saved EEPROM dump files from
pre calibrated joystick modules. Following this process, will ensure immediate access to the Joystick
Evaluation Environment with no further programming needed. However due to mechanical variations of
the assembled module the output of the sensor can be inaccurate.
In case the movement of the joystick is inverted relative to the visualization environment the magnet
attached to the joystick module can be reversed.
4.1.2 Sensor Calibration using HAL 3900 Programming Environment
In case further accuracy is desired, the sensor will need to be calibrated using a TDK SPI Programmer or
the TDK-MSP and the HAL 3900 Programming environment.
Two Point Calibration
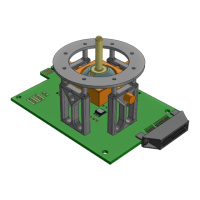
1. Connect the Joystick Module using the TDK SPI Programmer or the TDK-MSP.
2. Run the HAL 3900 Programming Environment.
3. The TDK SPI Programmer will be automatically detected (for the MSP select the used Com- Port.)
4. Set the SPI frequency to 1MHz.
5. Press VSUP ON.
6. Press Calibration Tool and select two-point calibration.
7. Select Data Channel 1.
8. Bring the Joystick lever to position 1 as shown in Figure 38 and press Calibration Point 1
9. Move the lever by approx. 1 cm and press Calibralibration Point 2.
10. Note if Angle Out 2 is higher or lower than Angle out 1 and set increasing or decreasing angle out
accordingly.
11. Bring the Joystick lever to position 2 and press Calibration Point 2.
12. Press Calculate and then Write & Store.
13. Select Data Channel 2.
14. Repeat steps 8-12 for position 3 and 4 of Figure 38.
15. Press Exit .
16. Press VSUP OFF.
17. Press STOP.
Note: For further information refer to HAL 3900 Programming Environment and User Manual documents.