Flushing technology
6-13
Protection class II
CE low voltage power
supply
Operating temperature - °C to + °C
Safety standard EN /EN
EMV standard EN /B
Technology Switching
Switch frequency KHz
Dielectric resistance V/ min
MTBF (MIL HDBK) , h
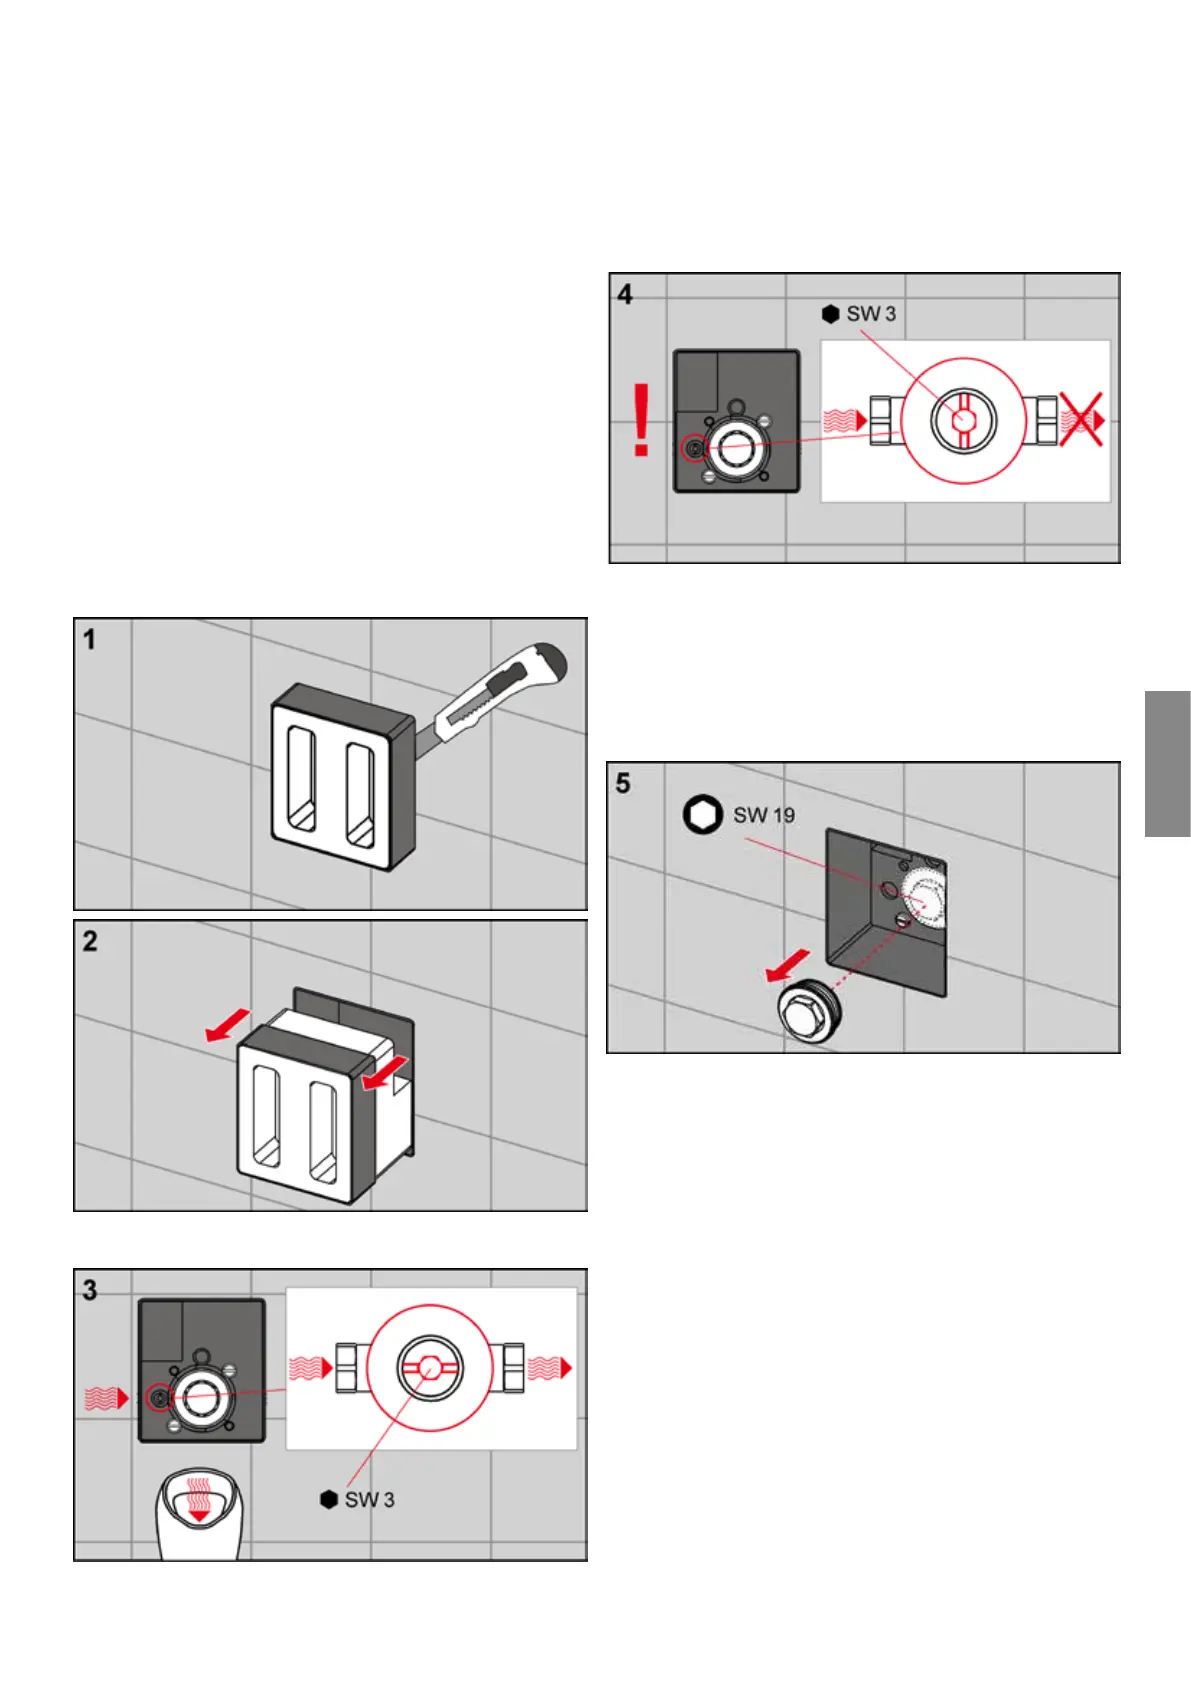
Installation of urinal flush valves
The installation procedures for the mechanical and the
electronic flush valves are practically identical:
Cut the bare-wall protection flush against the wall, and
remove it together with the polystyrene support.
Suciently flush out the pipe.
Observe the following:
When performing the pressure test, the inlet flow control of
the flush valve must be set to free-flow.
Before mounting the cartridge, ensure that the inlet flow
control is closed so that no water can leak out during
assembly. Close the shut-o using an Allen key. In the
free-flow setting (fig. ), the shut-o slot is parallel with
the housing, and in the closed setting (fig. ), it is at right
angles to the housing.
Remove the bare-wall plugs.