UK
13
11
V
V
4
3
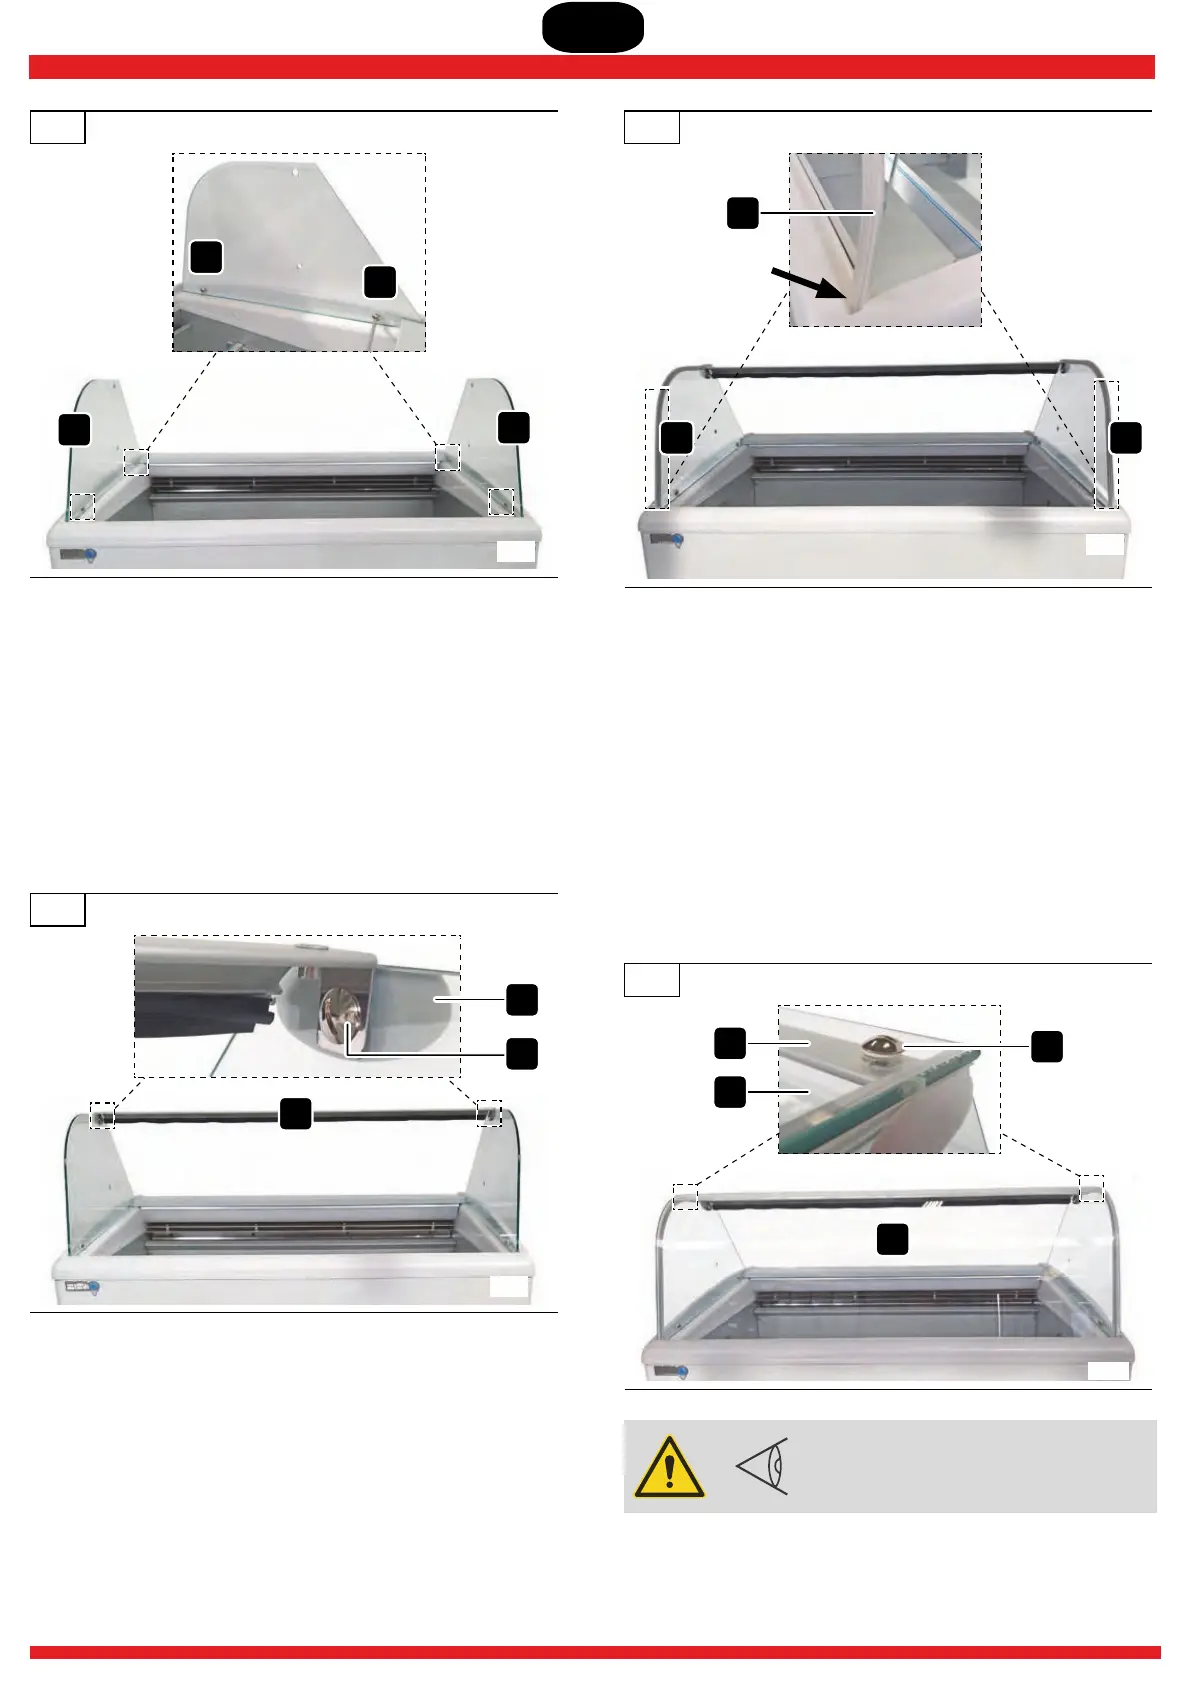
4.1.3 Installation of the crosspiece
▶ From the supplied fitting use:
! crosspiece ;5
! from the screw kit: 2x short screws and 2x white studs.
▶ Position crosspiece 5 in the upper part of the side panels,
▶ Tighten screws V B(from the inside) to studs .
12
5
V
B
4.1.4 Installation of the gaskets
▶ On the two side panels, install the gaskets G starting from
the bottom (front side) and proceed along the entire length
of the side panel exerting the necessary pressure (Fig. 13).
▶ Remove any excess gasket with a suitable tool (scissors
or Stanley knife).
13
G
G G
4.1.5 Installing the front glass
▶ From the supplied fittings use:
! Front glass 1 (previously removed) and remove the
packaging;
! from the screw kit: 2x long screws and 2 gaskets.
▶ Place glass 1 in its housing on the front side of the
showcase (Fig. 14).
▶ Rest the glass on the crosspiece 5 and fasten it to the unit
with screws and corresponding gaskets.V
14
1
5
1
V
CAUTION! Check that the compo -
nents are correctly installed; finally
tighten all the screws.
lining it up with the securing holes (Fig. 12).