EasyManua.ls Logo

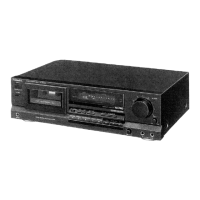
Technics RS-BR465

Technics RS-BR465
18 pages
To Next Page IconTo Next Page
To Previous Page IconTo Previous Page
Loading...
Accessories
eStereo
connection
Power
plug
adaptor
......
1
(For
areas
except
Australia)
Configuration
of
the
AC
power
supply
cord
differs
according
to
area.
Before
Use
Be
sure
to
disconnect
the
mains
cord
before
adjusting
the
voltage
selector.
Use
a
minus
(—)
screwdriver
to
set
the
voltage
selector
(on
the
rear
panel)
to
the
voltage
setting
for
the
area
in
which
the
unit
will
be
used.
Connections
Make
connections
in
the
numbered
sequence
by
using
the
in-
cluded
cables.
[1]
Connect
the
stereo
connection
cables.
[2|
Connect
the
L-type
cables.
[3]
Connect
the
AC
power
supply
cord.
Receiver
or
amplifier
(not
included)
REC
PLAY
REMOTE
CONTROL
OuT
Compact
disc
player
(not
included)
@
MAEMOTE
Ey
Lo
Household
AC
outlet
L-type
cable
a
(not
included)
T
0
An
beti
This
unit
in
IN
OUT
SYNCHRO
{INE
IN
LINE
OUT
Pal
as
ACIN~
TI
a
(If
the
power
supply
in
your
area
is
117
V
or
120
V,
set
to
the
“427
V"
position.)
Note
that
this
unit
will
be
seriously
damaged
if
this
setting
is
not
made
correctly.
(There
is
no
voltage
selector
for
some
countries;
the
correct
voltage
is
already
set.)
The
illustration
at
the
left
shows
an
example
of
connections
made
when
this
unit
is
combined
with
a
Technics
hi-fi
component
system,
and
shows
only
the
connections
to
be
made
to
and
from
this
unit
in
that
combination.
Refer
to
the
illustration
together
with
the
instructions
provided
below.
“REMOTE
CONTROL
IN”
terminal
Make
a
connection
from
this
terminal
to
the
control
terminal
for
a
cassette
deck
with
a
Technics
receiver
or
a
Technics
amplifier.
(For
detailed
information,
refer
to
the
operating
instructions
of
the
Technics
receiver
or
the
Technics
amplifier.)
“REMOTE
CONTROL
OUT”
terminal
Make
a
connection
from
this
terminal
to
the
“REMOTE
INPUT”
terminal
of
a
Technics
graphic
equalizer
or
to
the
“REMOTE”
terminal
of
a
Technics
compact
disc
player.
(For
detailed
information,
refer
to
the
operating
instructions
of
the
Technics
graphic
equalizer
or
the
Technics
compact
disc
player.)
“SYNCHRO
EDIT”
terminal
Make
a
connection
from
this
terminal
to
a
terminal
that
has
the
synchro-edit
function
of
a
Technics
compact
disc
player.
See
page
13.
(Contact
your
dealer
for
details.)
AC
power
supply
cord
((3))
The
configuration
of
the
AC
outlet
and
AC
power
supply
cord
differs
according
to
area.
For
areas
except
Australia
|
\f
the
power
plug
will
not
fit
your
socket,
use
the
power
plug
adaptor
(included).
-
=)
Placements
hints
if
this
unit
is
placed
near
a
receiver
or
a
tuner,
a
“hum”
noise
may
be
heard
during
tape
playback,
recording,
or
AM
reception
of
the
receiver
or
the
tuner.
If
this
occurs,
leave
as
much
space
as
possible
between
the
units,
or
place
them
where
there
is
the
least
amount
of
“hum”.
3
|
\
i
i
i
|
i
}

Related product manuals