12
Network settings
You can stream music from an iOS device
(iPhone/iPad/iPod), an Android™ device or a PC
(Mac/Windows) to this unit by using the AirPlay or DLNA
feature. (> 13, 18)
To use these features, this unit must join the same network
as the AirPlay compatible device or the DLNA compatible
device.
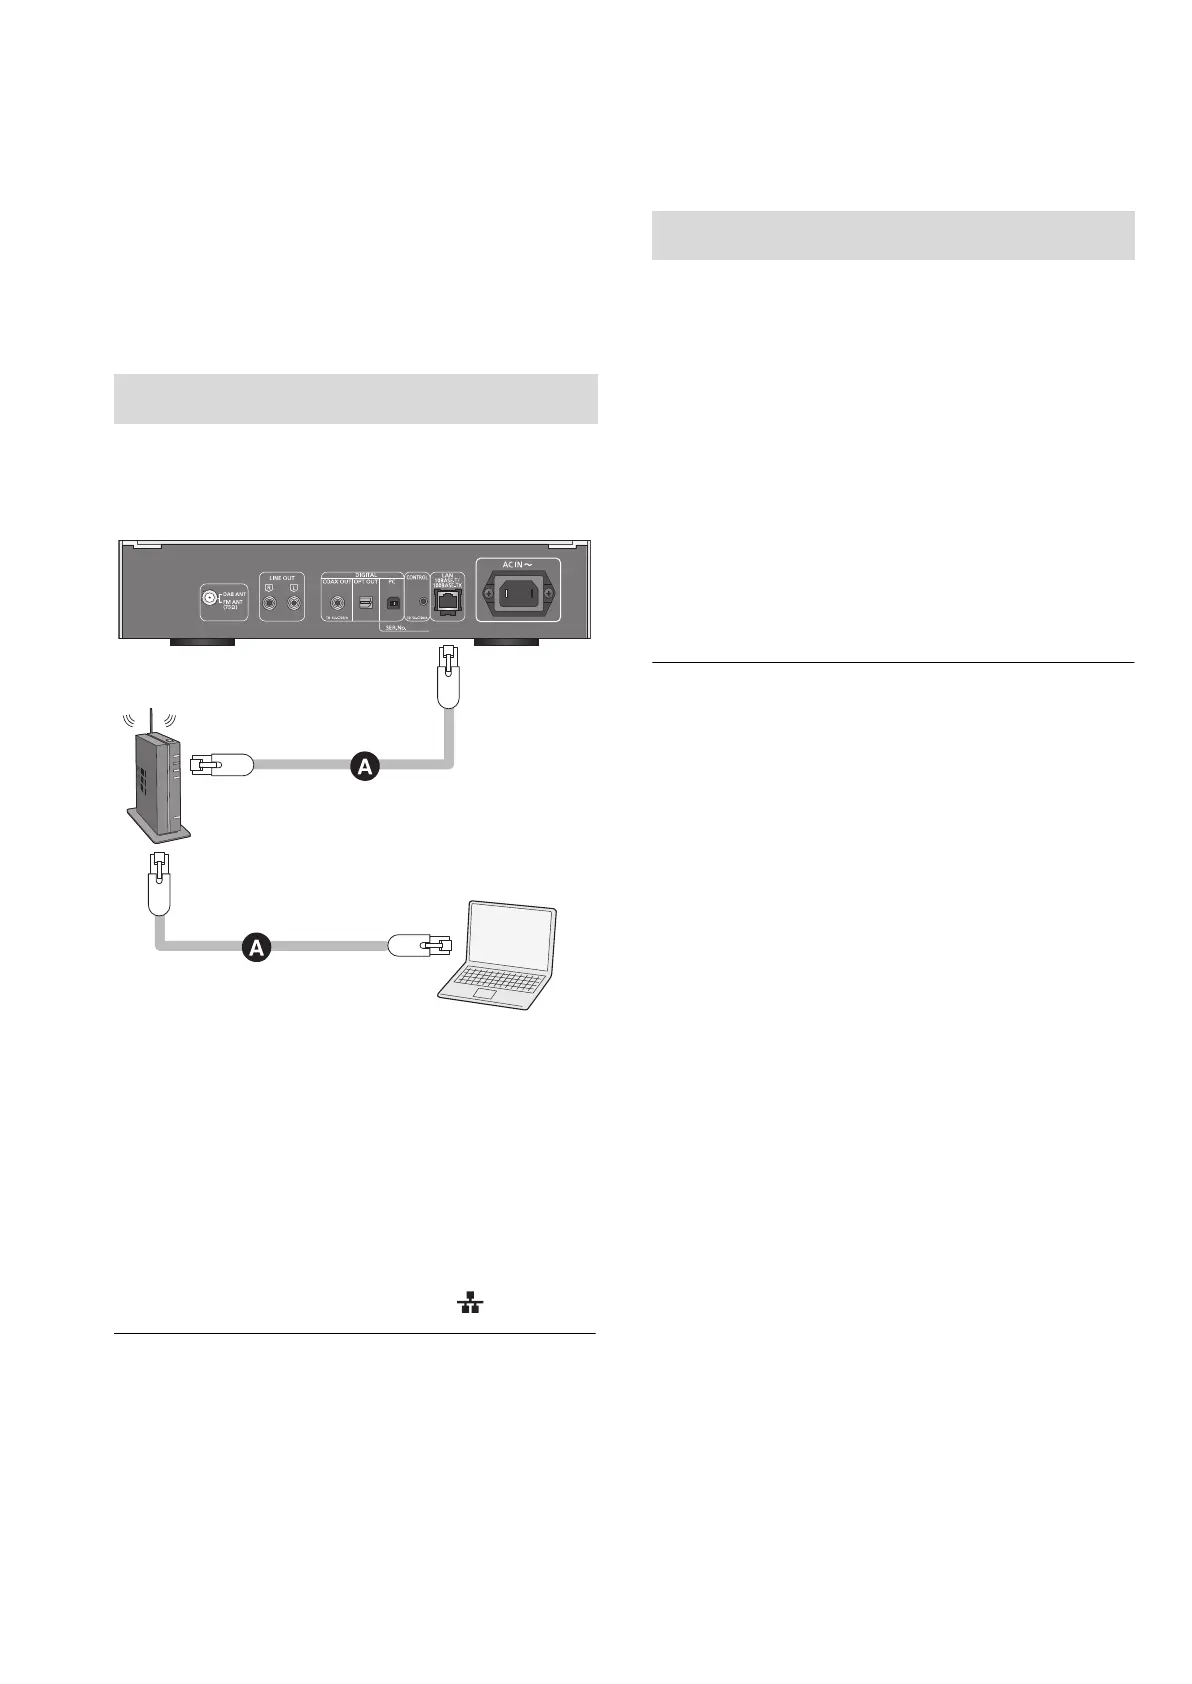
Normally, just connecting a LAN cable will complete the setup.
A: LAN cable (not supplied)
1 Disconnect the AC mains lead.
2 Connect this unit to a broadband router, etc.
using a LAN cable.
3 Connect the AC mains lead to this unit, and
raise the power switch lever to the [Í/I]
position. (> 10)
≥When the connection is established, “ ” is displayed.
≥ If “Firmware update is available” is displayed after the network
connection is set up, the firmware for this unit is available.
– Refer to “Firmware update is available” (> 31) for details on
update.
– For the update information, refer to the following website.
www.technics.com/support/firmware/
You can change this unit’s name on the network (Friendly
Name), and use specific IP address, subnet mask, default
gateway, primary DNS, etc.
≥ Do not play back music while changing these settings.
1 Press [NWP].
2 Press [HOME].
3 Press [3, 4] repeatedly to select “SETUP” and then
press [OK].
4 Press [3, 4] repeatedly to select “Network” and then
press [OK].
5 Select and input the details.
6 Press [OK] to apply the settings.
7 Press [RETURN] repeatedly to exit the settings.
8 Press [NWP Í] to turn the unit to standby mode.
≥ Wait until “Please Wait” disappears.
9 Perform “Wired LAN connection”. (> left)
≥ Use category 7 or above straight LAN cables (STP) when
connecting to peripheral devices.
≥ Inserting any cable other than a LAN cable in the LAN port can
damage the unit.
≥ If you try to change the network settings immediately after turning
on this unit, it may take some time until the network setup screen
is displayed.
∫ This unit’s name on the network
“Friendly Name”
1 Press [NWP].
2 Press [HOME].
3 Press [3, 4] repeatedly to select “SETUP” and then
press [OK].
4 Press [3, 4] repeatedly to select “Network” and then
press [OK].
5 Press [3, 4] repeatedly to select “Friendly Name” and
then press [OK]..
≥ The current name of this unit is displayed. Press [OK] to edit.
6 Press [3, 4, 2, 1] to input the friendly name.
≥ Only ASCII characters can be used.
≥ “A” can be added when you press the [1] at the time of the
last letter of the Friendly Name is selected.
≥ Press [CLEAR] to delete a letter.
≥ Press [S10] to insert a letter “A”.
≥ Default name is “Technics ST-C700D _ _ _ _ _ _”.
“ _ ” stands for a digit that is unique to each set.
7 Press [OK] to apply the settings.
8 Press [RETURN] repeatedly to exit the settings.
∫ To check the MAC address of this unit
1 Press [NWP].
2 Press [HOME].
3 Press [3, 4] repeatedly to select “SETUP” and then
press [OK].
4 Press [3, 4] repeatedly to select “Network” and then
press [OK].
5 Press [3, 4] repeatedly to select “MAC Address”.
≥ The MAC address of this unit is displayed.
Wired LAN connection
Broadband router, etc.
This unit
(rear)
PC, etc.
To make network-related settings
(12)
ST-C700DE-TQBM0007.book 12 ページ 2016年10月26日 水曜日 午後1時17分
 Loading...