EasyManuals Logo

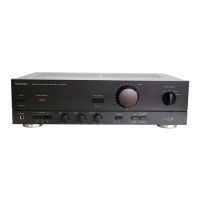
Technics SU-VZ220 Service Manual

Technics SU-VZ220
19 pages
To Next Page IconTo Next Page
To Previous Page IconTo Previous Page
Page #6 background imageLoading...
Page #6 background image
SU-VZ220
@
DISASSEMBLY
INSTRUCTIONS)
-
[
“ATTENTION
SERVICER”
7
Some
chassis
components
may
have
sharp
edges.
Be
careful
when
disassembling
and
servicing.
oe
ne
Removal
of
the
Cabinet
eee
|
Removal
of
the
Front
Panel
Ass’y
Procedure
Procedure
1
Cabinet
1>2
Fi
8
f
1
5
Q&
29
5
;
ve
B
i
Remove
the
7
screws
(@~@).
1.
Remove
the
1
flat
cable
(CN501).
;
Ref.
No.
Removal
of
the
Power
Switch
Enaat
P
3
Panel
Ass
g
3
3
:
Procedure
,
;
12-3
Front
Panel
Ass’y
I
Power
Button
:
&
|
i
4
¥
»
p
Power
Switch
oe”
P.C.B.
1.
Remove
the
2
screws
(@,
@).
2.
Release
the
1
claw.
3.
Remove
the
power
button
by
pushing
it
from
behind
the
front
2.
Remove
the
3
screws
(Q@~@).
panel
ass’y..
3.
Remove
the
front
panel
ass’y
in
the
direction
of
arrow..
Ref.
No.
Removal
of
the
LED
P.C.B.
and
4
Headphones
P.C.B.
Removal
of
the
Volume
P.C.B.
Procedure
Claws
Procedure
123-4
|
132-5
Volume
Knob
Volume
P.C.B.
Headphones
P.C.B.
Removal
of
the
LED
P.C.B.
1.
Remove
the
1
screw
(@).
2.
Release
the
2
claws.
Removal
of
the
headphones
P.C.B.
1.
Remove
the
2
screws
(@,
©).
2.
Release
the
1
claw.
1.
Pull
out
the
volume
knob.
2.
Remove
the
nut.
3.
Release
the
1
claw.
Bg
ab ee
mee
ee
OS

Other manuals for Technics SU-VZ220

Questions and Answers:

Question and Answer IconNeed help?

Do you have a question about the Technics SU-VZ220 and is the answer not in the manual?

Technics SU-VZ220 Specifications

General IconGeneral
BrandTechnics
ModelSU-VZ220
CategoryAmplifier
LanguageEnglish

Related product manuals