net panel and keyboard unit
- Remove the top cabinet (see step “Removing the top cabinet ”).
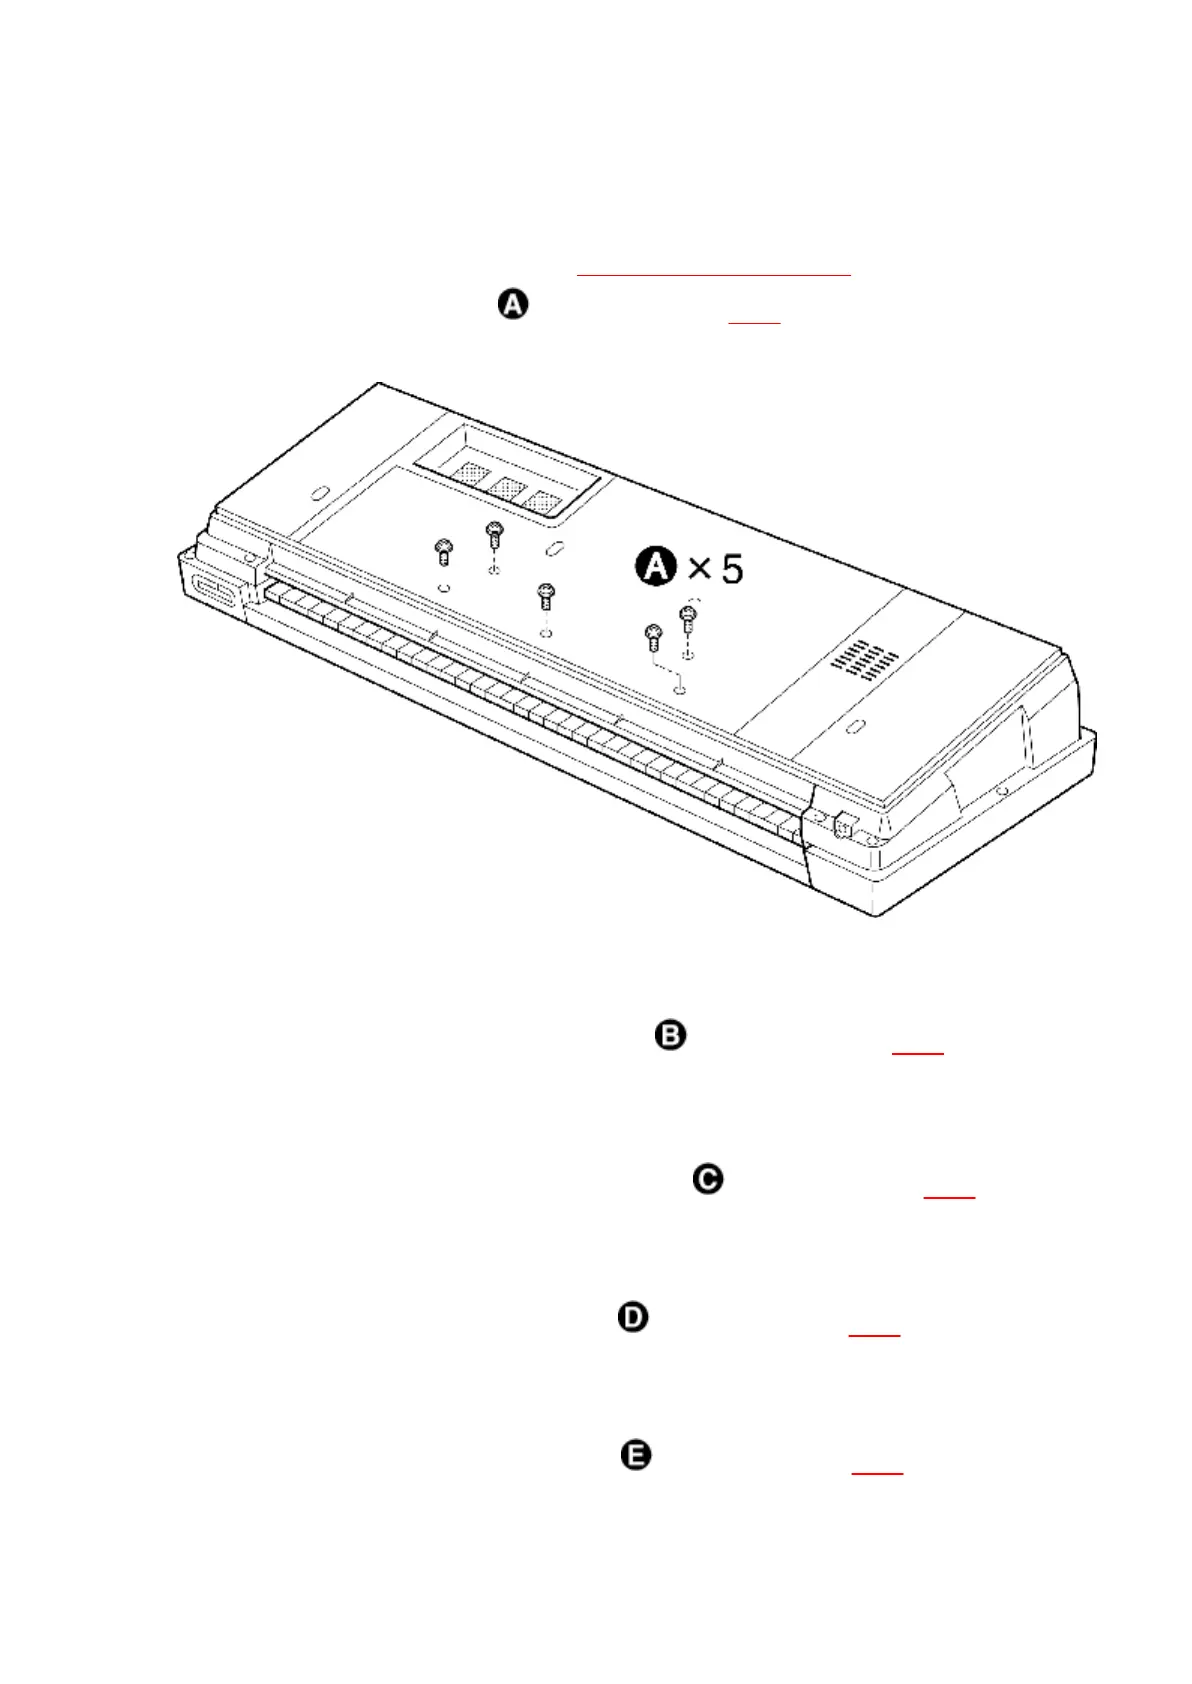
- Remove the bottom screws( 5pcs.) as shown in Fig.4
Fig.4
Control panel
1. Place the keyboard bottomside down.
2. Remove the control panel holding screws ( 4pcs.) as shown in Fig.7 .
Power SW panel
- Remove the power SW panel holding screws ( 2pcs.) as shown in Fig.7 .
SD panel
- Remove the SD panel holding screws ( 2pcs.) as shown in Fig.7 .
Net panel
- Remove the net panel holding screws ( 4pcs.) as shown in Fig.7 .
13