(2) Adjust the piano body so that the right and left sides project
evenly over the stand.
(3) Positioning the piano body on the stand, confirm that the
4 balck screws (A) can easily be inserted.
(4) Tighten the 4 screws securely.
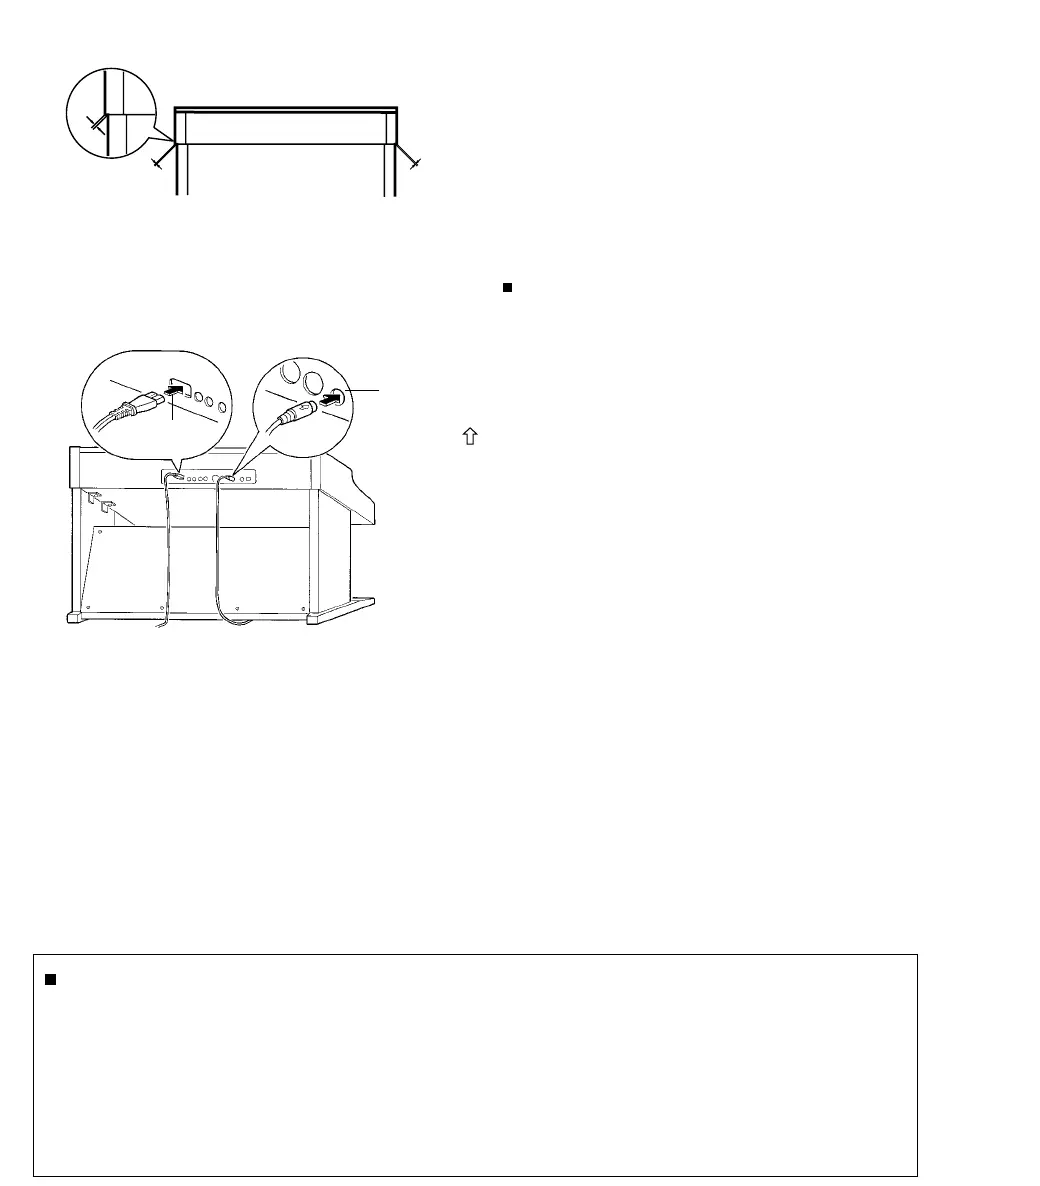
6.Connect the pedal cord and power cord to the terminals.
• Plug the pedal cord and power cord into the terminals on
the rear of the piano.
Confirm
After assembling, check these points.
• Are any parts left over?
➞ Check the assembly procedure again.
• Does the piano rattle when it is rocked?
➞ Make sure all the screws are securely tightened.
• Is the power cord firmly inserted?
➞ Check again.
• Is the plug of the pedal cord inserted as far into the con-
nector terminal as it will go?
➞ If it is not completely inserted, the sustain and
other pedal functions may not work.
When the piano has been moved or transported, re-
tighten the screws securely.
With the mark
upwards, insert the
plug fully.
plug
AC IN
PEDAL IN
About the backup memory
The selected sound and various functions, MIDI settings and SEQUENCER contents remain in the memory for about one
week after the POWER is turned off.
• The backup memory will not function until the POWER has been on for about 10 minutes.
• If you wish to return all memories and settings to their initialized status, while pressing the MODE SET button,
press the INITIAL key on the keyboard. Or you can turn on the POWER while pressing the INITIAL key.
• When the POWER is turned on, the MIDI LOCAL CONTROL is set to on.
• If you wish to retain the memory for longer than one week, before one week has elapsed, turn on the power
and leave it on for about 10 minutes before turning it off again. The settings will remain in the memory for
about one week from this time.

 Loading...