GETTING STARTED
Before connecting, ensure that the power cord of the unit is unplugged from the AC outlet and turn off
the devices to be connected. After making all connections (Diagrams on page 6), turn on the unit first
and then the other devices.
After plugging in the mains cord, wait until a blue light is viewable on the front panel (Standby Mode).
"NOTE" - When the unit is first powered up, please wait a short while before activating the receiver as
the unit's software needs to be initialised and the hard disk checked.
You can turn on your unit by pressing the Standby button on the remote control. Notice that the blue
light on the front panel will turn blue.
The unit is equipped with output terminals that support RGB, S-video and CVBS video signals.The
image quality is highest in the order of the RGB signal, the S-video signal and the CVBS video signal.
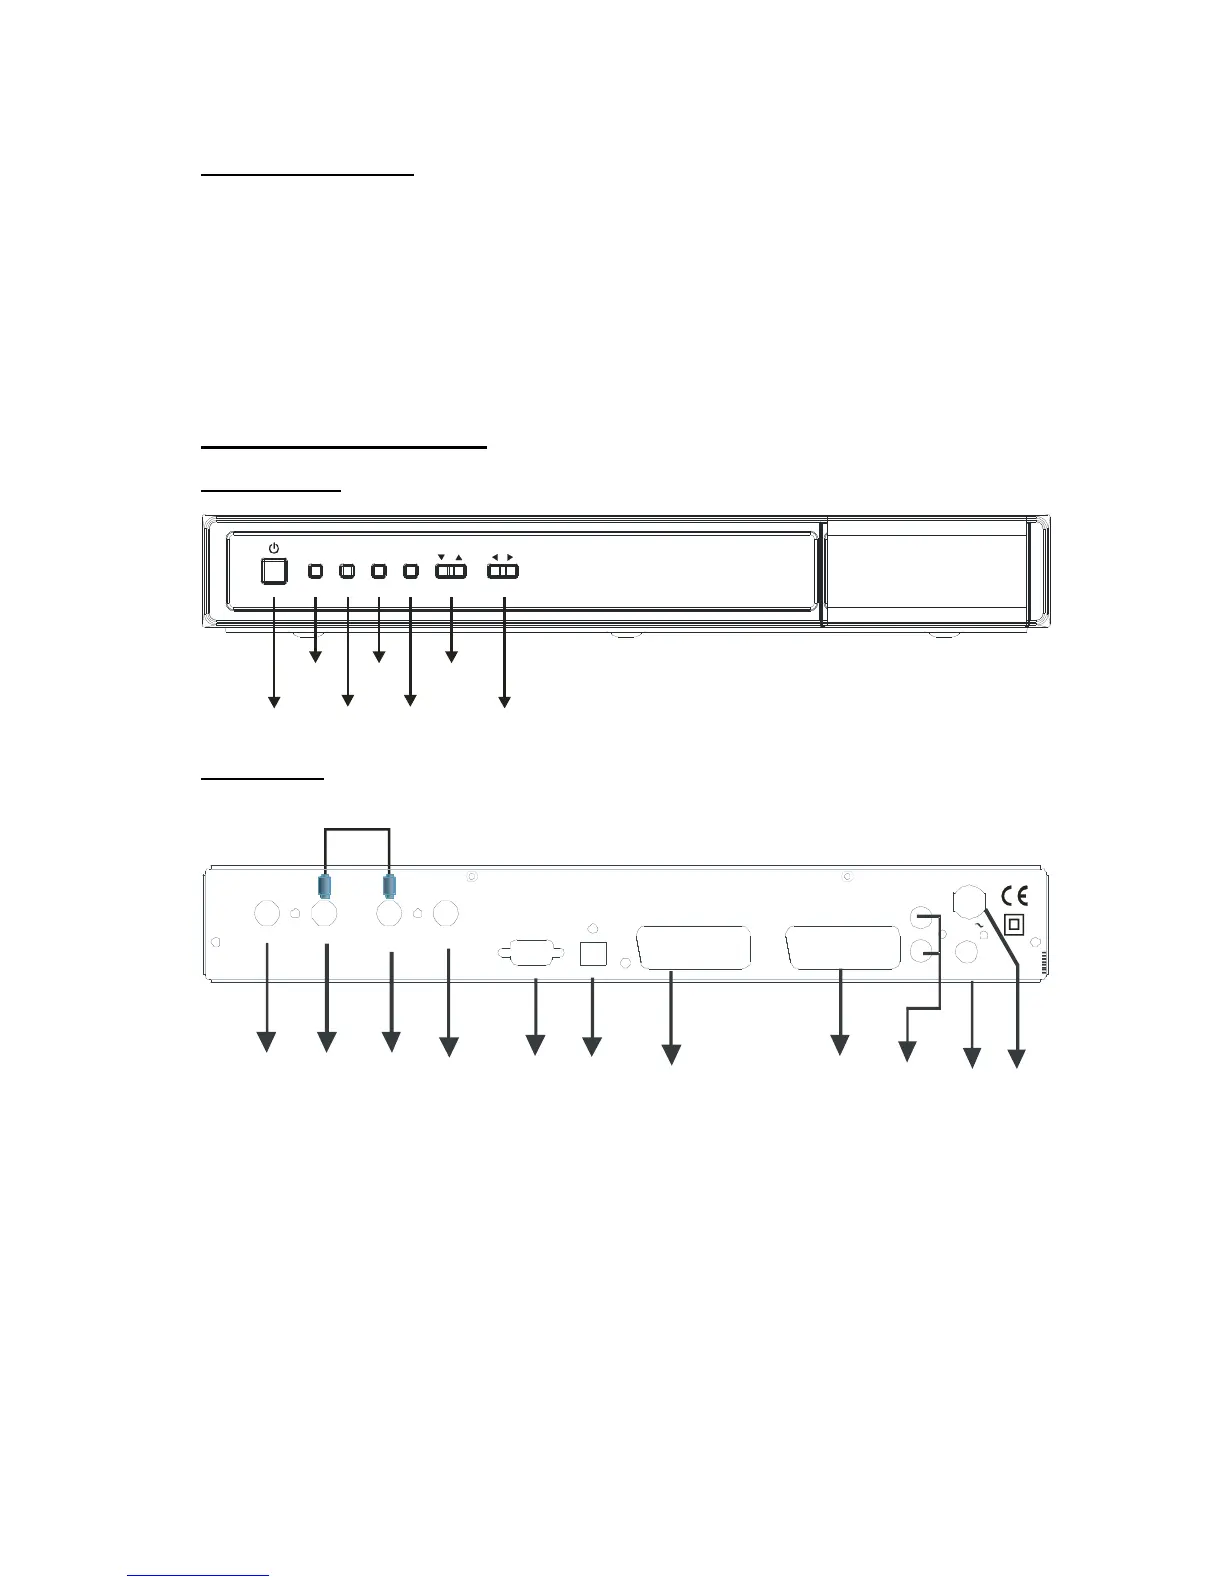
FRONT AND BACK PANEL
FRONT PANEL:
MENU RECOKPAUSE
ON / OFF
MENU
RECORD
PAUSE
OK
MENU
UP / DOWN
MENU
1. AERIAL 2 OUT : To watch analogue channels on the TV
2. AERIAL 2 IN : Loop through
3. AERIAL 1 OUT : Loop through
4. AERIAL 1 IN : Aerial input
5. RS232 : Software Upgrade
6. OPTICAL SPDIF : Optical Digital Audio Output
7. VCR SCART : Output for other equipment such as DVD, VCR...etc.
8. TV SCART : TV Scart connection
9. ANALOGUE AUDIO LEFT/RIGHT : Analogue Audio output
10. CVBS : Video Output
11. POWER SUPPLY : 220-240V AC, 50 Hz