• Consider the possible positions of the indoor unit when positioning the outdoor unit. The piping and
cables of indoor and outdoor unit have to be connected.
G
ATTENTION
For TSCS 8xx-10xx models: The length of the pipe is 4 meter.
For TS 8xx models: The maximum length of the piping between the indoor and outdoor unit is 15
meters.
The maximum height difference between the indoor and outdoor unit is 5
meters.
• Don’t put animals and plants or other objects in front of the air inlet of air exhaust.
• Always position the air conditioning at an easy to reach place.
• Check and follow the local legislation and regulation regarding the positioning and installation of
air conditioning equipment.
• If the unit is exposed to strong winds, for example when located by the sea, it has to be assured that
the fan is working properly by positioning the unit in the length direction along the wall or by using
dust or smoke deflectors. See Picture 6.
Picture 6
Strong
wind
Strong
wind
Barrier
Incorrect Correct
• If the outdoor unit is installed on roofs of outer walls this can lead to disturbing noises and vibrations.
• Make sure the outdoor unit can be secured on a firm foundation.
G
ATTENTION
If the outdoor unit is mounted against the wall, the bracket must comply with all technical
requirements. The wall has to be strong enough. Is this is not the case it needs to be reinforced.
The connections between support and wall and between support and air conditioning have to be
firm, solid and durable. In case of doubt, the unit can not be mounted and the necessary support
has to be calculated and constructed
by an authorised technician.
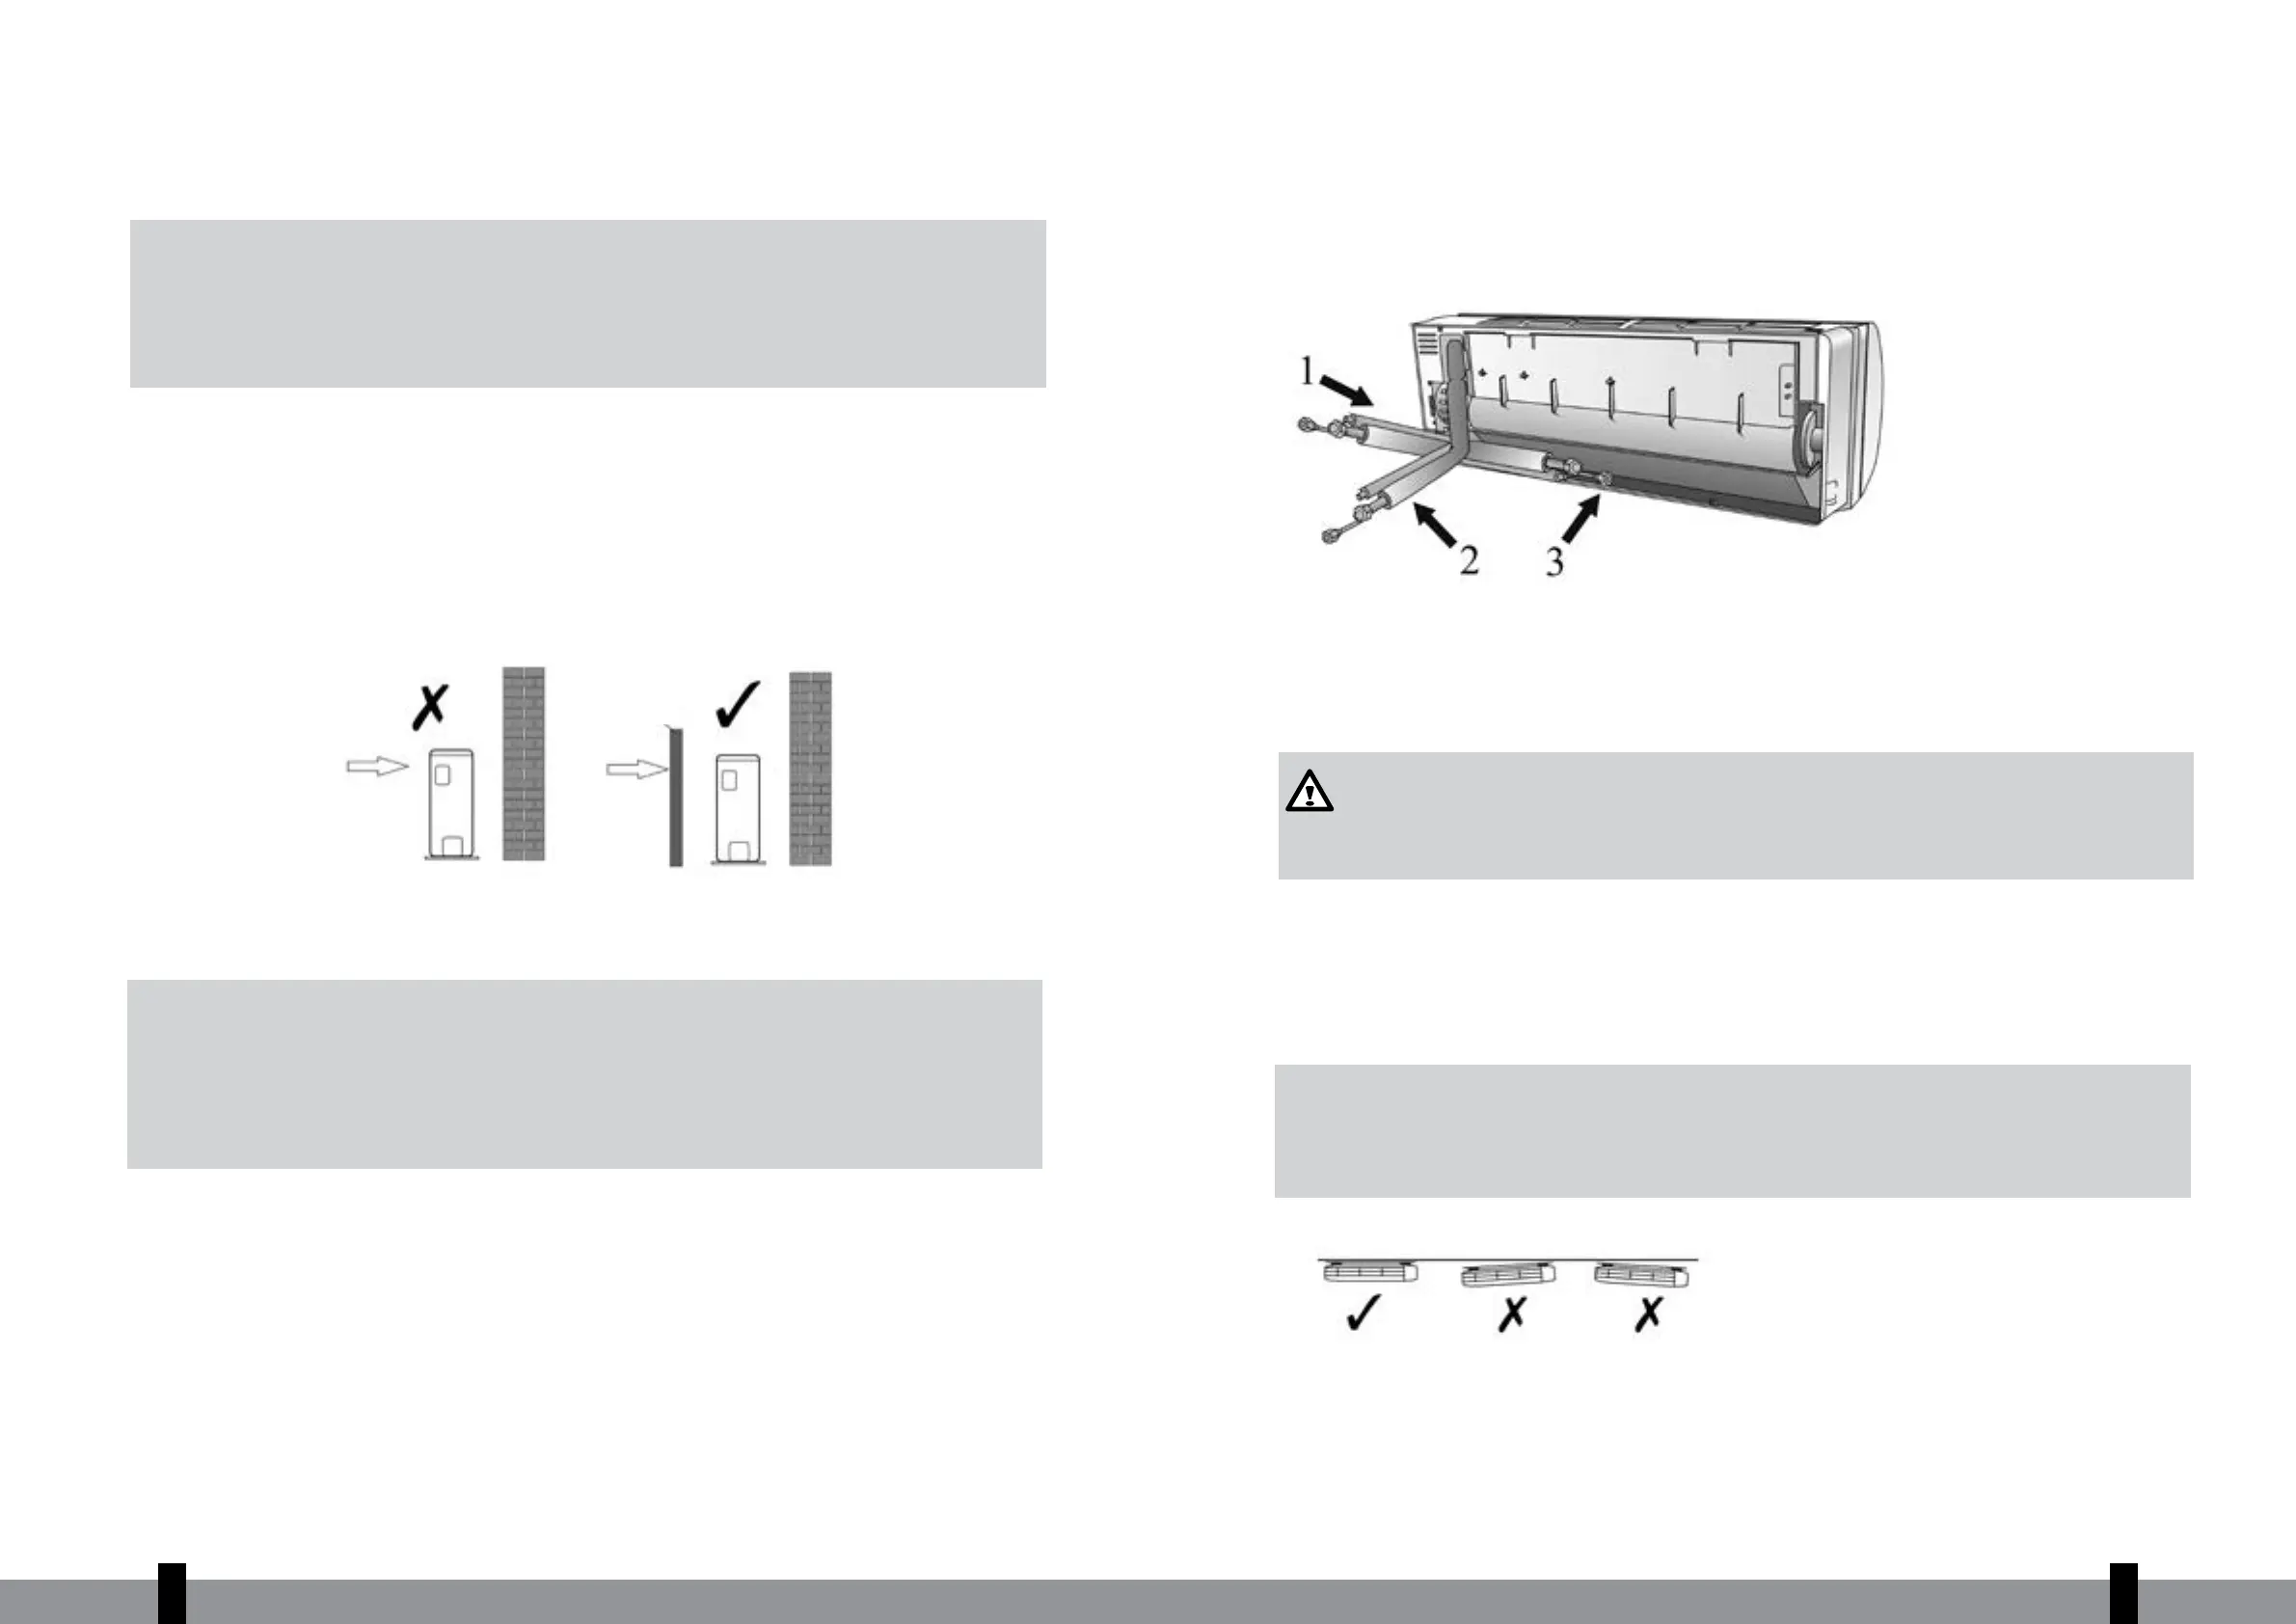
6. POSSIBLE OPTIONS FOR INSTALLING THE PIPING FROM THE INSIDE UNIT TO
THE OUTSIDE UNIT.
• The piping can be connected with an outlet to the left or right side of the indoor unit. Remove the
left or right rupture disc as necessary. See Picture 7.
• The piping can be connected with an outlet to the right rear or rear left. See Picture 7.
Picture 7
7. MOUNTING THE INSTALLATION PLATE AND DRILLING HOLES FOR PIPING.
7.1 Mounting the installation plate of the indoor unit.
WARNING
Use a detector before drilling the holes in the wall to detect power cables and piping in the wall
to avoid unnecessary damaging the wall and to avoid dangerous situations.
a. Position the installation plate level and on a sufficiently firm wall and leave a free space around
the installation plate. See Picture 8
b. If the wall is made of bricks, concrete or a similar material, eight holes with a diameter of 5 mm have
to be drilled in the wall. Insert the plugs for the respective mounting screws in the wall.
c. Mount the installation plate on the wall with eight type “A” screws .
G
NOTE
Mount the installation plate and drill wholes in the wall according the material in which the wall
is build and the respective attachment points on the installation plate. (dimensions are in “mm”
unless indicated otherwise).
Correct mounting of the installation plate
Picture 8
TS625
TS632
4
50
4
51
 Loading...