8
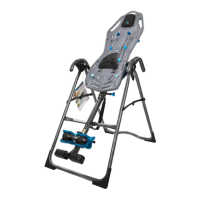
Forward Position Holes
Back Position Holes
Seat Installation - Model LT3 only
Skip this step for Model LT1.
Figure 9: The Model LT3 has two Lower Seat
assembly options. Before installing the seat, use
this figure to determine the Position Holes that
will be used during installation. The Forward
Position provides the largest surface area of
support during use. The seat can be adjusted
after assembly if needed.
108
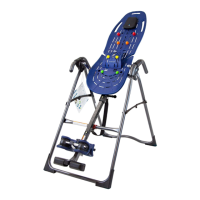
9
8
Bolt
Spring Washer
Washer
108
9
8
Bolt
Spring Washer
Washer
Forward Position (side view) Back Position (side view)
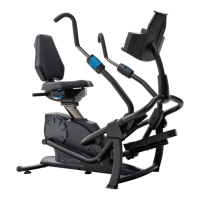
MODEL LT3 ONLY: Seat Position Options
FIGURE 4
STEP 3
ASSEMBLE SEAT
Locate the Lower Seat and place it upside-down
on a flat surface, such as the edge of a table.
Locate the Seat Back Assembly and line it up
with the Lower Seat.
Figure 10: Use the Step 3a Hardware Kit to
assemble the seat parts. Hand tighten 4 × Bolts
with 4 × Spring Washers and 4 × Washers as
shown. Proceed to fully tighten the Bolts with
the Allen Wrench.
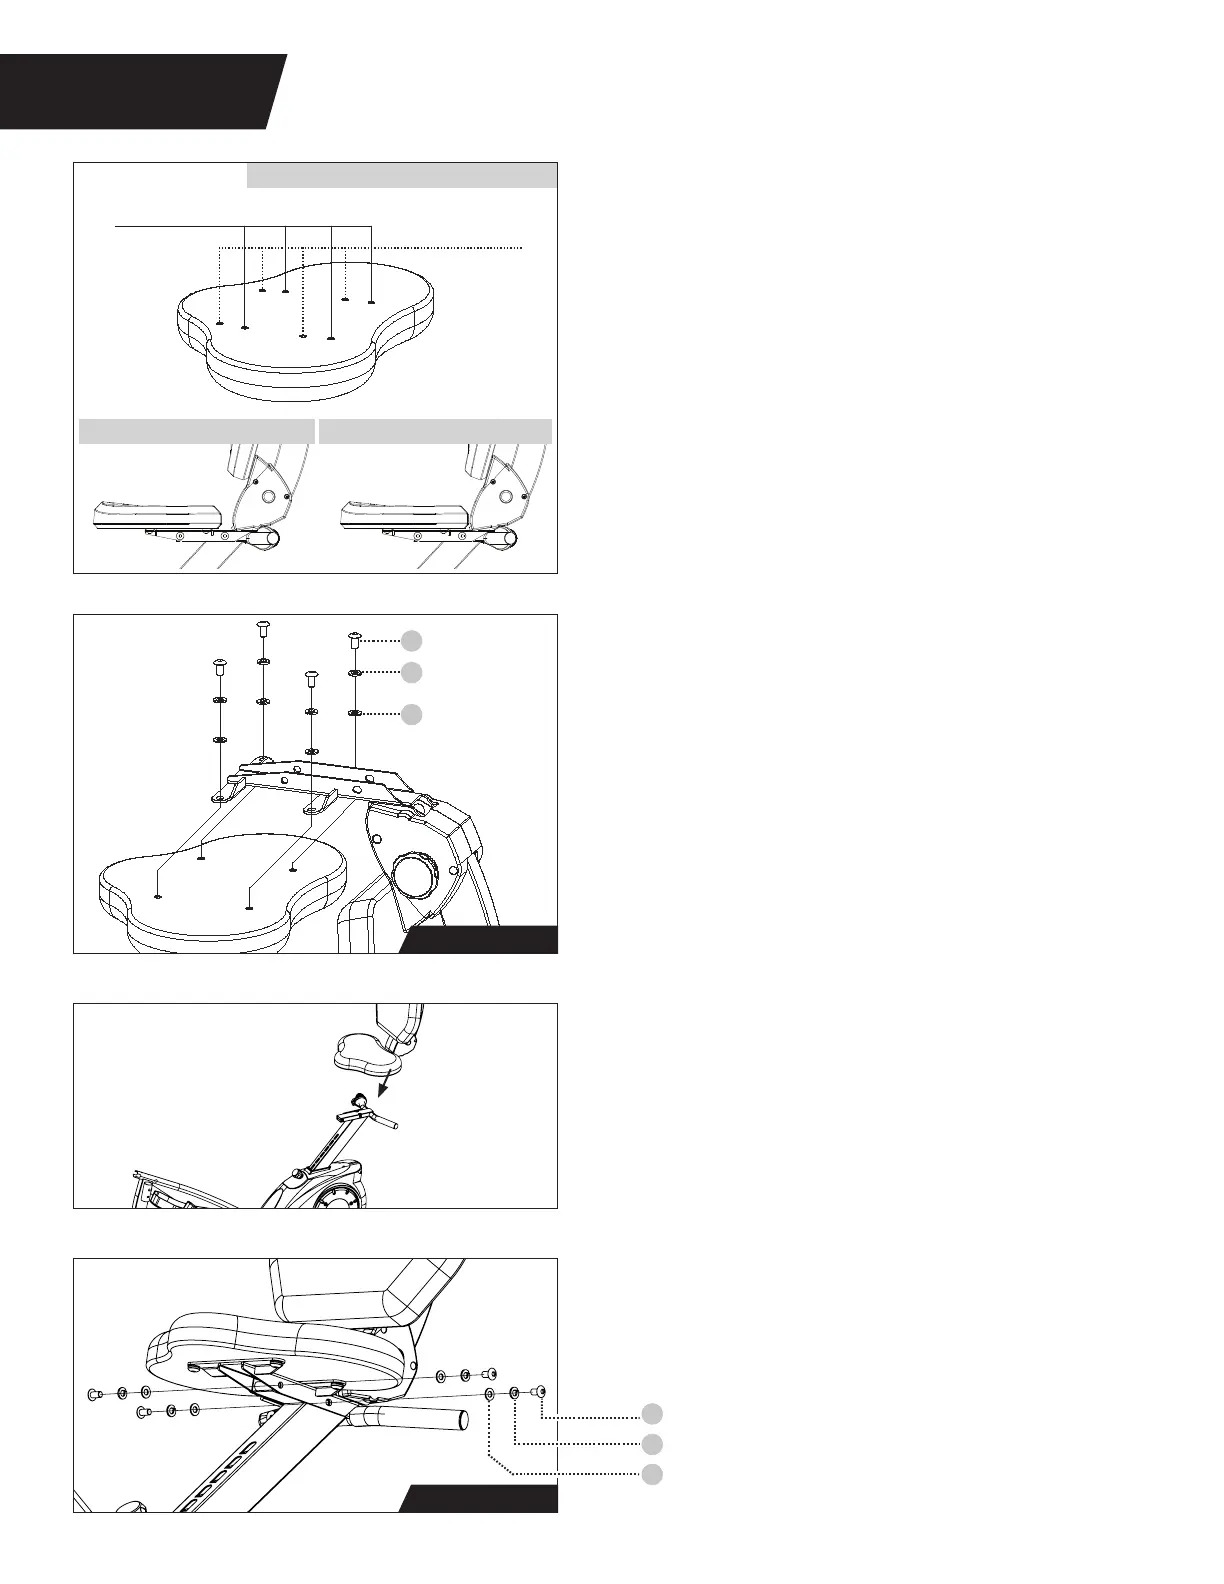
Figure 12
Figure 11
Figure 10
Figure 9
Step 3b Hardware
Step 3a Hardware
Figure 12: Use the Step 3b Hardware Kit to attach
the Seat. Hand tighten 4 × Bolts with 4 × Spring
Washers and 4 × Washers as shown. Proceed to
fully tighten the Bolts with the Allen Wrench.
Figure 11: Before attaching the assembled Seat
to the Seat Post, make sure the Seat Post is fully
raised for better access, then line the Seat up
with the Seat Post.
All Models