5 of 48 © 2016 680_D - 05/16
Installing the Enclosure
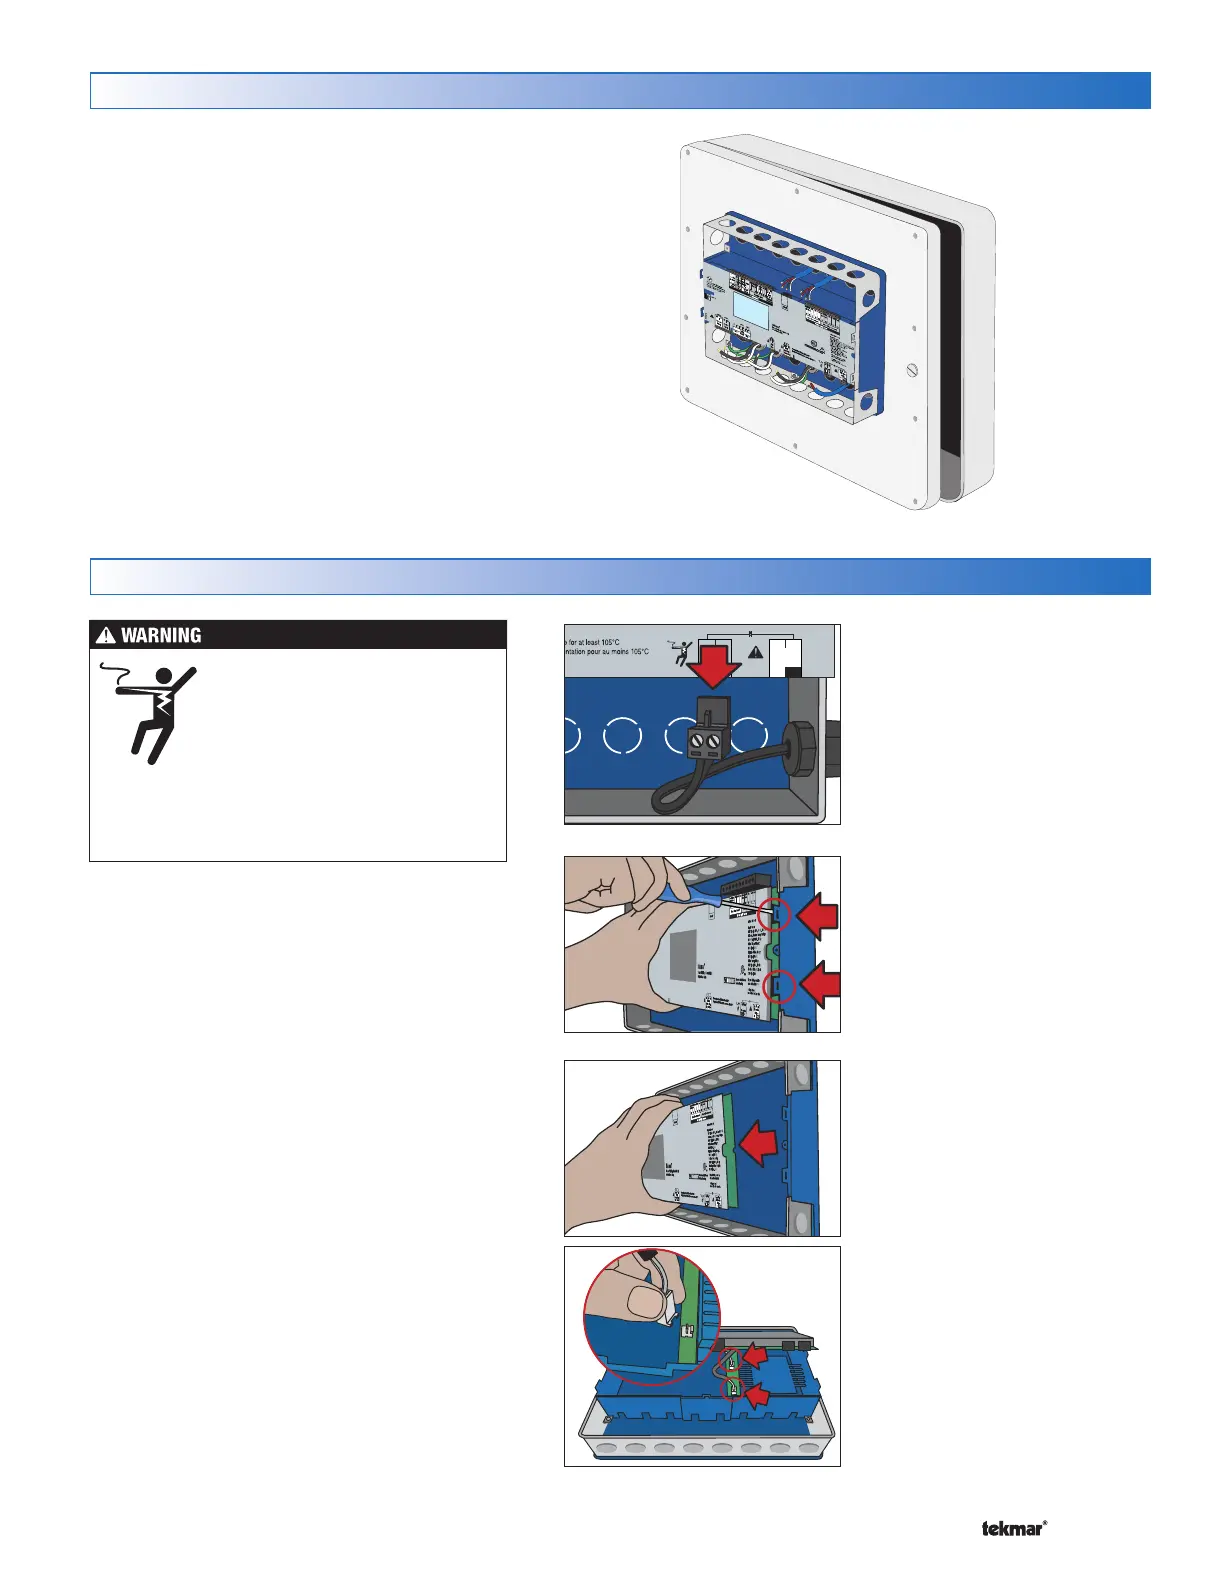
Servicing the Control
Injection
Mixing
Pmp
46 47
N
Signal wiring must be
rated at least 300 V
Designed and
assembled in Canada
44 45
Power In
NL
Disconnect All Power
Before Opening
Step 1
Disconnect the wiring terminal plugs
by pulling down in the lower wiring
chamber and by pulling up in the
upper wiring chamber.
Step 2
There are two tabs located on the
right side of the enclosure. Insert a
screwdriver into the top of the tab
and gently pry the tab away from the
control while pulling the control toward
you. Repeat for the second tab.
Step 3
Pull the control toward you.
Step 4
Disconnect the two wiring plugs and
remove the control.
Custom Panel
or Electrical Box
Wall or Panel Door
In the event that the control requires servicing or
replacement, the control can be easily removed from
the enclosure. This allows all wiring and conduit to
remain installed.
Step 5
The new control is now ready to be
installed in the reverse order.
• Install the control enclosure to a wall or to an electrical box.
•
Three wiring chamber dividers are included. The dividers
provide a barrier to keep low voltage wiring separated from
line voltage wiring.
•
If the dividers are not used, then low voltage circuits must
use wire rated at least 300 V.
To prevent the risk of personal injury
and/or death, make sure power is not
applied to the control until it is fully
installed and ready for final testing.
All work must be done with power to
the circuit being worked on turned off.
Please be aware local codes may require this
control to be installed or connected by an electrician.