______________________________________________________________________________ Page 13 of 31
Tekron International Ltd PO Box 31 285 Lower Hutt 6009 New Zealand
tel: +64 4 566 7722 fax: +64 4 569 9272
email: support@tekroninternational.com
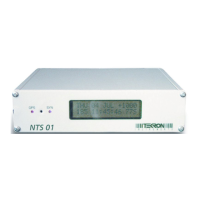
4.4 Time Server Ports: NTS1-NTS5
General
The following section applies to each Time Server Port equipped on the NTS01. Each Time-
server Port has its own IP address and operates independently of any other port. Operation is
completely automatic once the port it is correctly configured for the network. Section 5 gives
details on configuring Time Server Ports using the supplied Configuration utility, while Section
6 covers methods of configuring the Time Server Ports via Ethernet using Telnet. Telnet access
is controlled by password, but can be inhibited completely if more stringent security is required.
Individual Time-server Port configuration info is retained indefinitely when the NTS01 is not
powered (as is all other NTS01 configuration data). Each Time-Server Port responds to time
requests from multiple clients using either SNTP or NTP protocol. If the appropriate option is
configured for a particular port, then the server will also broadcast time messages on a regular
basis. The most common protocol in use is SNTP.
SNTP Client Software
Correct operation of a Network Time Server Port can be verified by installing an SNTP client on
any Windows-based PC attached to the network. Windows XP contains an NTP client as part of
the operating system. Alternatively, and for earlier Windows Versions, a very simple and
effective client, “Dimension 4” is included with the NTS01 package (3 licenses are provided.
Additional licenses may be purchased from Thinking Man Software www.thinkman.com)
After installing “Dimension 4” on the PC to be synched, add the IP address of the Time Server
Port to “Dimension 4”’s list of Time Servers, and select it. “Dimension 4” will then use this
address to fetch time information and sync the PC’s internal clock. “Dimension 4” installs
complete with a large list of internet time server addresses. To avoid any confusion, it is
suggested that the user remove all of these pre-installed addresses, leaving only the local Time
Server Port IP address(es) in the list.
Time Server Port LED Indications
Along with an RJ45 Connector, each Time Server Port features a group of four LED indicators.
The green
lnk LED indicator lights steadily when a network cable (UTP drop lead) is correctly
connected between the RJ45 Connector and the local network hub/switch.
The other green LED, the
lck indicator, lights up steadily when the NTS Port is correctly
synchronised with UTC time. Provided that NTS01’s front panel
SYN Led is on, then the lck
indicator should stabilise and remain on. If the lck indicator does not stabilise “on”, even though
the NTS01 is synchronised, then the most likely problem is that the “Visible Satellites”
parameter for the Time Server Port (see p.20) is set at too high a value.
The two lower LED indicators
err and sec may flash for up to 30 seconds immediately
following power-on. They also flash while the Time Server Port is being accessed by the
configuration utility software. At all other times, the
err and sec LED indicators remain off.