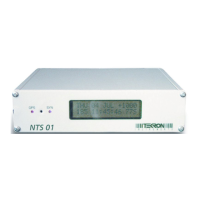
4 Operation
Connect the antenna lead and the antenna (with a good view of the sky). Then connect the power
source to
P1 and/or P2
Check the option label on the base for voltage requirements before switching on!
The time needed to attain tracking and synchronisation (given a good “view” of the sky) will
vary from just a few seconds to several hours in the worst case – such as reactivating a unit that
was recently synchronised 1000’s of km away from the present position.
4.1 Time Display
The LCD display shows a copyright message, along with the serial number and revision level of
the unit for approximately 10 seconds following power-up, (Fig.5 [a]). The display then
automatically changes to the operating default, (Fig.5 [b]). The top line of screen [b] announces
that the time standard is UTC (formerly known as GMT) and includes the current date. The day-
of-year and time-of-day are displayed on the bottom line. The three-character field at the right of
the bottom line is a status field. See 4.2 following for the definition of each character in this
field.
[a] Start-Up (Clock ID) [b] Operating Default
Fig 5a, b LCD display screens
Following the start-up period, Screens [a] and [b] can be accessed alternately by pushing the
recessed pushbutton located on the front panel between the LED indicators.
The standard NTS01 does not offer local time either on its display or on the IRIG-B output
port. Local time display (and IRIG-B output), complete with automatic daylight savings
operation is available as a factory option, but the NTS outputs
always use UTC time.
If the NTS01 is equipped with the “Local Time Display” option, (See 7.3 p25) then the
following two displays are also available by pushing the recessed pushbutton located on the
front panel between the LED indicators.
[c] Local Time (LST/DST) [d] Local Time with UTC Offset
Fig 5c, d LST = Local Standard time, DST = Local Daylight Time