Rackmounting—485/R485 Service
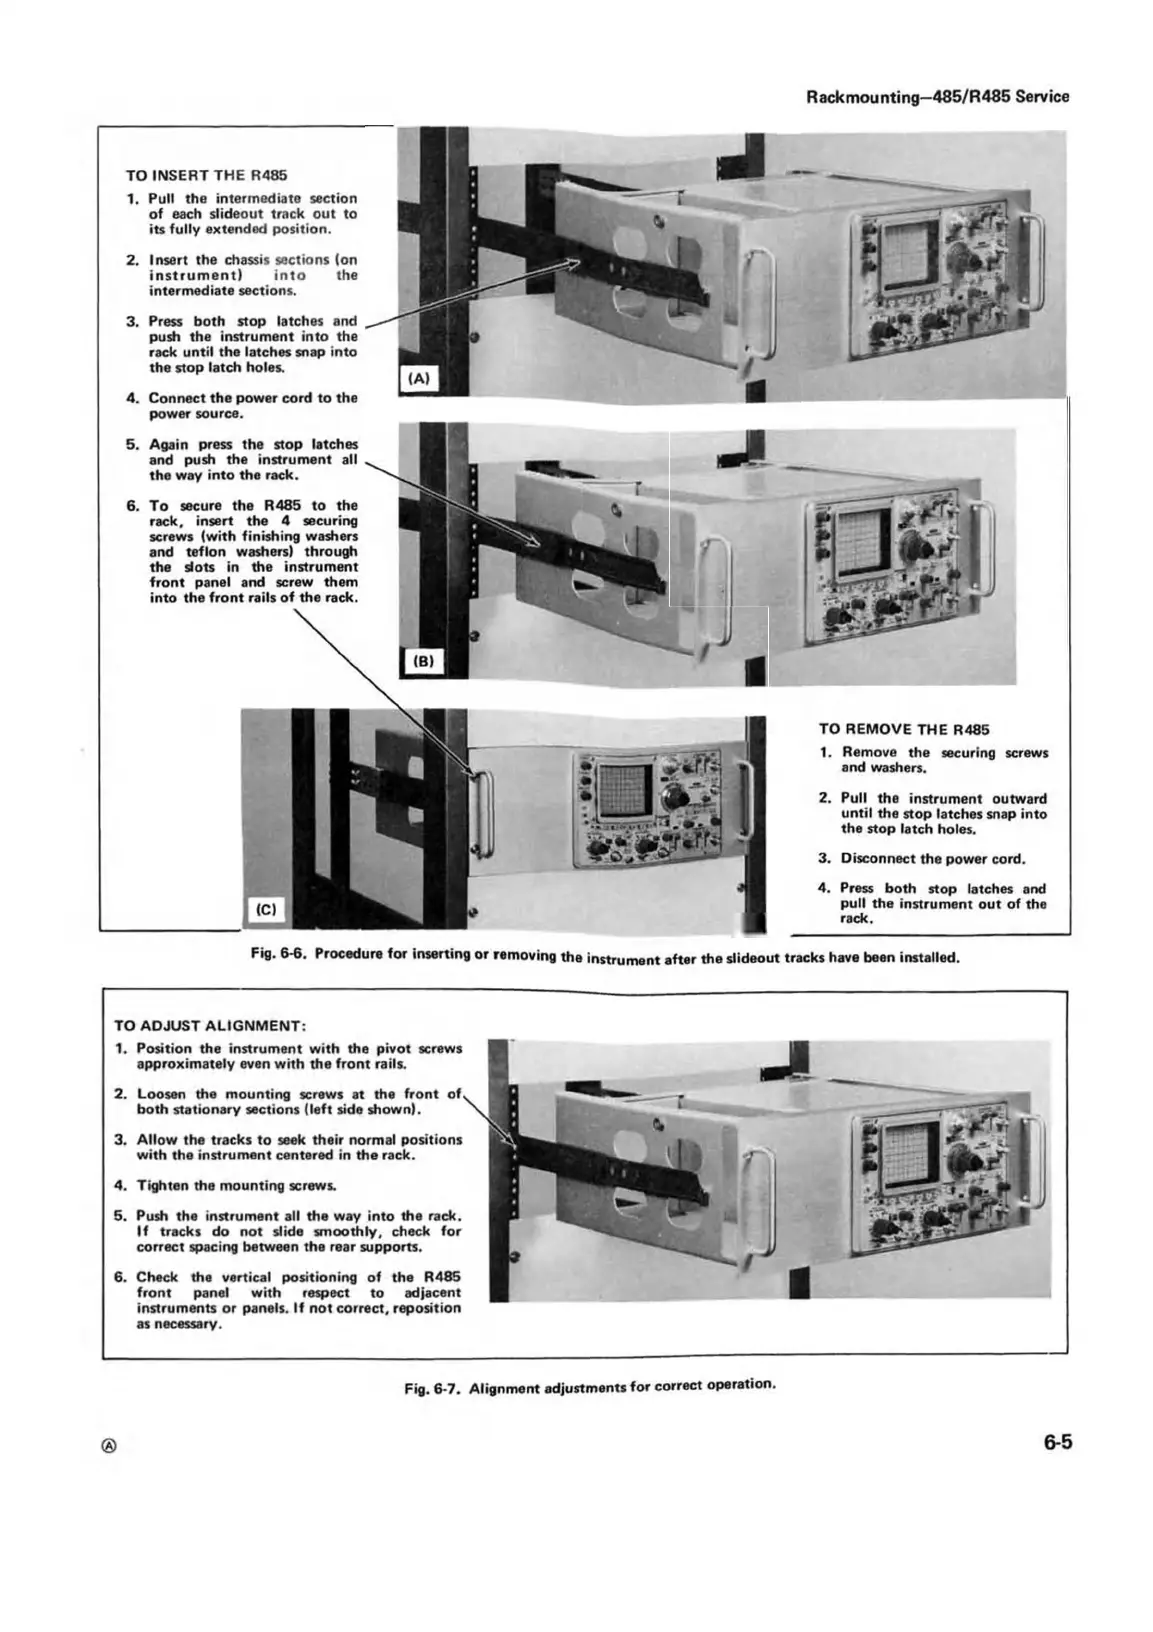
TO INSERT THE R485
1. Pull the intermediate section
of each slideout track out to
its fully extended position.
2. Insert the chassis sections (on
instrum ent) into the
intermediate sections.
3. Press both stop latches and
push the instrument into the
rack until the latches snap into
the stop latch holes.
4. Connect the power cord to the
power source.
5. Again press the stop latches
and push the instrument all
the way into the rack.
6. To secure the R485 to the
rack, insert the 4 securing
screws (with finishing washers
and teflon washers) through
the slots in the instrument
front panel and screw them
into the front rails of the rack.
TO REMOVE THE R485
1. Remove the securing screws
and washers.
2. Pull the instrument outward
until the stop latches snap into
the stop latch holes.
3. Disconnect the power cord.
4. Press both stop latches and
pull the instrument out of the
rack.
Fig. 6-6. Procedure for inserting or removing the instrument after the slideout tracks have been installed.
TO ADJUST ALIGNMENT:
1. Position the instrument with the pivot screws
approximately even with the front rails.
2. Loosen the mounting screws at the front of
both stationary sections (left side shown).
3. Allow the tracks to seek their normal positions
with the instrument centered in the rack.
4. Tighten the mounting screws.
5. Push the instrument all the way into the rack.
If tracks do not slide smoothly, check for
correct spacing between the rear supports.
6. Check the vertical positioning of the R485
front panel with respect to adjacent
instruments or panels. If not correct, reposition
as necessary.
®
6-5
Fig. 6-7. Alignment adjustments for correct operation.