Getting Started
Degaussing an
d A utobalancing the Current Probe
Degaussing the probe removes any residual magnetization from the probe core.
Such residual magnetization can induce measurement error. Autobalancing
removes unwa
nted DC offsets in the amplifier circuitry. Failure to degauss the
probe is a leading cause of measurement errors. The DEGAUSS LED flashes
until you degauss the probe.
To degauss the probe, disconnect the probe from the test circuit, or ensure that
the conductor under test has no power, close and lock the slide, and then press
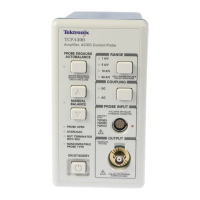
the amplifier PROBE DEGAUSS AUTOBALANCE button on the front panel of
the amplifier. To maintain measurement accuracy, degauss your probe in each of
these cases:
After you turn on the amplifier and allow a 20-minute warm-up period.
Before you connect the probe to a conductor.
Whenever a current or thermal overload condition occurs.
Whenever you connect a new probe.
Whene
ver you subject the probe to a strong external magnetic field.
Periodically during normal use.
To degauss and autobalance a current probe, perform these steps:
1. Verify that the c urrent probe is connected to the amplifier.
2. Remove the current probe from the conductor under test.
3. Locktheprobeslideclosed.(SeeFigure5.) (SeeFigure6.)
4. Pr
ess the amplifier PROBE DEGAUSS AUTOBALANCE button.
5. Wait about five seconds for the degauss procedure to complete.
The PROBE DEGAUSS AUTOBALANCE LED glows green when the
operation has successfully completed. If the LED is blinking orange, the degauss
o
peration is still in progress. If the LED is red, the operation failed, and the cause
of the failure needs to be found and fixed. (See page 16, PROBE DEGAUSS
AUTOBALANCE Button and Indicator.)
NOTE. The degauss procedure will fail if the amplifier is not properly connected
to an oscilloscope having 50 Ω input impedance. If this occurs, the NOT
TERMINATED INTO 50 Ω LED lights on the amplifier front panel.
After you have completed the oscilloscope adjustments and the amplifier
degauss/autobalance procedure, your system is ready to measure current.
TCPA300/400 Amplifiers and TCP300/400 Series Current Probes User Manual 11
 Loading...