Installation overview
CAUTION: To avoid ESD damage to the probe, always use an antistatic wrist strap (provided with your probe), and
work at a static-approved workstation when you handle the probe.
1. Connect the probe to the host instrument.
If it is the first time the probe has been connected to the oscilloscope, the oscilloscope will download the S-parameters
stored in the probe and cycle through the LEDs. Once the oscilloscope has stored the S-parameters for the probe, it
doesn’t matter which channel the probe is plugged into. The stored S-parameters will be available for any channel the
probe is moved to.
2. Connect the probe tip to the TekFlex connector on the probe.
When a tip is inserted into the probe for the first time, the oscilloscope will download the S-parameter data stored in the
tip.
3. The probe performs a self test, and then one Input Mode LED remains on. The Status LED is also lit green.
4. Open the Calibration menu (found in the Vertical menu).
5. Double-tap the channel badge to open the configuration menu.
6. Tap the Probe Setup panel to open the Probe Setup panel to confirm probe settings.
7. Perform the DC probe calibration procedure using the optional DC probe cal fixture. See TriMode probe DC
compensation on page 12.
8. Use the Probe Setup screen Probe Setup panel to set the probe parameters as described in the Basic operation
section.
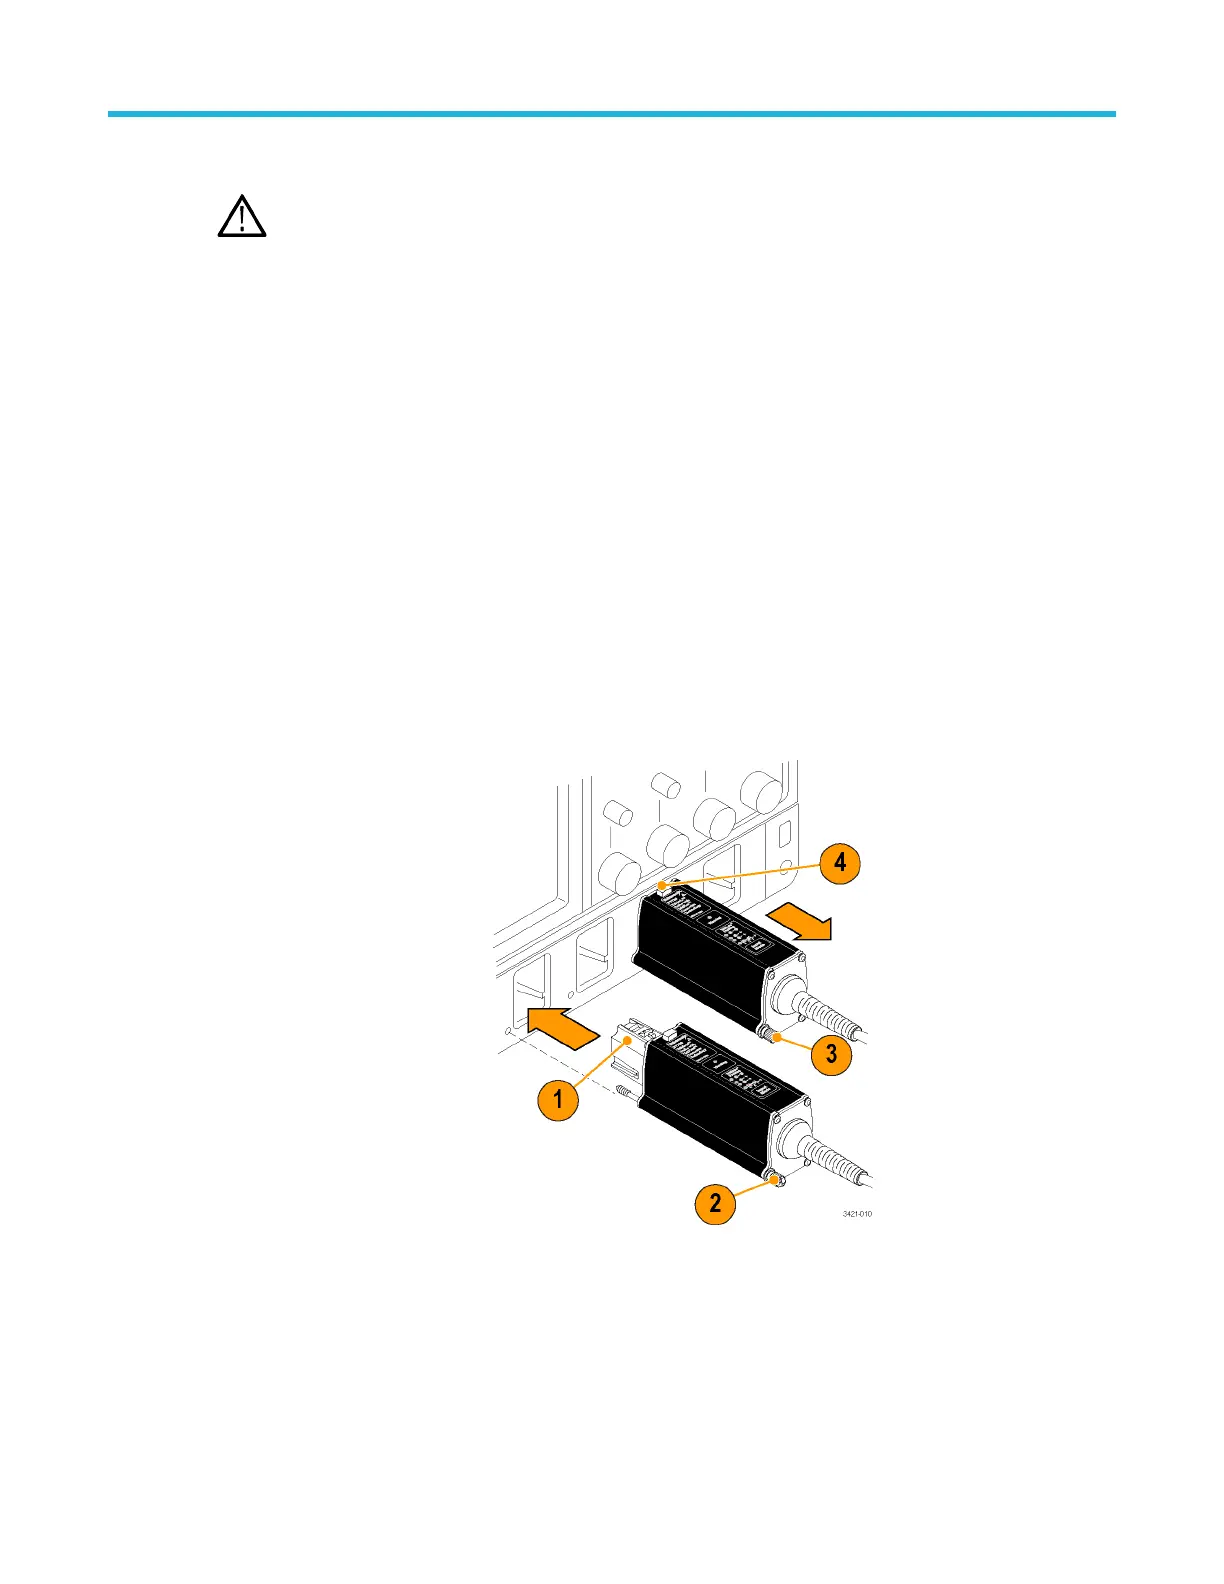
Connect to the host instrument
Before you connect the probe,
check the version requirements.
See Host instrument firmware
on page 41.
Slide the probe into the
TekConnect FlexChannel
receptacle. The probe clicks into
place when fully engaged.
Optional. Turn the thumbscrew
clockwise (finger-tight only) to
secure the probe to the
instrument.
Move the locking lever to the
locked position.
Installation
P7700 Series TriMode™ Probes 4

 Loading...


