Incoming Inspection
Basic Turn On and Self
Test
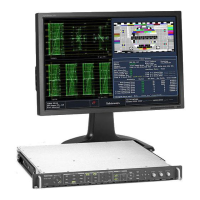
1. Connect a XGA mo
nitor to the connector on the rear of the waveform
rasterizer.
2. Connect the AC
line cord to the rear of the instrument and to a 100 to
240 VAC source. There is no power switch on the waveform rasterizer, so the
instrument will turn on as soon as you apply power.
3. Look at the front panel immediately after you apply power. All the buttons
should be lit, the text above the three knobs should also be lit, and the FAULT
indicator
should be lit.
4. After a couple of seconds, the lights in the buttons and text will turn off.
5. After about 15 seconds, the FAULT light should turn off. Record Pass or
Fail in the test record.
6. Also after about 15 seconds, the Power on diagnostic page should appear
on the X GA monitor.
7. Verify that the instrument Passes all self tests. Any failures are shown in red.
The results of the power-on diagnostics are erased from the screen, but you can
view t
he results by selecting CONFIG > Utilities > View Diagnostics Log.
8. After the diagnostics are finished, the instrument state will be restored. When
the pr
ogress indicator in the middle-right part of the sc reen is finished, the
instrument has finished initializing.
9. Reco
rd Pass or Fail for the POST in the test record.
Waveform Rasterizers Specifications and Performance Verification 5 5
 Loading...